(Editor’s Notes: Made to Match Bows, often abbreviated to M2M, is a wonderful way to coordinate and accessorize bows to your daughter’s 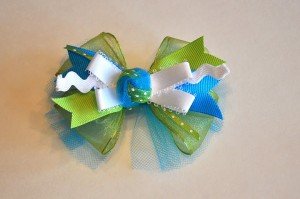

TURQUISE AND LIME BOW
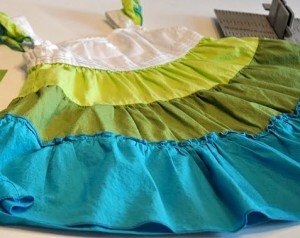
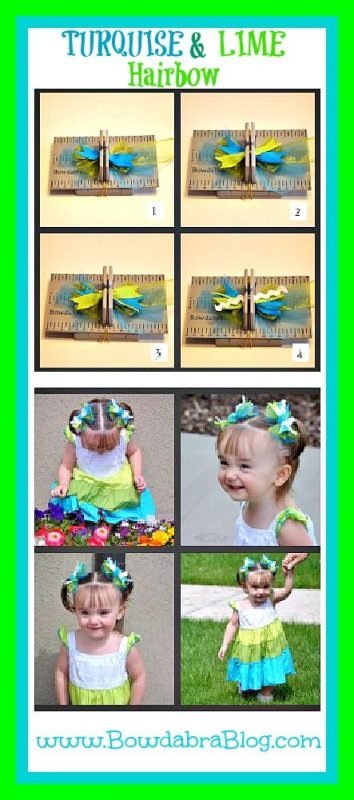
Choose a favorite outfit and make gorgeous bows to match it perfectly! Find the ribbon and tulle that match just right and start the fun. This boutique style bow was inspired by a simple green and turquoise striped sundress. The materials used were tulle, ribbon, and ric-rac.
To make this bow you will need:
· Mini Bowdabra
· Hair Bow Tool and Ruler
· Bowdabra Bow Wire
· Tulle (6 inch spool)
· 1.5” Wire Edged Ribbon
· Pieces of colored 7/8” Grosgrain Ribbon
· 1/8” Polka Dot Ribbon
· 3/8” Ric-rac
· 3/8” Satin Scalloped Edge Ribbon
· 3/8” Sheer Polka Dot Ribbon
· Alligator Clip
· Hot Glue
Instructions:
1. Start by finding the ribbon, tulle, and ric-rac that match the outfit perfectly.

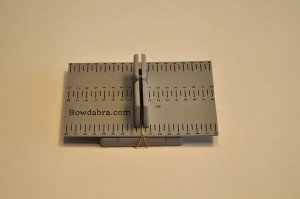
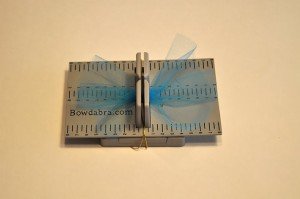
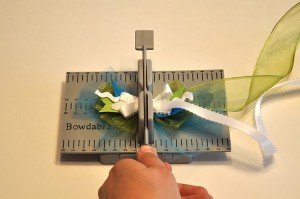
2. Next, place the Hair Bow Tool & Ruler on top of the Mini Bowdabra. Cut a piece of 18”³ Bowdabra Bow Wire, fold it in half and place it into the Bowdabra. I chose to use the metric side but you can use the inches side, as well.
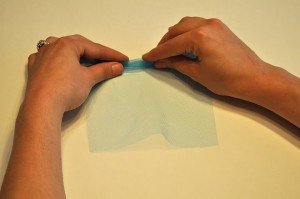
3. Then cut a 12” piece of tulle from the 6” wide spool. Scrunch with fingers.
4. Place scrunched tulle in Mini Bowdabra.
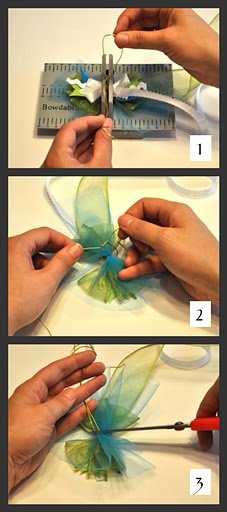
5. Next, begin to form loops at the 4cm mark. Fold the ribbon back and forth at the 4cm mark creating 4 loops. Leave a ribbon tail that will be cut later.
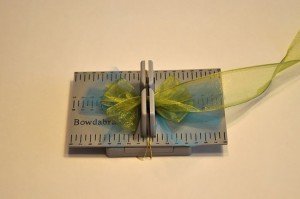
6. Pre-cut 4” pieces of 2 colors 7/8” grosgrain (cut v-edges), 1/8” polka dot, 3/8” ric-rac. Place in Bowdabra. In the order listed previously.

7. Next, scrunch the bow down with the Mini Bowdabra Wand.
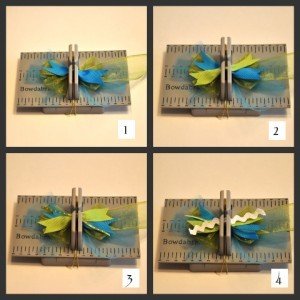
8. Then make another bow using 3/8” Satin Scalloped Edge Ribbon Ribbon at the 3cm mark. Make 4 loops and leave a ribbon tail. Scrunch with Mini Bowdabra Wand.
9. While the bow is still in the Mini Bowdabra, thread the two loose ends of the Bowdabra Bow Wire through the loop at the other end. Pull the Bowdabra Bow Wire tightly while the bow is still in the Mini Bowdabra. Gently pull the bow out of the Mini Bowdabra. Separate the two loose ends of the Bowdabra Bow Wire and bring them around to the back of the bow. To tie off the bow, pinch the Bowdabra Bow Wire securely against the bow and double knot. Trim off extra wire.

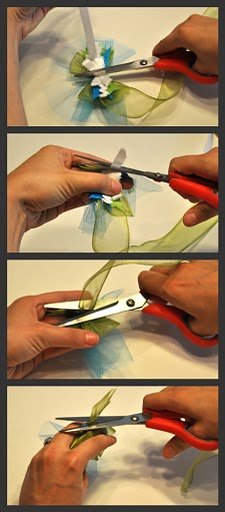
10. Trim all tails of the extra ribbon.

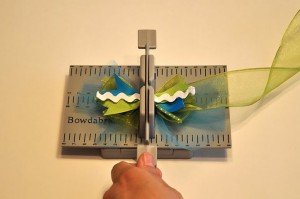
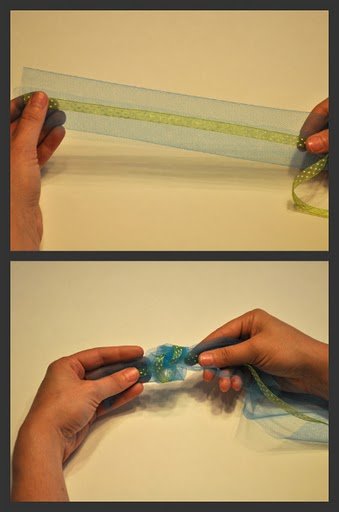
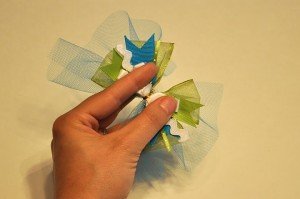
11. Place 3/8” sheer polka dot ribbon over scrunched piece of tulle. Tie a loose knot, keeping green polka dot ribbon on the outside. Set aside.

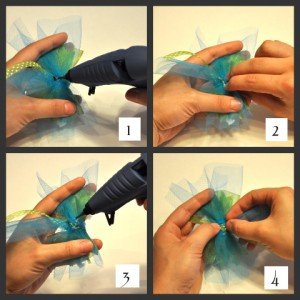
12. Prepare bow to have knot glued on by positioning ribbon exactly where you want it and hold it with one hand.
13. With the other hand do a glue dab on the top and both sides of the bow.


14. Place prepared knot over middle and side of bow and press.

15. Trim one side of knot and glue to back of bow. Glue the other side to back of bow and trim extra ribbon and tulle.
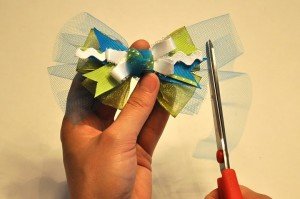
16. Trim tulle on each side in rounded motion so it hangs out from the edge of the bow.
17. Hold alligator clip open (to ensure clip not getting glue on the inside) and glue top of it. Then press to back of bow. (Please note: You can line the clip with ribbon, but I prefer not to. The clip stays in hair better without being lined and the clip does not show in this particular bow)


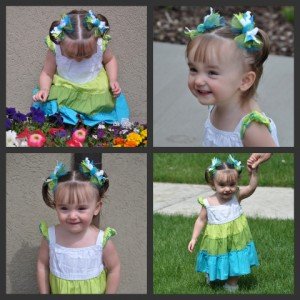
18. Your bow is ready to wear! Make two for a pig tails look. These matching bows will dress up any outfit and make your little cutie even cuter!

To learn more about our Design Team possibilities please visit our Design Team Page.