Using our Mini Bowdabra and Hair Bow Tool & Ruler you can easily create this fun little girl’s Valentine’s Day hair bow.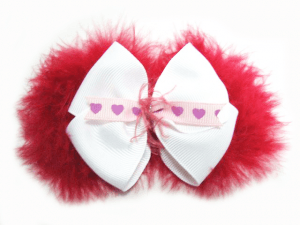

Materials
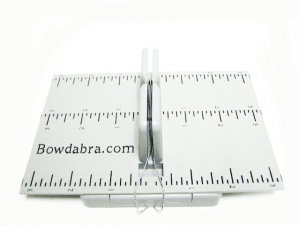
- Mini Bowdabra
- Hair Bow Tool & Ruler
- Bowdabra Bow Wire
- 1.5? White Grosgrain
- 3/8? Heart Bobbin Ribbon
Instructions:
1. To make the Valentine’s Day hair bow: Cut an 18” piece of Bowdabra Bow Wire and fold it in half. Lay it into the Mini Bowdabra . You’ll have a loop at one end and two loose pieces at the opposite end.
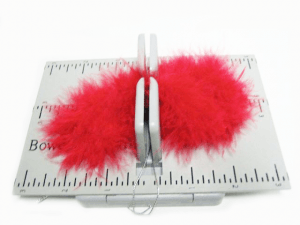
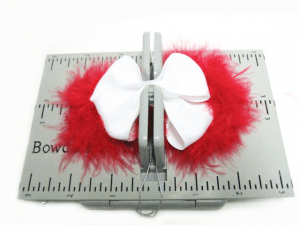
2. Place the end of craft boa into the Mini Bowdabra.
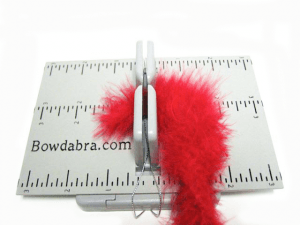
3. Form a 2” loop and then press into Mini Bowdabra.
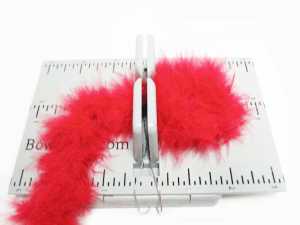
4. Form a 2” loop on the other side and cut away craft boa.
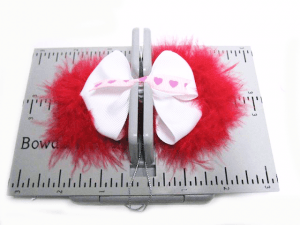
5. Next, cut a piece of ribbon 14” long to make a 3” wide Boutique Bow.
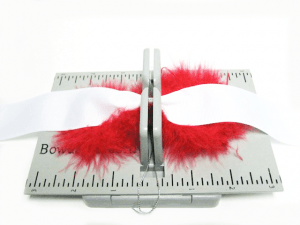
6. Grab one end of the ribbon and crease the ribbon into the Mini Bowdabra.
7. Grab the ribbon on the other side of the Mini Bowdabra tower. Fold over the first ribbon loop and down into the center of the Mini Bowdabra. The two ribbons will form an X on the top of the Mini Bowdabra towers.
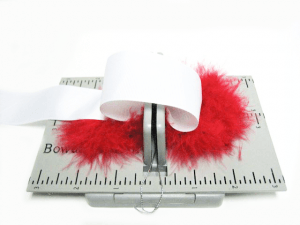
8. Using the Hair Bow Tool and Ruler as your guide position all four loops evenly and symmetrically. Start with the bottom loop and make a crease in the center and press into the Mini Bowdabra. Then take the top loop and make a crease in the center of it, as well, press into the Mini Bowdabra.
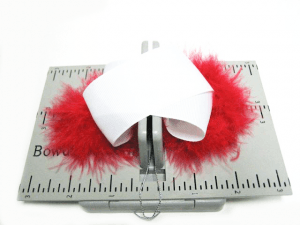
9. Add a small ribbon spray, press it into the Mini Bowdabra.
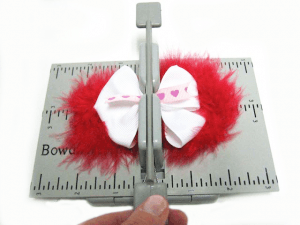
10. Scrunch down the ribbon with the Mini Bowdabra Wand. While the bow is still in the Mini Bowdabra, thread the two loose ends of the Mini Bowdabra Bow Wire through the loop at the other end. Pull the Bowdabra Bow Wire tightly while the bow is still in the Mini Bowdabra. Gently pull the bow out of the Mini Bowdabra. Separate the two loose ends of the Bowdabra Bow Wire and bring them around to the back of the bow and knot.
11. Fluff bow and adjust loops. Attach a finishing ribbon and a hair clip.
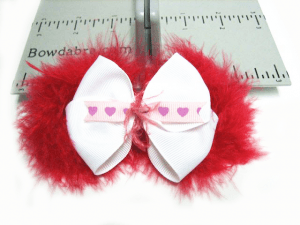
12. Hair bow is finished and is ready to be worn!
