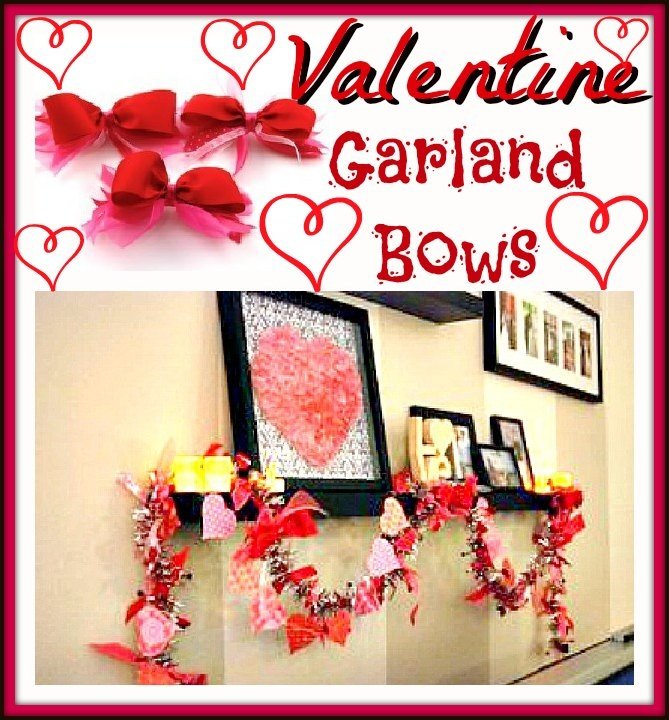
Creating an inexpensive Valentine Garland using scrap ribbon is a way to create a high impact in a small room. Jazz  up the garland by adding multiple Spiky Bow & Bow Tie Stacked bows to the garland. Step-by-step directions for making the Bowdabra bows are provided below. For additional craft instructions visit Sew Woodsy and learn how to create this Scrap Ribbon Valentine Garland.
Supplies:
Instructions:
1. Begin by gathering all the materials you will need for this project.

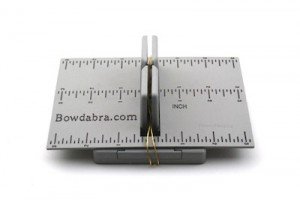
2. Place Bowdabra ® Hair Bow Tool and Ruler onto the Mini Bowdabra, leaving a space at the bottom for the Mini Bowdabra tower to move. Cut a 18” piece of Bowdabra Bow Wire and fold it in half. Lay it into the Mini Bowdabra. You’ll have a loop at one end and two loose pieces at the opposite end.
3. Make a crease on one of the ends and press it into the Mini Bowdabra.

4. Make another crease at the other end of the ribbon and press it into the Mini Bowdabra.

5. A loop above the Mini Bowdabra Tower is formed with each end gathered in the center of the Mini Bowdabra.

6. Using the Hair Bow Tool and Ruler as your guide position the loops evenly. Make a crease in the center of the ribbon and press it into the Mini Bowdabra.

7. Scrunch down the ribbon with the Mini Bowdabra Wand.

8. While the bow is still in the Mini Bowdabra, thread the two loose ends of the Mini Bowdabra Bow Wire through the loop at the other end. Pull the Bowdabra Bow Wire tightly while the bow is still in the Mini Bowdabra.

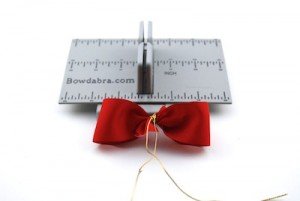
9. Gently pull the bow out of the Mini Bowdabra. Separate the two loose ends of the Bowdabra Bow Wire and bring them around to the back of the bow and knot.
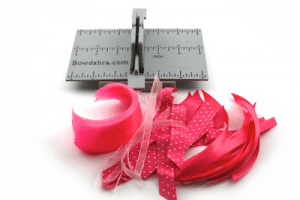
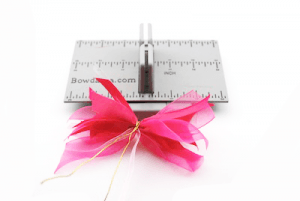
10. To make the spiky bow. Begin by gathering all the materials you will need for this project. I cut the ribbon pieces to be 6-8 inches in length. I did not seal the ends of the ribbons because I want the frayed edge look.
11. Again you will need the Bowdabra ® Hair Bow Tool and Ruler onto the Mini Bowdabra, leaving a space at the bottom for the Mini Bowdabra tower to move. Cut a 18” piece of Bowdabra Bow Wire and fold it in half. Lay it into the Mini Bowdabra. You’ll have a loop at one end and two loose pieces at the opposite end.

12. Place the ribbon strands into the center of the Mini Bowdabra. Arrange the strands at various angles. Use the Hair Bow Tool & Ruler as your guide to keep all the strands at even lengths. Scrunch down
the ribbon with the Mini Bowdabra Wand.

13. While the bow is still in the Mini Bowdabra, thread the two loose ends of the Mini Bowdabra Bow Wire through the loop at the other end. Pull the Bowdabra Bow Wire tightly while the bow is still in the Mini Bowdabra.

14. Gently pull the bow out of the Mini Bowdabra. Separate the two loose ends of the Bowdabra Bow Wire and bring them around to the back of the bow. To tie off the bow, pinch the Bowdabra Bow Wire securely against the bow. Twist the bow in a clockwise direction and knot.
15. Next, you will want to attach the bow tie to the spiky bow.
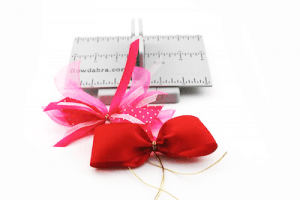
16. Separate the two loose ends of the Bowdabra Bow Wire on both bows and bring them around to the back of the bow and knot.

17. Cut off the Bowdabra Bow Wire, and reserve for later use.

18. Place a 6inch strip of ribbon on your table. Center your bow over the ribbon.

19. Using a hot glue gun carefully squeeze a dollop of hot glue on to the back of your bow.
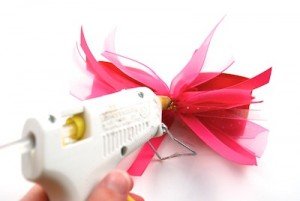
20. Attach one side of the ribbon to the hot glue on the back end of the bow.

21. Repeat the step above and pull tightly.

22. This is what the back of your ribbon will look like.

23. This is what the 3 bows looked like after the centers were finished with satin ribbon.

24. Using the leftover Bowdabra Bow Wire attach the wire on to the bow and then attach the bow on to the garland. To learn how to make this gorgeous Valentine’s Day garland please visit our Bowdabra Designer Katie at her blog SewWoodsy.com

For more about the designer of this tutorial click here….
For more Valentine’s Day Crafts click here….
Added to following link parties:
Whats Up Wednesday Link Party by SewWoodsy.com
Momnivore’s Valentine’s Day Link Party
Very Merry Vintage Style
Chic On A Shoestring Decorating