Create a beautiful St. Patrick’s Day ribbon bouquet that will last long after St. Patrick’s Day is past.
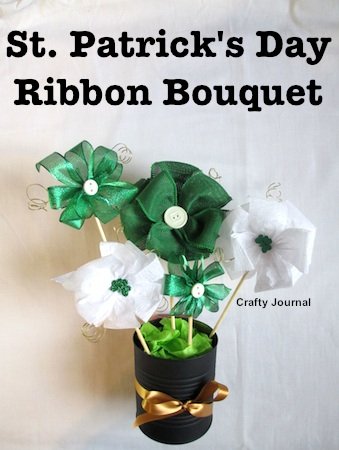
You can use different widths of ribbon, and shades of green and white to make an eye catching bouquet.
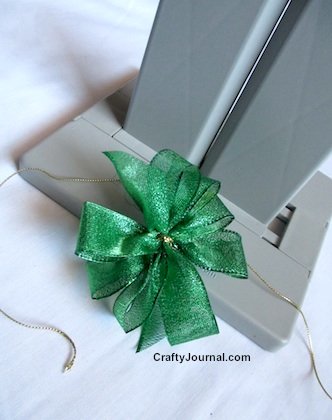
These bows were made using the Bowdabra which makes quick and beautiful bows.
Supplies:
Bowdabra
Green and White Ribbons, varying shades of green, and various widths.
Gold Ribbon
Tin Can – 29 ounce size for this project
Green Tissue Paper
Styrofoam or Florists Foam
Black Spray Paint
Skewers
Green and White Buttons
Needle and Thread
How to Make a St. Patrick’s Day Ribbon Bouquet.
Make the Bows:
1. Cut a piece of Bowdabra bow wire 24 inches long.
Fold it in half and lay it in the long slot. Tuck the loop under one side and the ends under the other side of the Bowdabra.
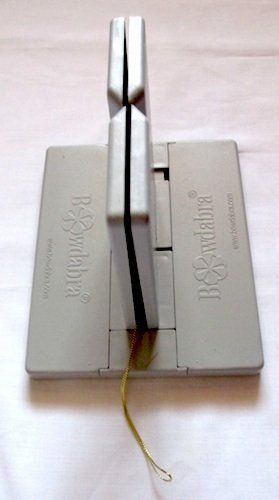
2. Start the bow by laying one end of the ribbon through the slit as shown.
Make a loop the size you want on the right side of the slit, and then press the ribbon through the slit to the left side.
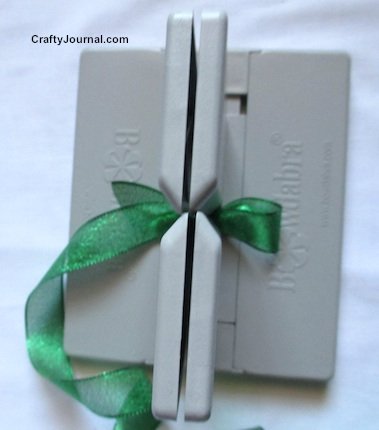
3. On the left side, make a loop about the size as your first loop and then put the ribbon back through the slit to the right side.

4. Make an equal size loop on top of your first loop on the right side, and then put the ribbon through the slot to the left side and make another loop on top of that one.

Try to make the loops about the same size.
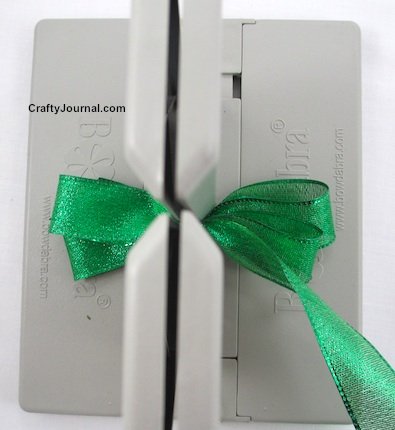
Continue back and forth through the slit making a loop on each side until you have 3 or 4 loops on each side.
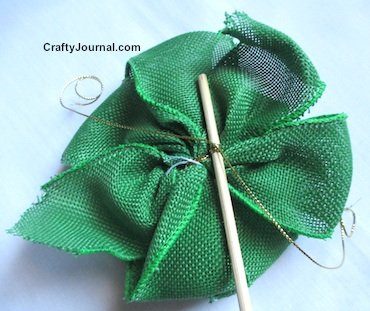
5. I made 4 loops on each side for the smaller flowers and 3 on each side for the large one.
6. Use the Bowdabra wand to scrunch the center of the bow down.
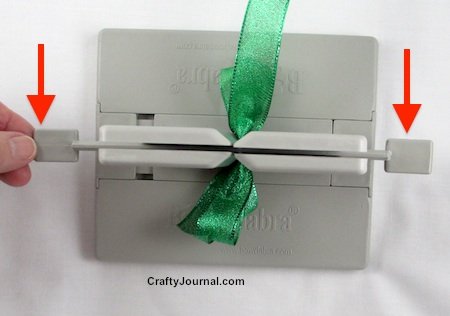
7. Pull the wire ends up
and put them through the wire loop at the other end without disturbing the ribbon too much.

Pull the loop tight.
Slide the bow gently upward and out of the Bowdabra.
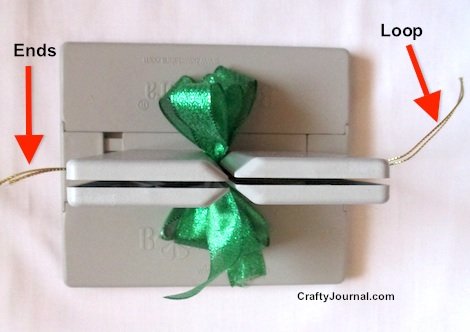
8. Wrap the wire ends around the center of the bow in opposite directions.
Pull them tight under the bow and tie a knot. Do not cut off the wire ends.
9. Repeat with all the ribbons until you have enough bows to make a bouquet.
I made 5 bows: 2 white, 2 small green, and 1 large green burlap one.
10. Choose a button for the center of each bow.
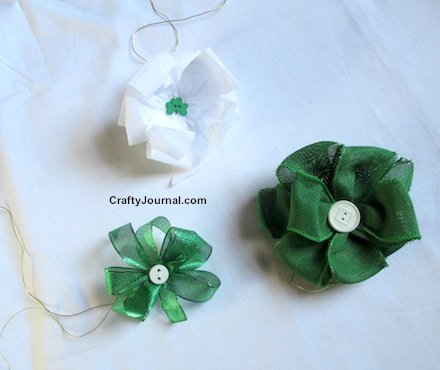
I found green shamrock buttons which I used for the white bows, and white buttons for the green bows.
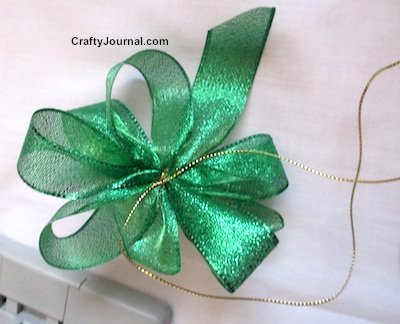
11. Fluff up the bow until it has a round, pleasing shape.
12. Use a needle and thread and a couple of stitches to attach a button to the center of each bow.
How to Put the Bouquet Together:
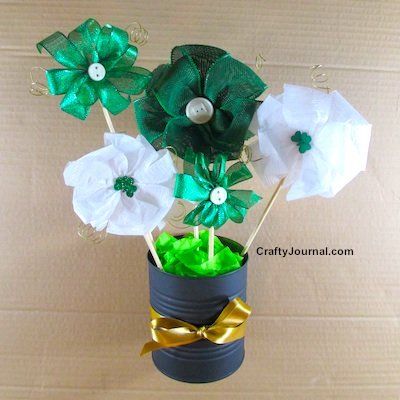
1. Spray the outside of the tin can black. Let dry.
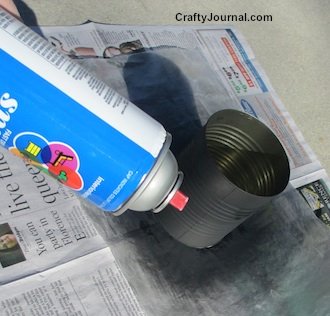
I used 3 thin coats.
2. Turn the can upside down and press down into the florists foam to fill the can.
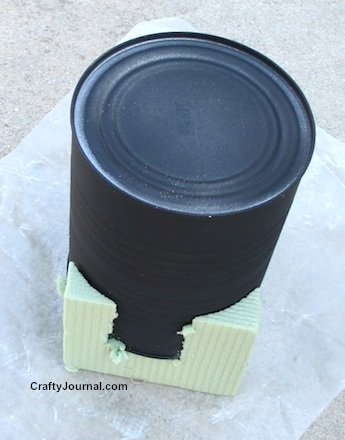
If you’re using styrofoam, you will need a knife to cut it to can size.
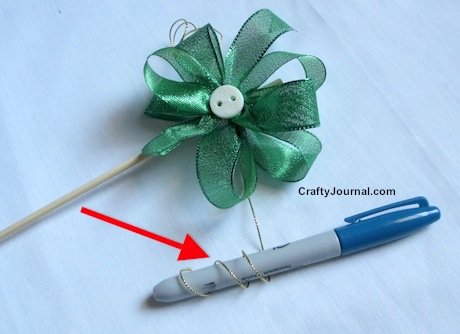
3. Using the bow wire at the back of the bow, wrap the wire tightly around the skewer a couple of times near the flat end and tie the wire tightly into a knot.
Do not cut the ends off.
Instead, curl the ends of the wires around a marker to look like tendrils.
4. Lay the flowers out and rearrange them until you have a pleasing look.
Make sure some of the flowers are taller and some shorter.
When you have an arrangement you like, cut off the bottom ends of the skewers as much as you need to allow them to fit into the can at different heights.
5. Poke the cut ends of the skewers into the florists foam in the can at different angles, and with one or two behind and one or two in front.
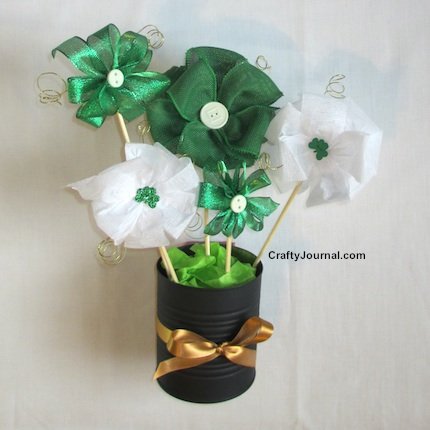
The taller ones should be in back to allow the shorter ones to be seen.
6. Tie a gold ribbon around the can with a simple bow at the front.
You don’t want an elaborate bow to compete with the flowers.
7. Insert a bit of tissue paper around the skewers to cover the florists foam and give the bouquet a finished look.
Tips:
Grosgrain ribbon was too stiff to use for these bows as I couldn’t shape the loops into flowers.
Wire edged ribbon and soft ribbons, as well as crepe paper strips were very easy to work with and made lovely flowers.
You could use glue to attach the buttons to the bow centers.
by Noreen Doll