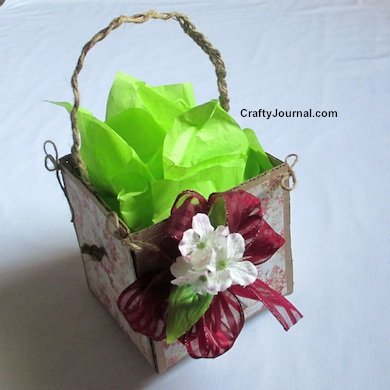
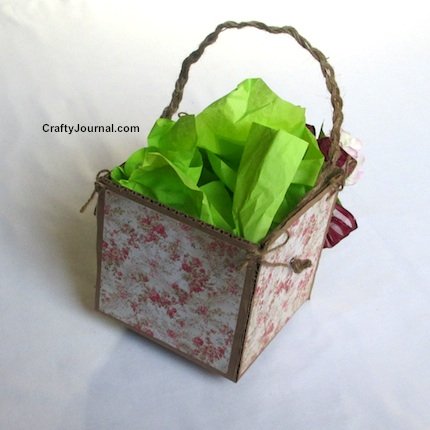
Create a rustic basket from the side of a cardboard box. It makes a lovely holder for a gift. This adorable rustic basket is also a perfect recycling project since it uses a corrugated cardboard box!

Or use it as a Spring basket or Easter Basket. It would also be perfect for Mother’s Day.
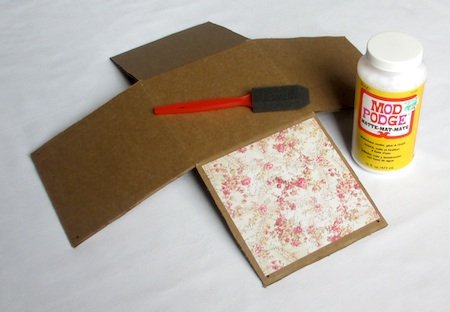
Supplies:
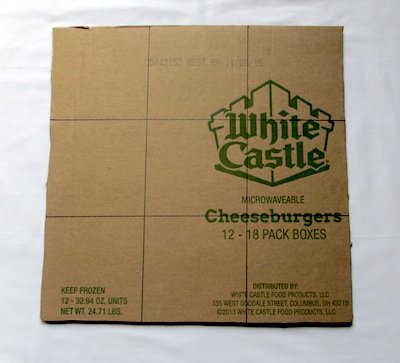
Corrugated Cardboard Box
Twine
18 or 20 Gauge Wire, about 26 inches long
22 or 24 Gauge Wire about 20 inches long
Scrap Book Paper or other colorful Paper
Ribbon
Silk Flowers
Mod Podge or White Glue
Scissors
Paper Punch
Ruler
Pencil
How to Make a Rustic Basket from a Cardboard Box.
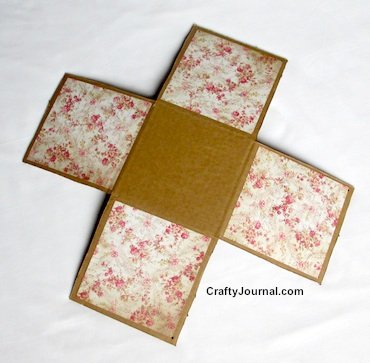
1. Cut out the largest panel from a cardboard box. Your box will be 1/3 the size of your cardboard square.
Cut a square from this panel. I made the largest square possible from the piece of cardboard I had. It was 16 1/2 inches square.
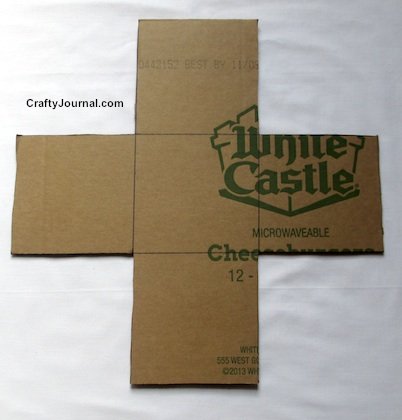
2. Divide the cardboard square into 9 equal sized smaller squares.
Each of my squares was 5 1/2 inches.
3. Cut out and discard the 4 corners.
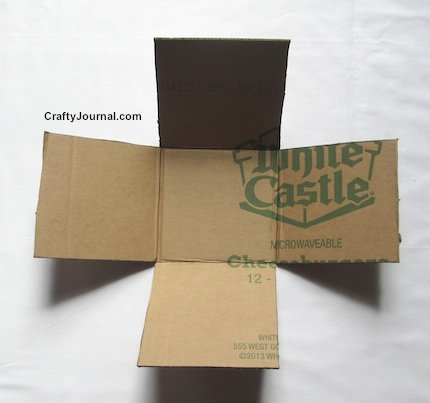
4. On the printed side of the box, score across the base of each side square so it will fold evenly.
Lay a ruler next to the score line and fold the side up and to the inside of the box.
Fold it all the way flat and crease it.
Repeat with each side of the box until all are folded up.
5. Cut out 4 squares of scrap book paper or other colorful paper, 1 for each side of the box.
The squares should be about 1/4 of an inch smaller on each edge than the box side is. (My box side is 5 1/2 inches square, so I made the paper 5 inches square.)
6. Lay the box flat again.
Using Mod Podge or white glue, cover the back side of each square and attach it to one of the sides – on the outside of the box. Let dry.
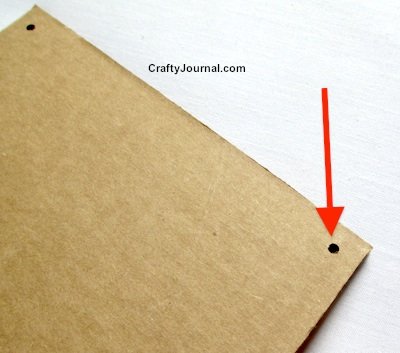
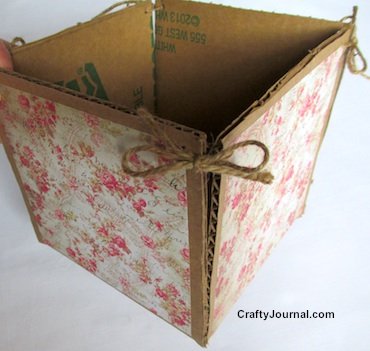
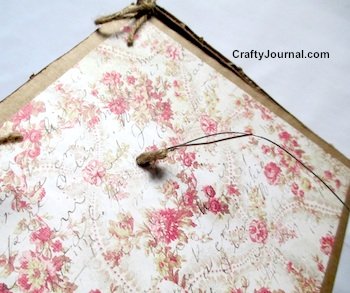
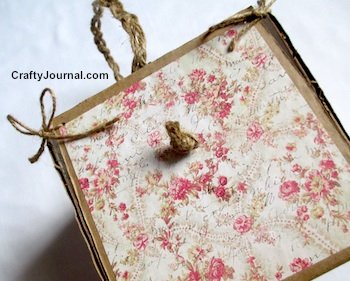
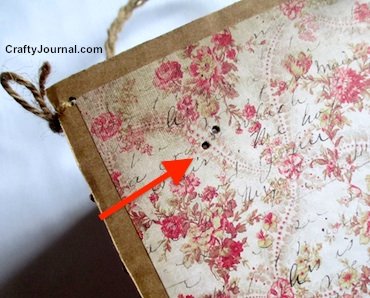
7. Punch holes in all the top 8 corners about 1/4 inch from each edge.
Cut 4 pieces of twine about 12 inches long.
Use these pieces of twine to tie the top corners together as shown.

Tie the twine into a nice bow.
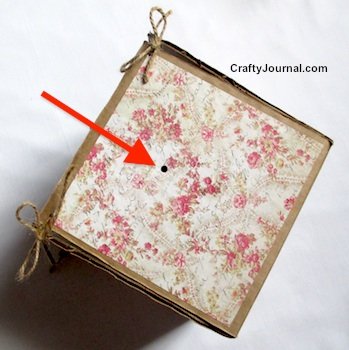
8. Decide where the front and back of the basket are.
On the sides, punch a hole in the center about 2 1/4 inches down from the top.
9. Cut several pieces of twine about 30 inches long. The number of pieces you use will be in multiples of 3.
I used 6 pieces of twine and paired 2 of them for each braid strand I used.
Clamp all the twine pieces together at one end and braid the twine for the handle.
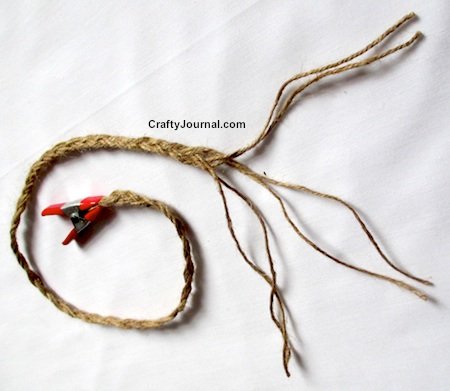
Clamp the second end of the finished braid.
Cut a piece of 18 or 20 gauge wire about 26 inches long.
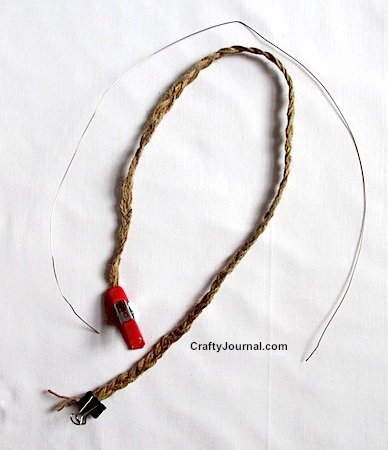
This will give the handle body and allow you to shape it.
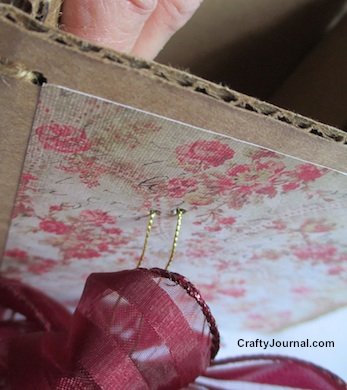
10. Loop one end of a very thin wire (22 or 24 gauge) about 15 or 20 inches long, to make a large eye for a needle.
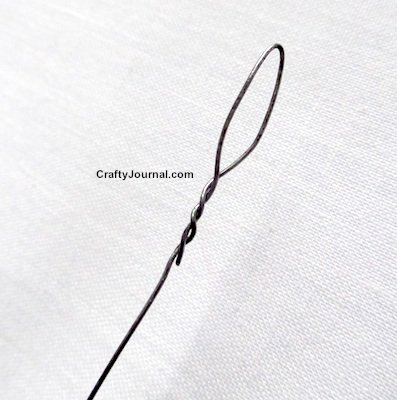
Put all the ends of the twine from one end of the braid, plus the wire, through this “needle eye”.
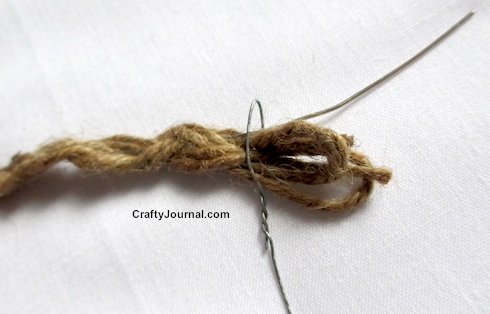
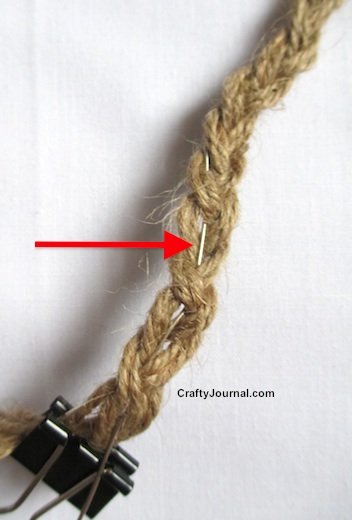
From the inside of the basket to the outside, use the “needle” to pull all the ends through the side hole you punched.
Tie the twine into a neat knot.
Wrap the end of the wire several times around the braid between the knot and the basket. Cut off the excess wire.
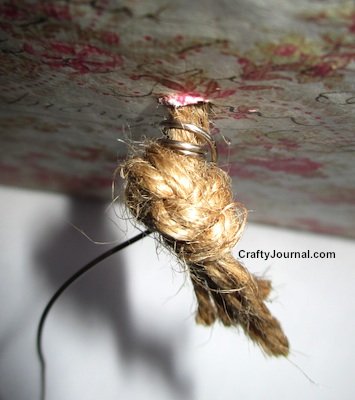
Repeat on the other side of the basket.
Trim any ends of the twine that need to be evened up.
11. Shape the handle over the top of the basket.
How to Make the Bow on the Bowdabra Bow Maker.
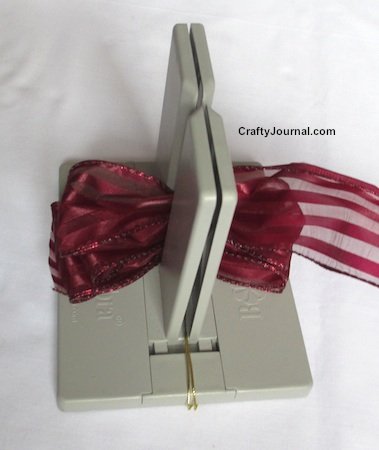
1. Cut a piece of Bowdabra bow wire 24 inches long and fold it in half.
Lay it in the middle of the long slit of the Bowdabra Bow Maker, tucking the loop under one side and the ends under the other side.
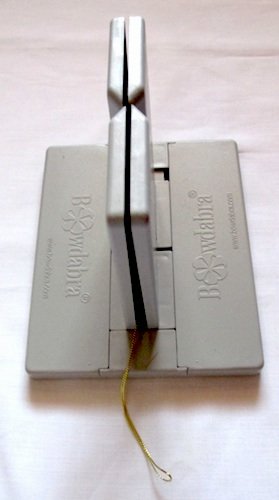
2. Lay one end of the ribbon through the short slit as shown.
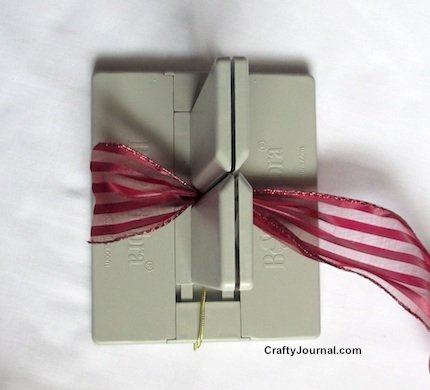
3. Loop the ribbon on the right side and put it back through the slit, leaving about a 3 inch loop.

My bow is about 6 inches wide, so one loop would be about 3 inches long.
4. Make a loop on the left side and put the ribbon back through the short slit. This loop should also be about 3 inches.
5. Loop the ribbon on the right side so it is about the same size as the previous one and put the ribbon back through the slit to the left side.
6. Continue making loops this way until you have 3 loops on each side.
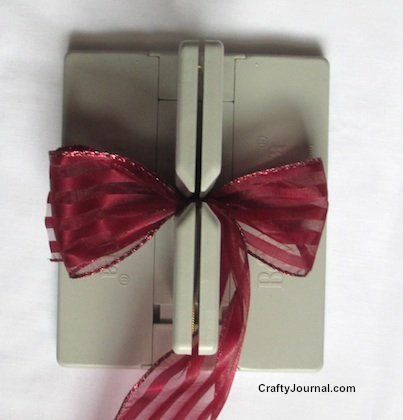
7. Lay the flower piece across the top center of the bow, through the slit in the Bowdabra.
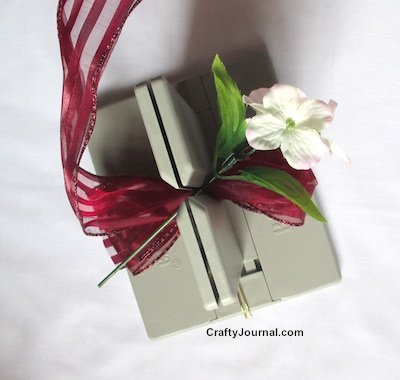
8. Use the Bowdabra wand to press down the center of the bow.
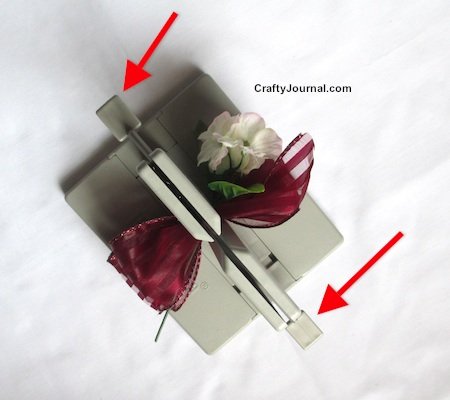
9. Pull up the ends of the Bowdabra wire and put them through the wire loop at the other end.
Pull it tight.
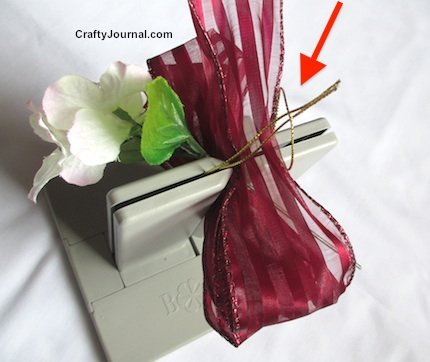
10. Gently pull the bow up off the Bowdabra, wrap 1 wire around each way on the bow and tie it firmly in the back.
Finish the Rustic Basket.
Lay the finished bow on the front of the box the way you want it to look.
Check where the wires on the back of the bow meet the box, and punch 2 holes about 1/4 inch apart.
Push the wires through the holes from outside to inside,
and tie in a knot on the inside of the box. Trim the wire ends.
Here’s how the back of the basket looks.
by Noreen Doll