I love making these little headbands! They can easily be made with scrap materials, so they are as close to free as it gets. If you have a fashionista like I do, then you know what it’s like to have a girl who wants a matching headband or bow for each outfit. The method I’m using today for this Back to School headband is inexpensive enough to do just that!
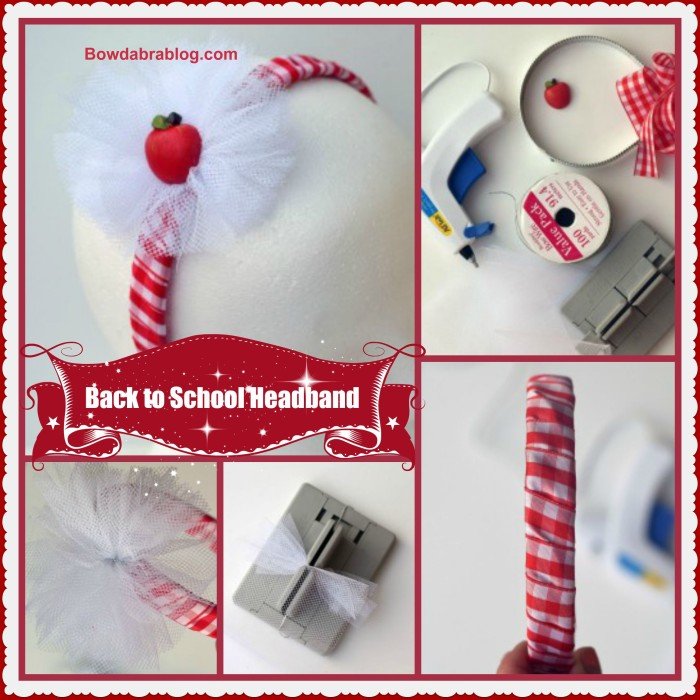
Supplies:
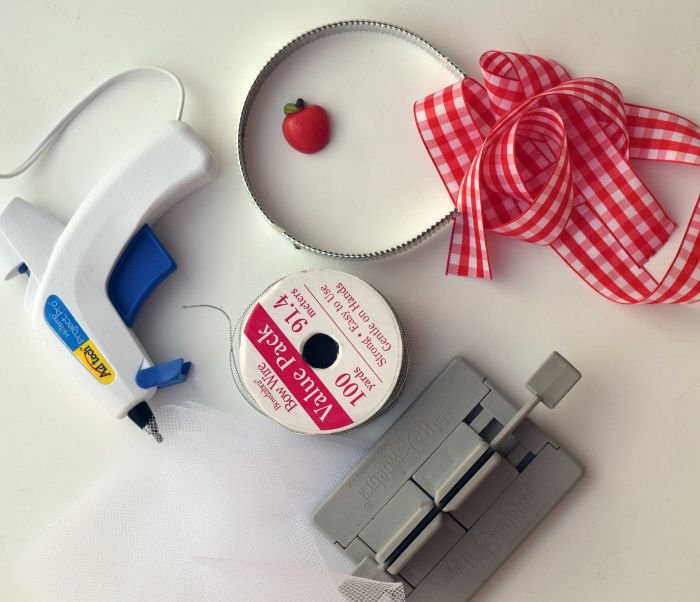
- Mini Bowdabra
- Bowdabra bow wire
- Scrap tulle or netting
- Scissors
- Red and white ribbon
- Plain headband base
- Hot glue and hot glue gun
- Apple button or embellishment
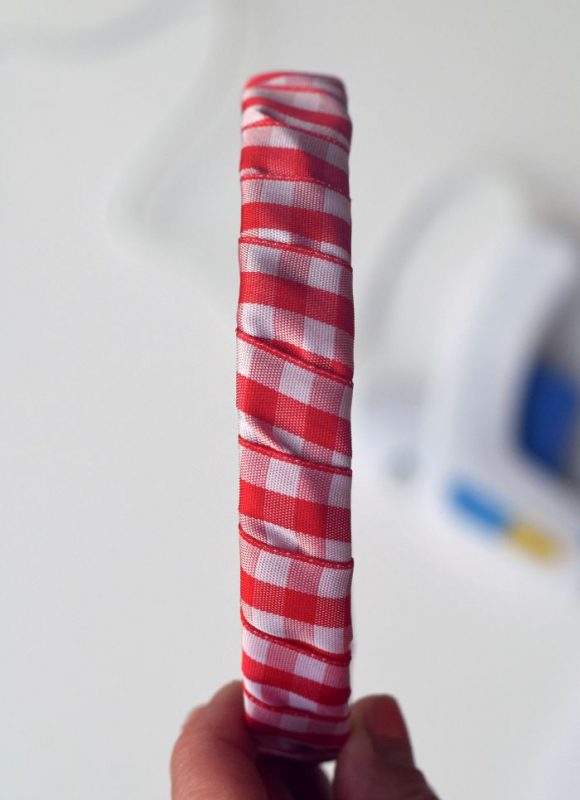
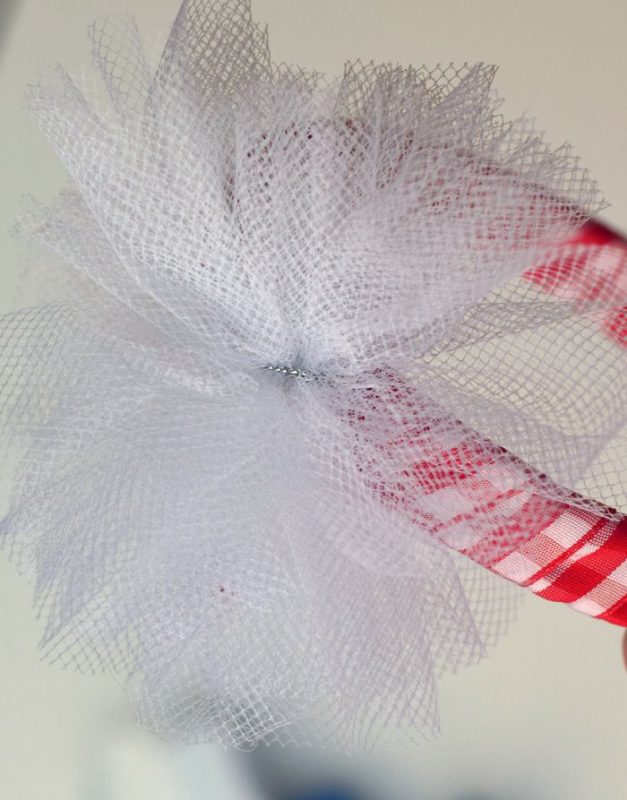
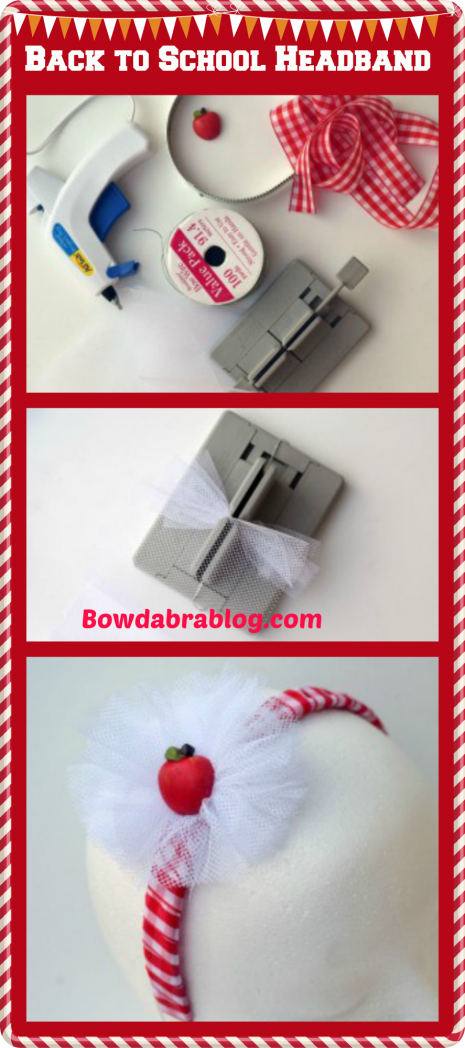
Begin by grabbing the blank headband base. Wrap the red and white ribbon around the headband, using the hot glue gun to secure the ribbon at the ends.
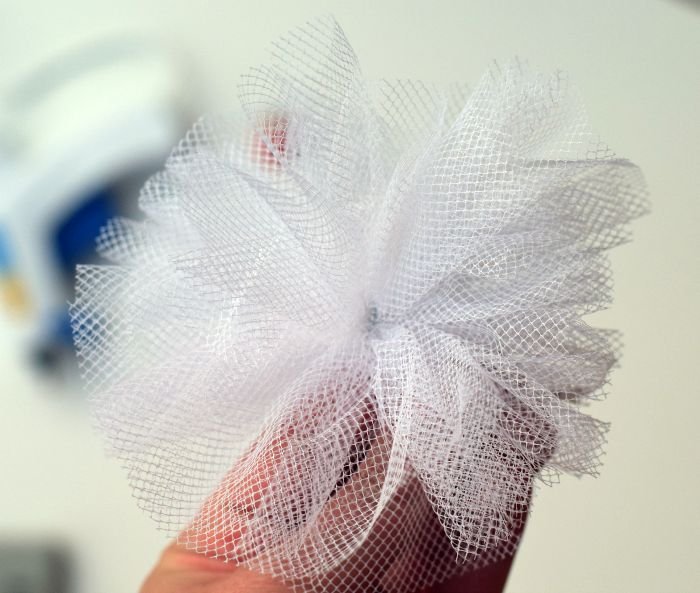
Lay a piece of Bowdabra bow wire across the Mini Bowdabra.

Fold the tulle or netting in half crosswise. Starting with the folded end, push the tulle or netting in the Mini Bowdabra like an accordion until all the material is within the Mini Bowdabra.
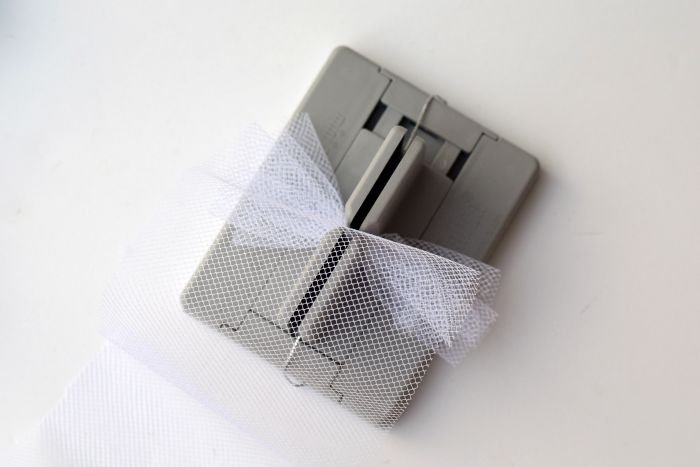
Use the scrunching tool to push down the material. Bring up the bow wire to secure.
Fan out the material to take on a circular bow shape. If the edges are uneven, cut around the outside of the material to even out the bow.
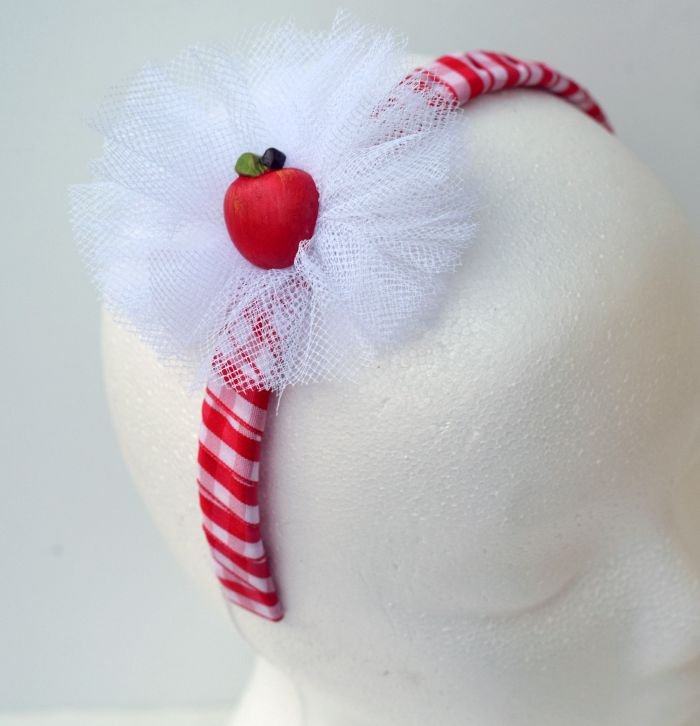
Hot glue the bow to the headband, offsetting to one side.
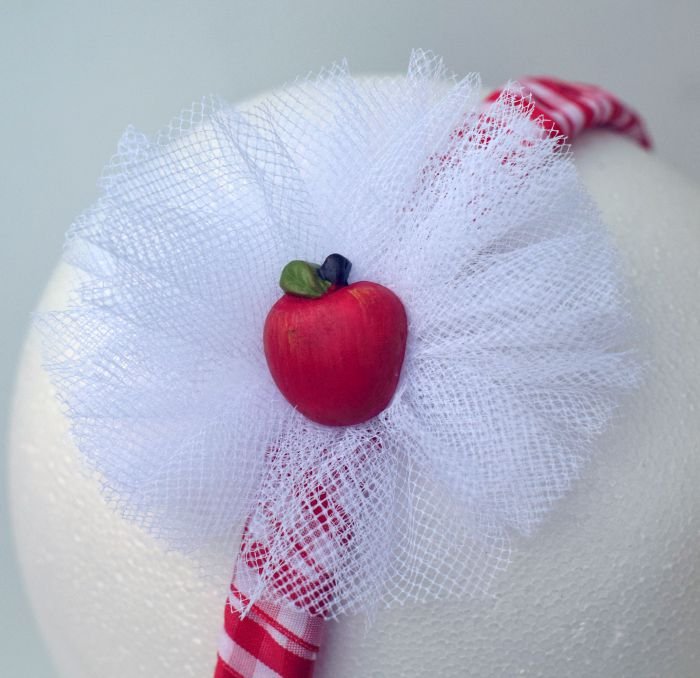
Hot glue the apple embellishment to the center of the bow.
Who would you make this fun Back to School bow for?
Melanie is a craft designer, baker, seamstress, and mom of triplets plus one. You can find her at ItHappensinaBlink.com, a space where she shares crafts, DIY projects, and recipes that can be completed in less time with fewer supplies. Occasionally, she’ll share a glimpse into her life as a mom of wild triplet toddler boys.


Save
Save
Save
Save