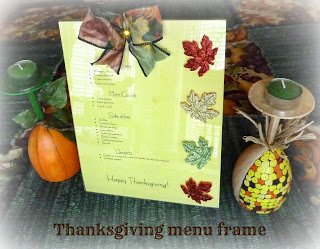
Every Thanksgiving I have a lot of guests so I set up a buffet table with a printed Thanksgiving menu frame displayed. It looks so pretty and festive dressed up with a beautiful Bowdabra bow in an acrylic 8 x 10 frame. There are so many fall and Thanksgiving ribbons in the craft stores that will match any décor. Add some sparkle leaves to further accent your frame.
Let the kid’s help out with typing the menu and after dinner they can get all the guests to sign the back for a lasting memento of Thanksgiving 2015!
Supplies:
- 8 x 10 acrylic frame
- 18 inches Bowdabra bow wire
- 18 inches 1 ½” fall print wired ribbon
- Glue gun and hot glue sticks
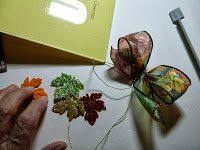
- Glitter felt leaves
- Small gold rhinestone
- Menu printed on your home printer cut to 8 x 10 size
- Bowdabra mini bow maker with ruler
- Ruler
- Scissors
Directions:
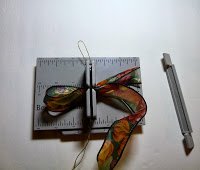
- Gather your materials. Place the ruler onto the mini Bowdabra. Cut 18″ of Bowdabra Bow Wire and fold it in half. Place the wire into the Mini Bowdabra. You will have a loop at one end and two pieces of wire at the other.
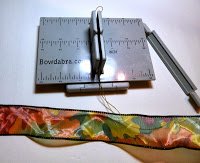
- Place the ribbon into the Mini Bowdabra to create a 2 ½” tail. Next, fold the ribbon to form a loop at the 2 1/2″ mark.
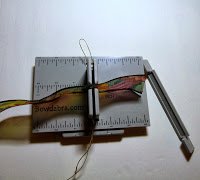
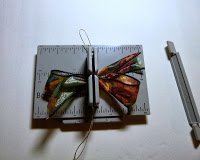
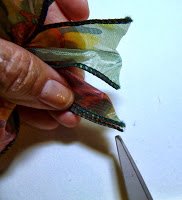
- Fold a matching loop on the other side and trim the ribbon at the 2 1/2″ mark.
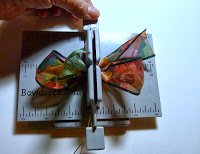
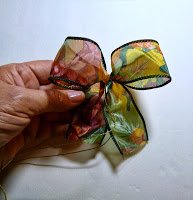
- Scrunch down the ribbon with the Mini Bowdabra Wand. Next, take the wire tails and thread them through the loop. Pull it tight and remove from the Bowmaker. Tie a knot in the back and fluff up the bow. Fold each tail and cut at an angle. Glue a gold or red rhinestone in the center of the bow.

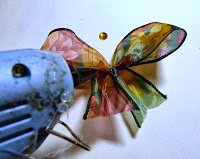
- Use the glue gun to attach the bow to the top center of the frame and attach some glitter felt leaves down the side. Insert your printed menu to display for your guests.


Visit Designer Crystal at her blog Make it easy crafts, Facebook, Twitter, Pinterest, G+, and Bloglovin