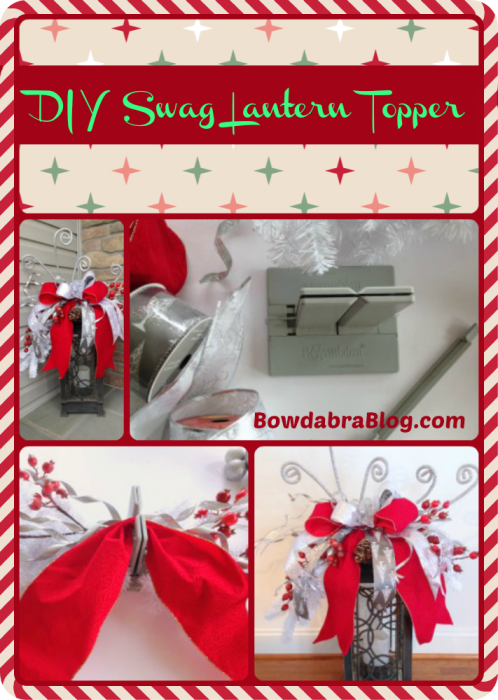
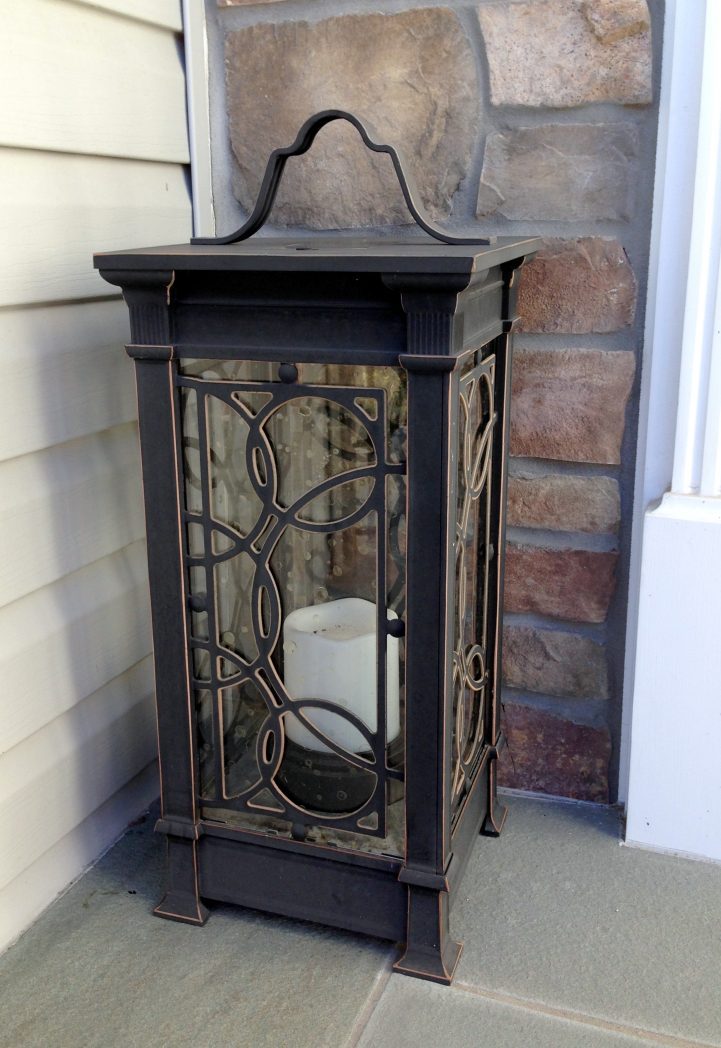
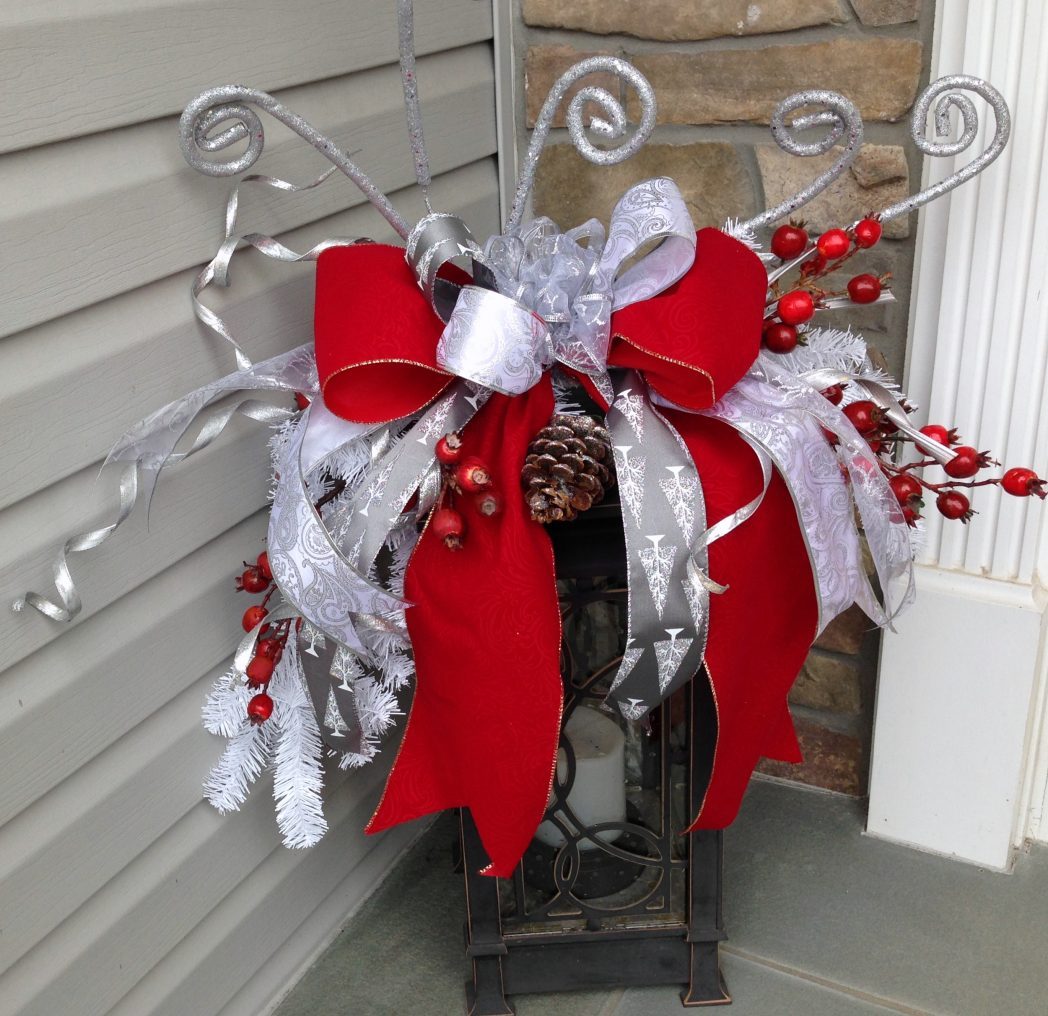
Lanterns are very popular in home décor, both inside and out, and come in a variety of sizes and colors. Wouldn’t it be awesome to dress up your lanterns for the upcoming holidays using bows, floral sprays, berries and other decorative accents?
Here’s how to make a lovely swag lantern topper using your Bowdabra bow maker for a versatile unique look that can also be used, in addition to, on a lantern a door, mantel, tabletop centerpiece, and so many other places.
Let’s get started by gathering the following materials:
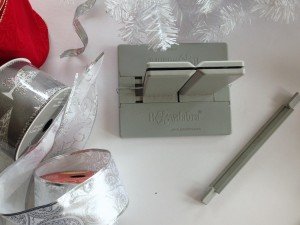
- Bowdabra, wire, and wand
- Assorted holiday ribbons
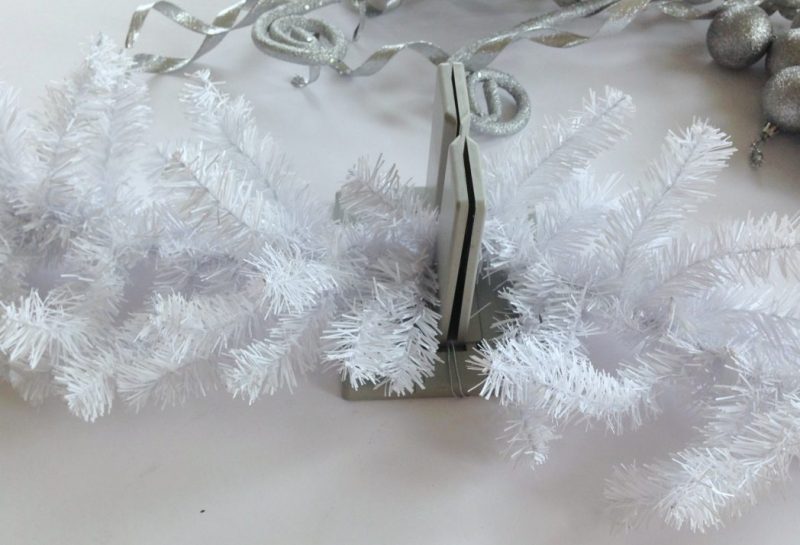
- White faux foliage garland or spray (42″)
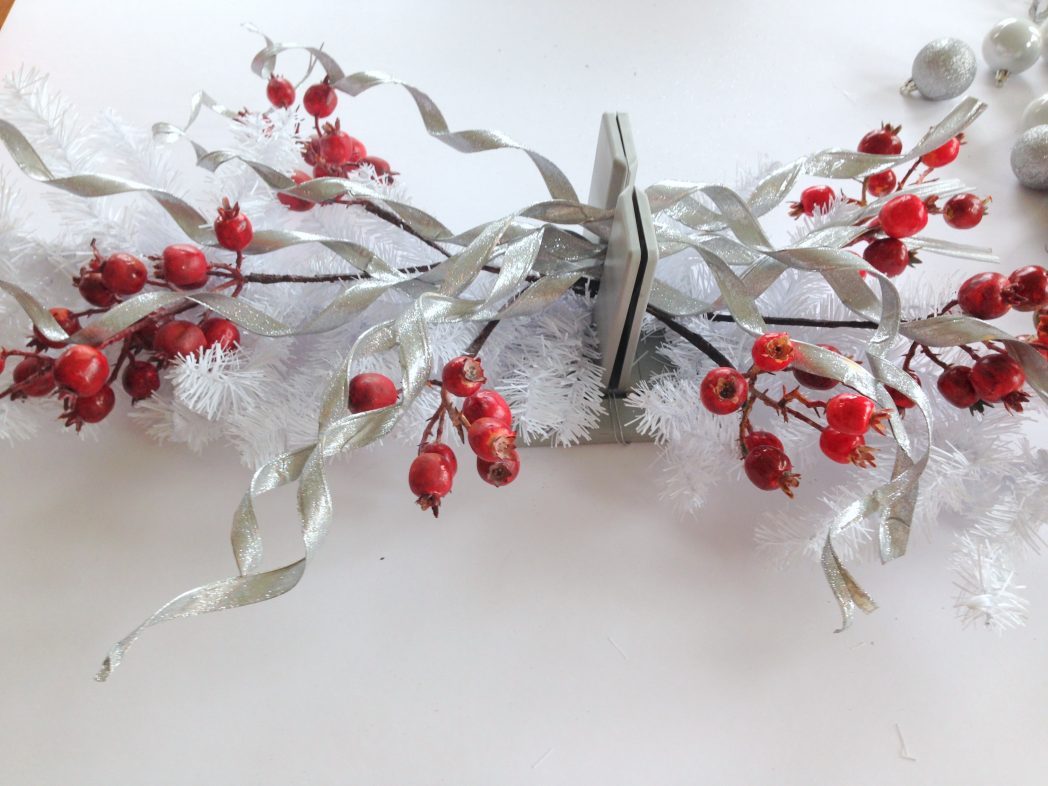
- Berries sprays
- Silver decorative sprays
- Pinecones and other embellishments
- Scissors
Next:
1. Fold a 36″ piece of Bowdabra wire in half and lay in the Bowdabra. You’ll have a loop at one end and two loose pieces at the opposite end.

2. Lay the white foliage spray into the Bowdabra with about 24″ on one side and 18″ on the other, so one side will be cascading down the lantern.
3. Place on top of the white spray a stem of red berries into the Bowdabra, on each side, having one side longer, as before.
4. Separate the silver sprays individually , and place several into the Bowdabra on each side. Scrunch the materials down using the Bowdabra wand.
5. Center a 36″ piece of ribbon in the Bowdabra to create 18″ tails on each side. Dovetail the ends by folding the ribbon in half and cut at the fold on a 45 degree angle.
6. Add additional ribbon tails, one at a time, into the Bowdabra.

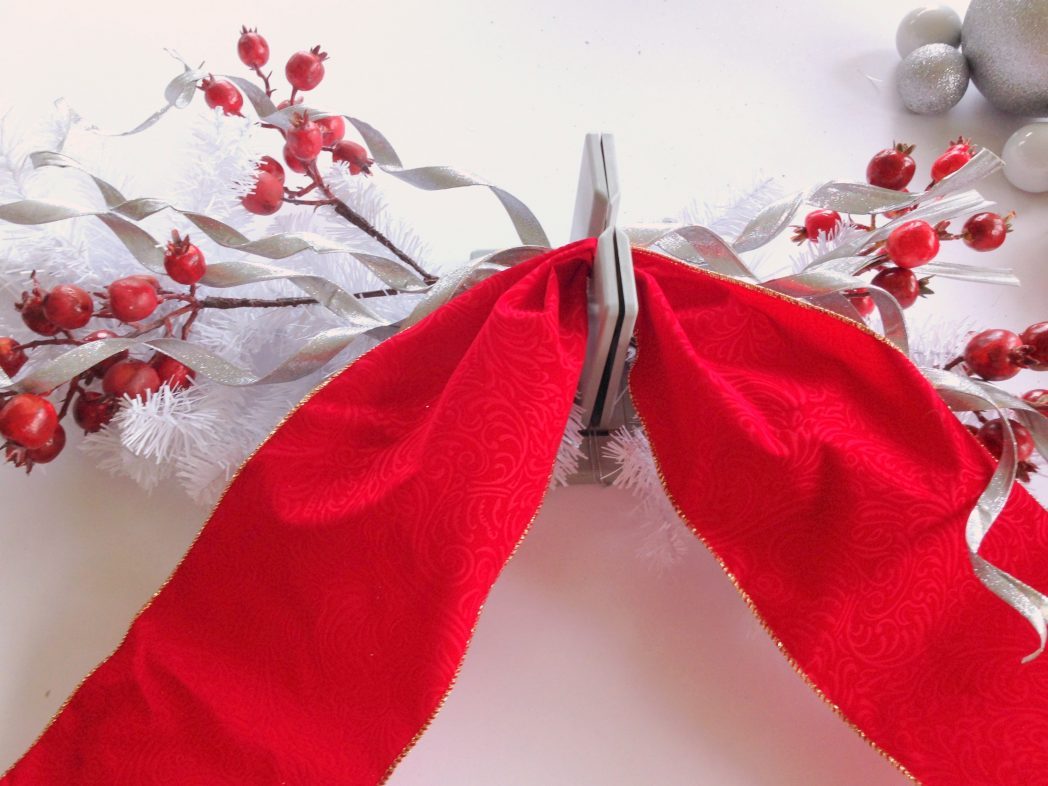
7. For a bow with a 8″ loop on each side, you will need 32 inches of ribbon. Pinch the end of the ribbon together and place down in the Bowdabra. Pinch the other end together and place in the Bowdabra with the 8″ loop above the tower with each end gathered in the center of the Bowdabra. making a crease in the center of the ribbon. Scrunch down the ribbon with the Bowdabra wand.
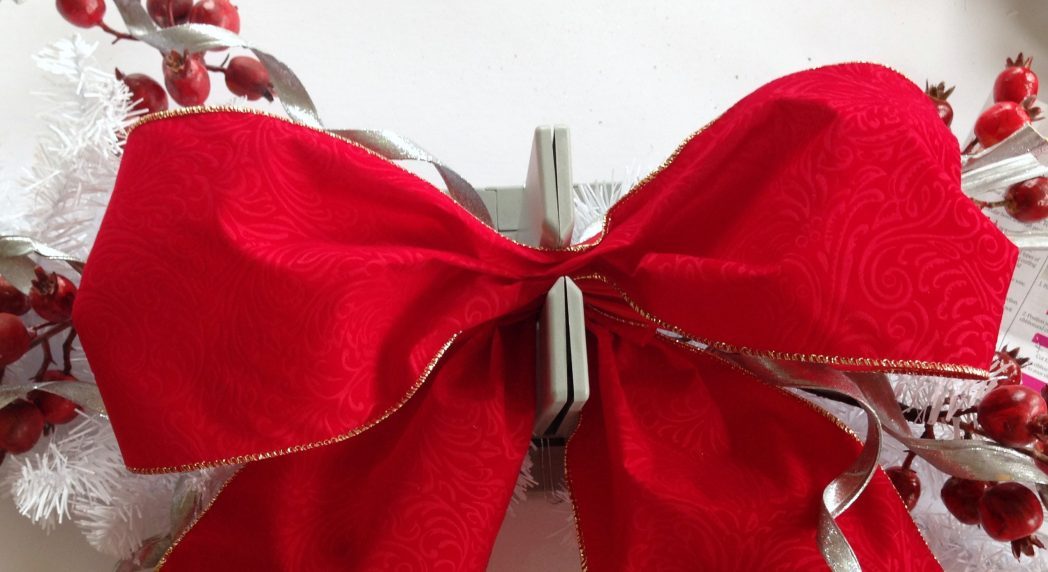
8. Do the same for each additional ribbon, decreasing the length of the ribbon and size of the loops.
9. For the final wired ribbon, make a fold and twist bow beginning with the end of the ribbon is placed down into the Bowdabra. Fold and twist the ribbon, creating the first loop. Continue folding and twisting the ribbon creating as many loops on each side, as desired for the bow. Scrunch down using the Bowdabra wand.
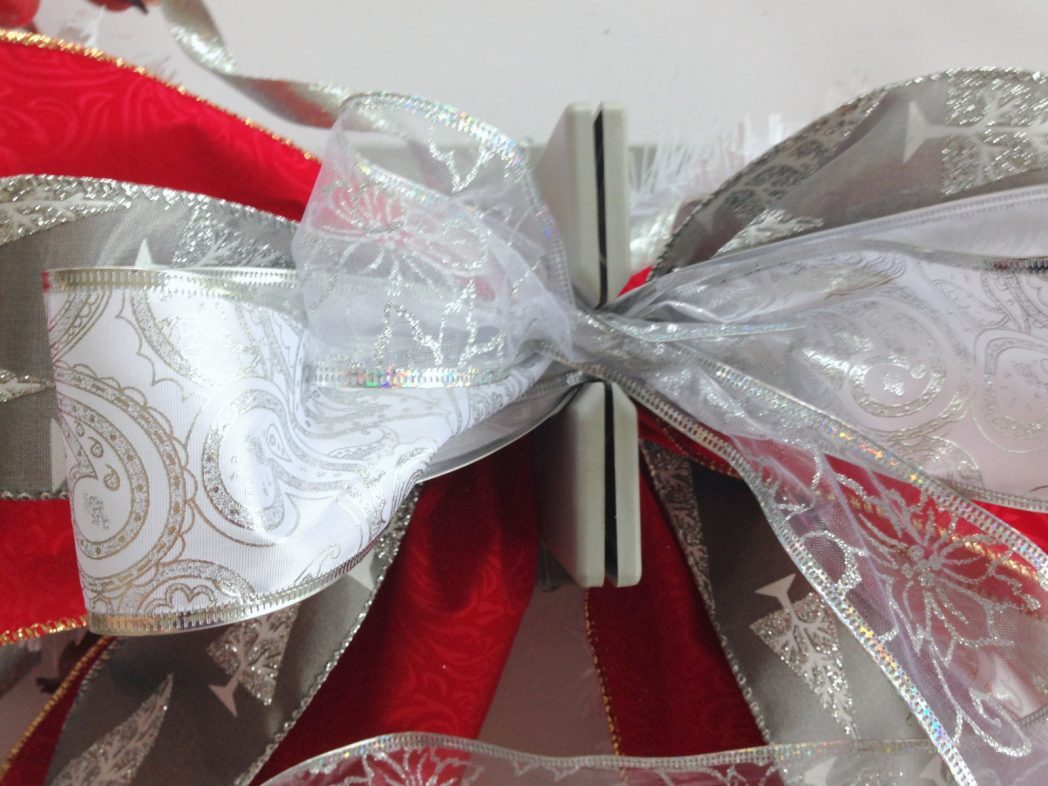
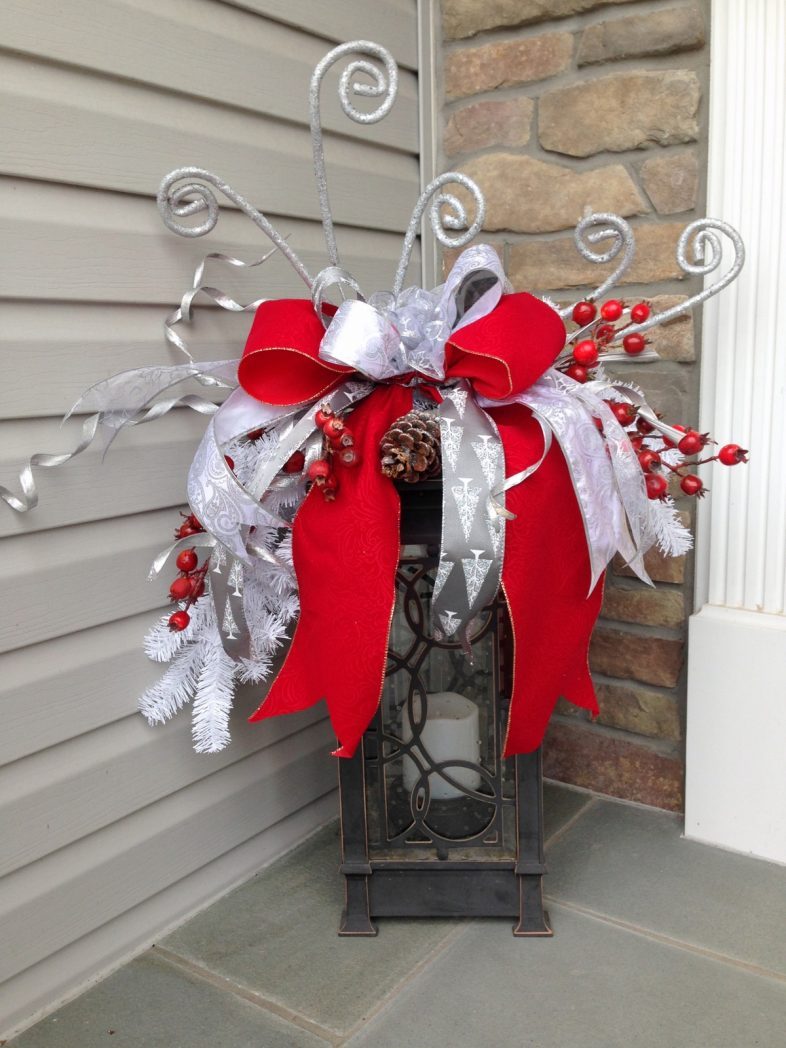
10. While the swag and bows are still in the Bowdabra, tie off the swag by threading the two loose ends of the bow wire through the loop at the other end. Pull the bow wire tightly before removing the entire bow swag from the Bowdabra. Bring the wire ends around to the back of the swag. Tie in a knot to secure tightly.

11. Tie the bow swag onto the top of the lantern using the Bowdabra wire to secure. Fluff all of the bows and ribbon and adjust the foliage.
12. Additional embellishments can be attached with the bow wire or hot glue.
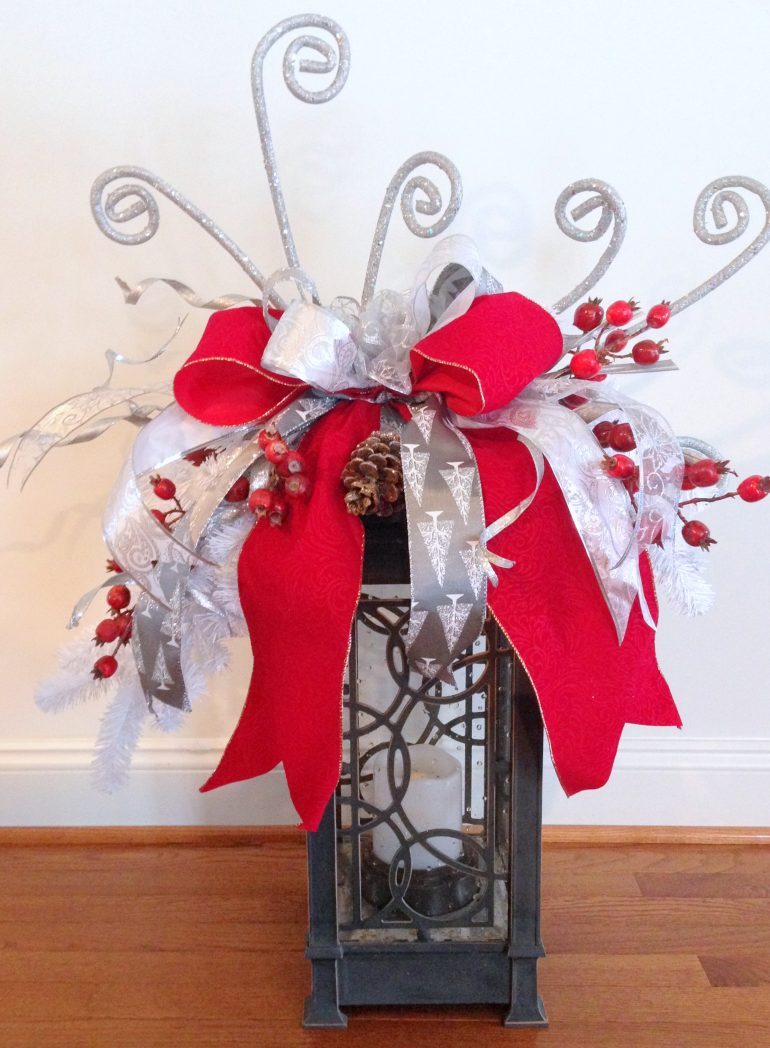
Now stand back and admire your lovely creation!
The best part about using a Bowdabra for making this lantern swag topper is that everything is contained together and in one unit, secured with Bowdabra bow wire. How easy is that!
Have Fun with Your Bowdabra
and
Keep Crafting!
Be sure and visit Bowdabra designer Gail at her blog Purple Hues and Me, G+, Pinterest, and Twitter.