

All it takes is 10 minutes to transform this ugly garland into an exquisite Show-Stopping Garland! The Video takes you step by step and shows how you can make a wreath bow, how to make a Tree Topper bow and how to make ornament bows for you gifts and tree. It is so easy you’ll wonder why you never tried it!!
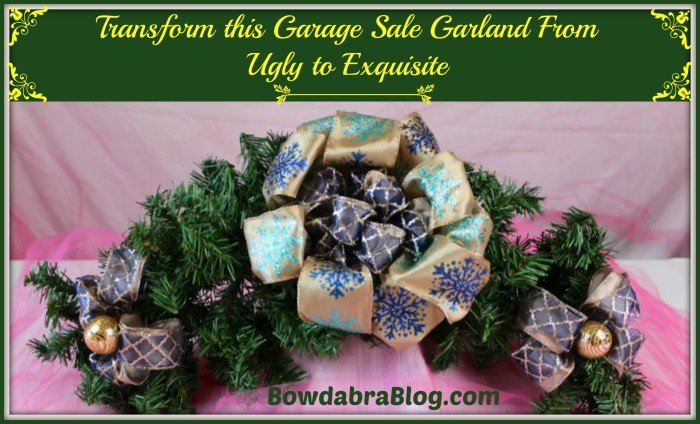
A large exquisite bow made from a variety of ribbons and a couple of smaller bows that are embellished with golden ornaments are added to this garland to make it colorful and trendy. All you need is the Bowdabra bow maker, ribbon, and some Christmas embellishments.
For your Christmas decorations this garland gives an added touch of elegance to your home decor
All you need is:
YouTube Transcript
I picked this wreath up for 50¢ at a thrift store, and the wreath was perfect but it definitely needed some updating. So I took it apart and now we’re going to start by making a beautiful bow for the center. Obviously I have my Bowdabra and I’m going to show you how to make this bow.
I fold my Bowdabra bow wire in half. I have about 22 inches, and I’m going to lay that down into my Bowdabra, tuck the ends under so they stay out of my way. Now, for this bow I have this beautiful 2 ½-inch wired ribbon, and I have four yards. So this is going to be a pretty big bow.
So first, I put it in. Now this is the wrong side of my ribbon, so I’m going to loop it back and I’m going to twist it and put it right back down into the Bowdabra and I’m going to fold it, fold it back, twist it, and put it right down into my Bowdabra.
And I’m just going to keep going back and forth, fold/twist, and fold it, twist it. Let’s just kind of unroll this a little bit. And actually, I picked this ribbon up this week at Sam’s Club, so I was absolutely blown away by how beautiful it was and relatively inexpensive.
So I’m just going to fold this back, fold over, twist and again fold it. Make sure that the inside – so this is really how to make a bow the very, very easy way, and I’m just going to fold my last loop in there, take my Bowdabra wand, scrunch it down, take the wand out.
Then I have these two ribbons that I match, I think, with my ribbon, and I cut about 2 yards maybe. I think I measured it at about 54 inches. And all I’m going to do is keep the two together, twist them and then fold it back, and twist it.
And then probably making these about an inch and a half, but anybody who’s watched any of my other videos knows that I always say it’s a hand-tied bow so it shouldn’t be perfect. So I’m just going to keep going and folding back and forth.
And I love how the Bowdabra holds everything together, because it’s so difficult when you have two different ribbons to make them match up when you’re trying to do this by hand. I would never even like attempt – I don’t think – forget attempt it. I could not do this by hand. Which is why I love my Bowdabra because it helps me to make absolutely gorgeous bows that I could never, ever make by hand. And you make them pretty quickly.
This one takes a little bit longer because it is – there’s a lot of ribbon in this bow, and it’s a pretty big bow. I’m going to put this on my outside bow garland, but you can also use a bow like this as a tree topper because it makes an absolutely beautiful tree topper bow.
So now I’m just going to fold this back in here and I’m going to make my little loop in the center and just take my Bowdabra wand, scrunch it down. And now I’m going to take the ends of my Bowdabra bow wire and I –
Remember when I first put it in I folded it in half so now I have a slipknot. Pull it through my slipknot, hold it down. Pull it really, really tight. Separate the ends and pull it out of my Bowdabra so that now I’m not going to struggle with my bow, and I’m just going to pull it really tight.
I’m even going to twist the bow a little bit so I can pull it really tight. Bring it around to the back and tie it off, and knot it, just because that way it won’t come apart.
And I’m just – here I’m just going to fluff the bow. And one of the things about fluffing a bow to go on an – I mean this would make an absolutely beautiful bow for a gift. Someone would be very happy. They probably wouldn’t even care what was inside the package.
So here I’m doing – is just fluffing it. And I’m going to finish the fluff once I put it on my garland because when you fluff in air it never quite – you’re never going to quite get it right, but when it has something on the back – I’m just going to put this aside and when we put it on our garland we’ll finish off.
The second bow I’m going to make is – I’ve already made one and it’s this cute little bow, but I’m going to show you how I made it. Now I’m going to take another piece of Bowdabra bow wire and I’m going to fold it in half. Right. Now into my Bowdabra and just tuck it under.
Then I’m going to take my two ribbons that match the ribbon I just used and I’m going to twist and put that down into the Bowdabra. And I’m going to again, just twist and pull it and bring that back and do the same thing on the other side.
And this bow actually would make a really nice smaller bow for your Christmas tree or also for on top of a gift for Hanukkah, Christmas, Kwanza, whatever. Now I’m going to put my little ornament in the middle.
Alright. Lay that down in there, take my Bowdabra wand and just kind of scrunch everything together. Then I’m taking my Bowdabra bow wire. I’m going to again pull it through the slipknot. Pull it really tight while it’s still in the Bowdabra. Separate the ends. Bring it around to the back and just – whoops – tie it off.
And now I’m just going to shape my bow. Again, I’m going to shape this more once I put it onto my garland. I’m just throwing everything all over. But the Bowdabra’s durable, so you don’t have to worry about it. I’m just going to cut this piece of ribbon a little bit here. And there we go.
So now what I’m going to do is take my wreath, everything back over here and I’m going to take this bow and tie it onto my wreath. Whoops. And then I’m just going to bring the wire around. Now one of the things that I did do before we started filming was I shaped – I took the pieces of the wreath and I kind of separated them to make them a little bit more full.
And I’ll pull that around to the front and just going to fluff my bow. And like – as I said a little bit earlier, I think this bow maybe if – depending on the size of your tree, or you can make two of them, one for the front, one for the back, would make a very, very pretty tree topper bow.
Now I’m going to take my smaller bows and I’m just going to tie them – grab the wire here. I’m just going to bring this around to the back and flip it over and just tie it. I have no idea why I tied a bow there, but I guess I was in a bow mood.
So now I’m just going to separate the ends. And I really love this because it’s so easy to make. And every time I turn it over I scrunch my bow. So I am going to have to fluff everything out again. So I’ll take this here, just tie this little bow onto the end here and fluffing. And have an absolutely beautiful garland.


