Hi everyone, Steph here today sharing how to create a fall wreath with the Bowdabra.
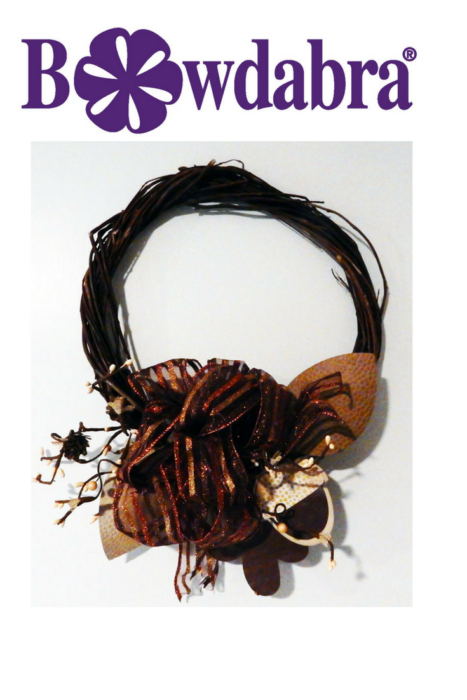
It’s easy to create your own personalized wreath using the Bowdabra. There are so many options available to you. Selecting a grapevine wreath, I created a glittery bow, added some die cut fall elements and assorted fall twigs.

Supplies:
Bowdabra
Gold Bowdabra Wire
3 inch wide ribbon
Grapevine Wreath
Die cut leaves and acorns
Fall Foliage
Scissors
Begin by placing the Gold Bow Wire in the Bowdabra. Fold the Bow Wire under the Bowdabra so it’s out of your way. Determine the size of the bow loops you want then start adding ribbon to the Bowdabra, twisting the ribbon on each turn.
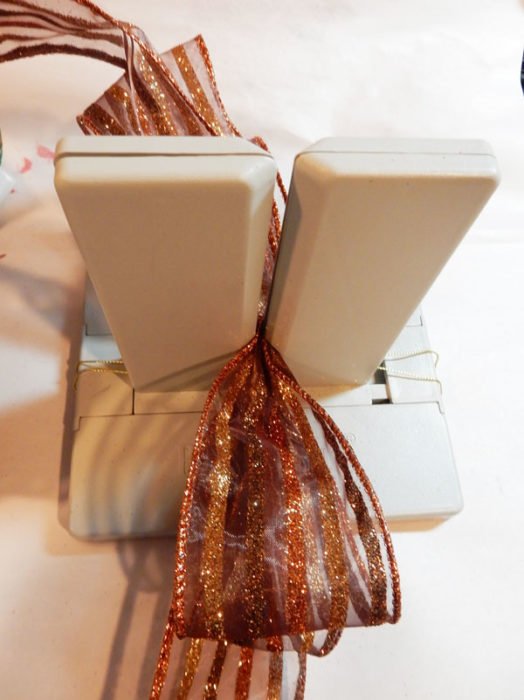

Continue adding ribbon until you have the number of desired loops. Once I had 8 loops, I pulled up on the Gold Bow Wire and pulled the bow out of the Bowdabra. I used the Gold Bow Wire to tie the bow.
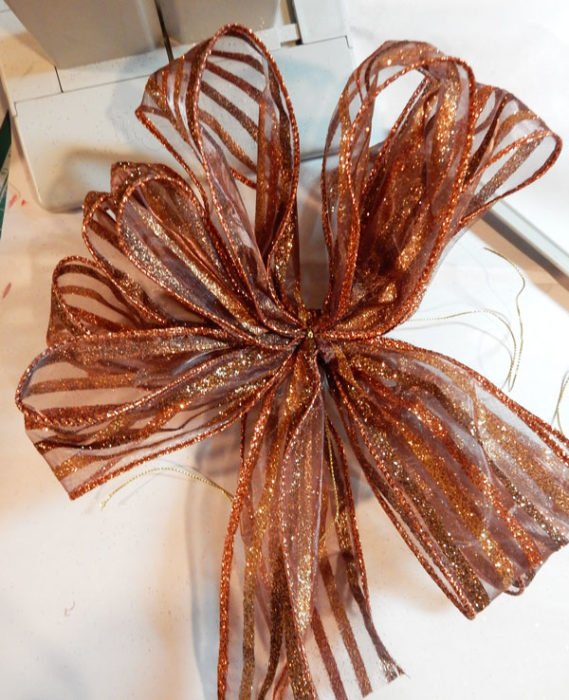

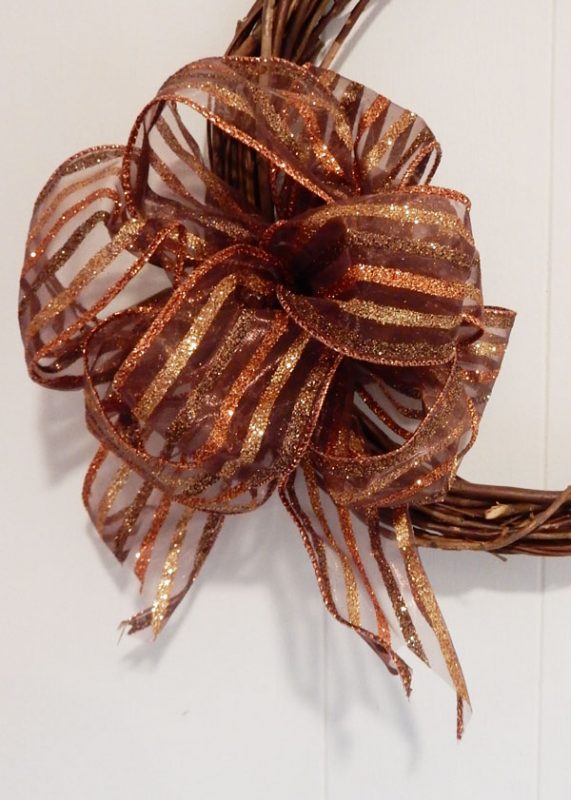
Next, I used the excess Gold Bow Wire to tie the bow to the wreath. Then I fluffed out the loops. Using wired ribbon allows you to manipulate your loops.

Die cut an assortment of leaves and acorns in a variety of sizes and colors. Emboss each item for additional dimension, then ink each piece and add to the wreath.


Finishing your Fall wreath
Finally, gather a selection of twigs and insert them around the bow to finish off the wreath.


The glittery bow really pops on the grapevine wreath.
Thanks for stopping by today.