Hey everyone, Steph here today to show you how to dress up a Valentine’s Day chipboard sign with the Bowdabra.


Supplies:
Bowdabra Bow Making and Design Tool
Bowdabra Gold Wire
Tulle
Ribbon
Tattered Angels Glimmer Mist
Beacon Adhesive
Chipboard Sign
Valentine’s Day chipboard sign
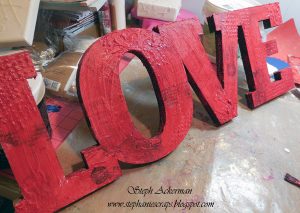

This large chipboard sign can be decorated in any number of ways. Think paint, stencils, molding paste, washi tape, stamps and more. Once dry, spritz with Tattered Angels Glimmer Mist for a little glimmer. Finally, don’t forget to add a bow created with the Bowdabra for the finishing touch.
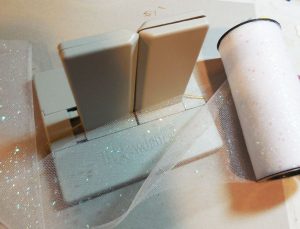

I used some glittery tulle to create my bow with the Bowdabra. First I cut bow wire about 18″ and placed it in the Bowdabra. I folded it underneath while I worked on my bow.
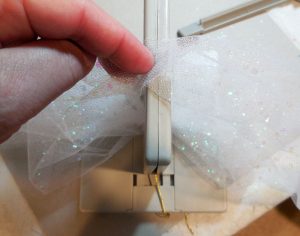

Due to it’s size, I scrunched the tulle before placing it in the Bowdabra. I continued until I had the number of loops I wanted.
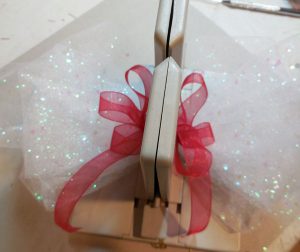

To add a little color to the glittery tulle, while the tulle is still in the Bowdabra, create a second bow using 1/2″ red ribbon. Use the wand to help push the ribbon in the Bowdabra while working.
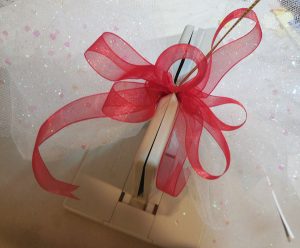

Pull up on the bow wire and tie off.
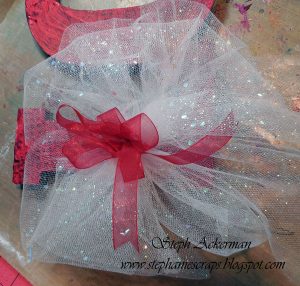

Once the chipboard sign is painted, stamped, inked, stencilled, etc., tie the glittery bow to the chipboard sign with the left over bow wire. Next, add a large brad to the center of the bow and glue in place.


Thanks for stopping by today. We hope you “love’ this adorable decor idea from Bowdabra as much as we do!
Steph