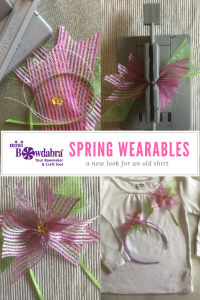

It’s easy to upcycle your child’s old shirt into a perky spring wearable. The addition of a flower bow adds new life to a tired shirt. A second bow for a matching headband completes a new spring look. We hope you enjoy this fun quick and easy tutorial from Bowdabra designer Carole Lassak!
Supplies for Flower Bow
- Mini Bowdabra
- 15″ of strong thread*
- 5″ length of 1½” wide sheer ribbon for the leaf*
- 12″ length of 1½” wide ribbon for the petals*
- 8″ length of 1/8″ wide satin ribbon for the stems*
- 1 triangle or pony bead for flower center*
- pin back
- headband
- shirt
- Hot glue gun and hot glue
*These supplies are for one flower bow. Multiply these lengths by the number of bows you will be making.
Instructions for Flower Bow
Begin by cutting the 12″ length of ribbon in three 4″ lengths. Dovetail the ends of each of these 4″ ribbons. Cut a straight angle on each end of the leaf ribbon and the stem ribbon.

If you are using wired ribbon, remove the wire so there is no danger of it poking the wearer.
Fold in 15″ length of strong thread in half, and place in the Mini Bowdabra. 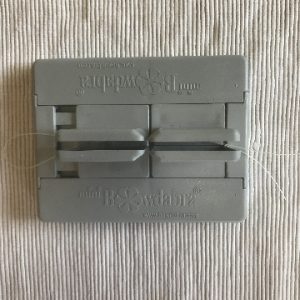
Now, begin layering the flower parts. Start with the 1/8″ ribbon stem, then the leaf, then the three petals. When you load the petals into the Mini Bowdabra form an X with two of them, and lay the third petal straight across.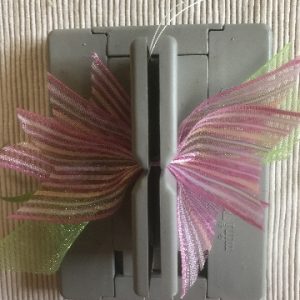
Press these layers firmly in place with the Mini Bowdabra wand.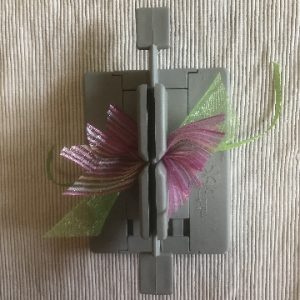
With the layers in place in the Mini Bowdabra, pass the ends of the thread through the loop and tighten. Bring the thread ends to the reverse side of the flower bow and tie tightly. 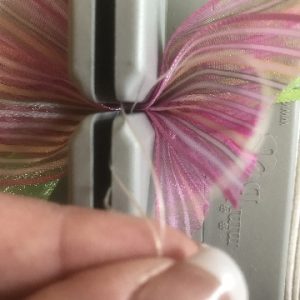
Bring the ends of the thread to the front of the flower bow—one thread from each side. Pass both end of the thread through the bead. Pull the thread ends in opposite directions to tighten the bead in place. Bring the threads to the back of the flower bow, and tie tightly. For the headband bow, leave the thread ends intact. For the shirt bow, trim the end of the thread close to the bow. Here’s the almost finished flower bow.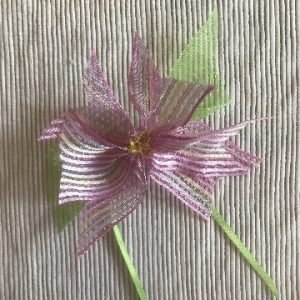
Finishing your flower bow
Next. using a hot glue gun adhere the pin back to the reverse side of the flower bow.
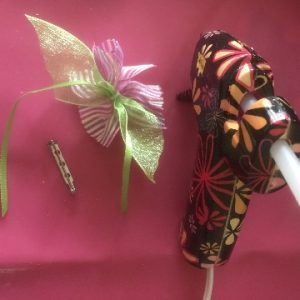 Preparing to Glue Pin Back |
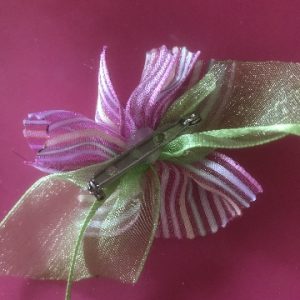 Pin Glued to Back of Bow |

Follow these same instructions to make a send flower bow to attach to a headband. Use the untrimmed thread ends to tie this flower bow onto the headband.
What a great way to upcycle and welcome spring by breathing life into an old shirt!!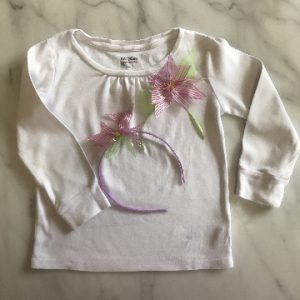
Stay in touch with me on Facebook, Create & Craft, and Pinterest.