You can make a sweet pet bow for your pet in no time! And they will be all dressed in their spring finery!


Your pet is special, so make them a bow—for a special occassion or “just because.” Every pet deserves their own bow, and with the Mini Bowdabra, they are oh-h-h so easy to make.
Supplies for Your Pet Bow
- Mini Bowdabra
- 15″ length of Bowdabra bow wire
- 12″ length of 3″ tulle
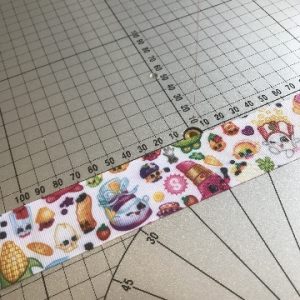
- 9″ length of 1½” grosgrain ribbon
- 12″ length of ½” satin ribbon
- 4″ length of ½” satin ribbon
- Proxxon Hotwire Cutter (optional)
Instructions for Your Pet Bow
- Use the Proxxon Hotwire Cutter to cut the ribbons to the appropriate lengths and seal the edges. Alternatively, use scissors to cut the ribbons, then quickly pass the cut end through a flame to seal the edges and prevent fraying and raveling.
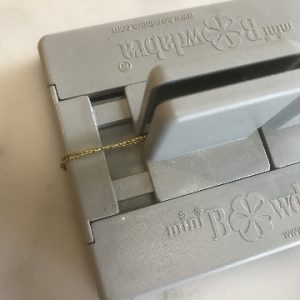
- Fold the bow wire in half, and place in the Mini Bowdabra. Tuck the ends under the Mini Bowdabra.
- Place the grosgrain ribbon, right side down, into the Mini Bowdabra.
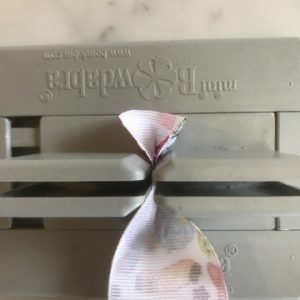
- Bring the opposite end of the grosgrain ribbon up and over the top of the Mini Bowdabra, and tuck it into the Mini Bowdabra. Adjust the ribbon to form two loops, and press the center into the Mini Bowdabra.
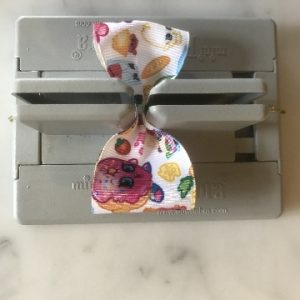
- With the narrow end of the tulle parallel to your work surface, scrunch it into the Mini Bowdabra.
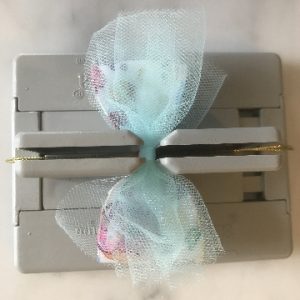
- Add the short length of satin ribbon to the Mini Bowdabra.
- Compress the layers of ribbon using the Mini Bowdabra wand.
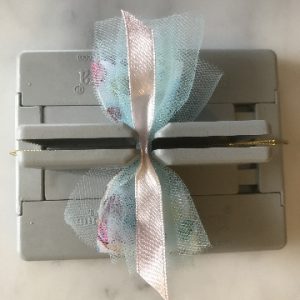
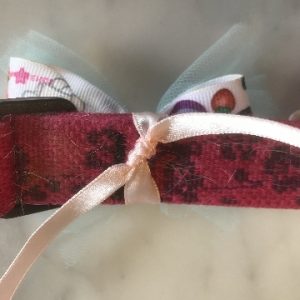
- Secure the bow wire by passing the ends through the loop, and tightening. Bring the wire ends to the back of the bow, tie a knot, and trim the ends.
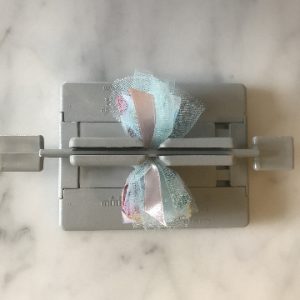
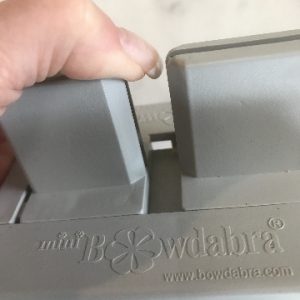
- Attach the long length of satin ribbon to your completed bow. This ribbon will be used to tie the bow to your pet’s collar. I use the Mini Bowdabra as a “third hand” to help with this process. Here you see I’ve opened the Mini Bowdabra.
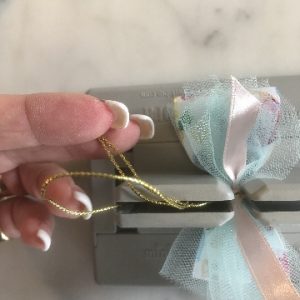
- Put the long length of satin ribbon and your pet bow into the Mini Bowdabra. Secure the ribbon to the bow with a knot tied on the back side of the bow.

- The final step is tying the bow to your pet’s collar. You can either leave the ribbon ends long, or trim them.

Here’s our precious Roxy wearing her new adornment.

Stay in touch with me on Facebook, Create & Craft, and Pinterest.