

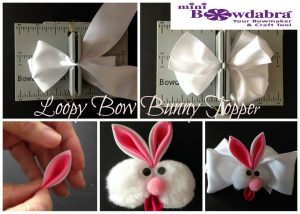
Want to learn how to dress up a plain Mini Bowdabra Loopy Bow for Easter? Here’s an easy to follow tutorial on making a Loopy Bow adorned with an adorable bunny topper.
Materials Needed:
Mini Bowdabra, Hair Bow Tool and Ruler, Bow Wire, Wand
1.5″ wide Satin Ribbon – white, pink, raspberry
Proxxon Hot Wire Cutter or lighter
Fabric glue or hot glue
Pom poms
Googly eyes
Scissors
Tweezers
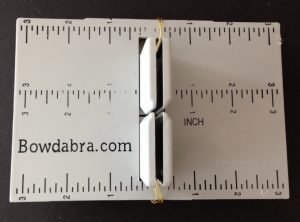
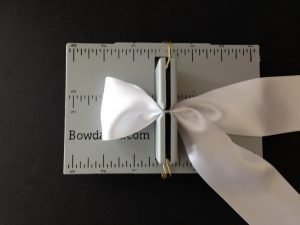
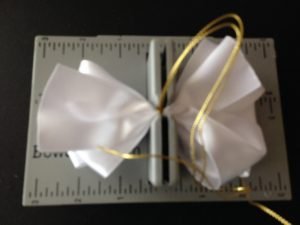
Begin by folding 18″ bow wire in half and placing it in the Mini Bowdabra, tucking ends under.
Fold a 36″ ribbon to find the center, creasing it and placing into the Mini Bowdabra.
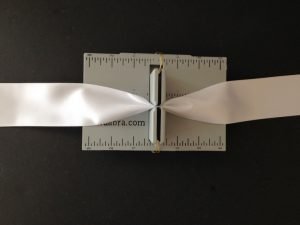
Using the tool ruler, make a 2″ loop on one side, creasing the ribbon down into the Mini Bowdabra.
Next, fold the other side ribbon making the loop the same width with the ribbon tails above the loops.
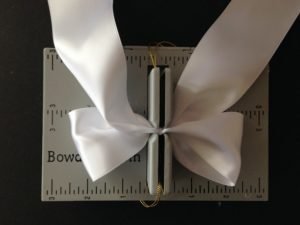
Continue making loops with the tails, one at a time, creasing down into the Mini Bowdabra.
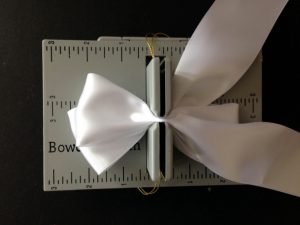
Once all the loops are made, scrunch down using the wand.
While the bow is still in, push the loose ends of the bow wire through the loop, pulling tightly while pulling the bow out. Wrap the wires to the back , tying in a knot.
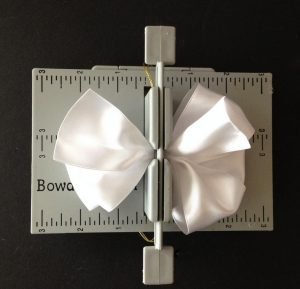
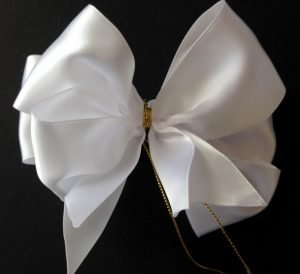
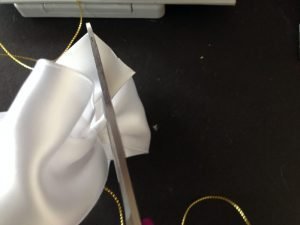
Dove tail the ends and fluff bow.
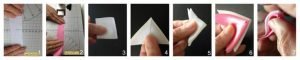
1. Cut and seal two 3 inch lengths of white 1.5″ wide ribbon using the Proxxon hot wire cutter. Or you can seal the ends with a lighter flame.
2. Repeat for the pink ribbon.
3. Fold the 3″ ribbon in half to find center.
4. Take the top ribbon edge and fold down to center (both sides) creating a triangle.
5. Fold triangle in half.
6. Repeat for the pink ribbon and place on top of the white ribbon triangle.
7. Bring the widest ends of both ribbon triangles together creating the bunny’s ears.

8. Grasp the tips of the ribbon together.
9. Cut off tips to even out, using the end of tweezers to hold in place.
10. Use fame of lighter to seal ends together. Take caution to prevent burns and use tweezers to hold until cool.
11. Turn ribbon around placing tweezers near longer edge, cutting about 1/4″ off.
12 Seal edges with flame.
13. Make sure all edges are sealed.
14. Make second one, matching sizeof the first. Glue the bottom tips of bunny ears together.

15. Cut 1.5″ of raspberry ribbon creating a square.
16. Fold ends together creating a triangle.
17. Take the longer ends and fold to center tip.
18. While holding in place, fold again to back, holding bottom tips.
19. Use tweezers to hold together, cut and seal tip with flame from lighter.
20. Shape to mimic tongue.
These ribbon folding pieces for the bunny’s ears and tonque are similar to Japanese fabric folding techniques called Kanzashi that are very popular using ribbon.

21. Glue two pom poms together at center.
22. Take the two ears (glued together at bottom)
23. Glue ears between the center top of pom poms.
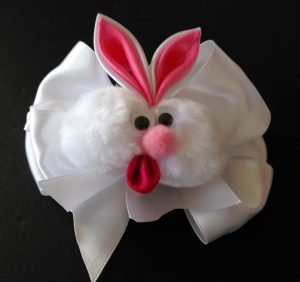
24-26. Glue on googly eyes, pom pom (nose) and tongue.
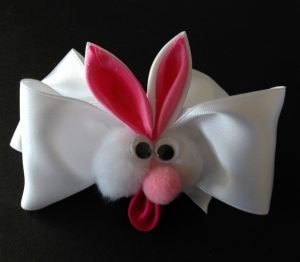
Glue bunny head to center of the Mini Bowdabra Loopy Bows for an adorable whimsy Easter look! Oh, and as an added bonus, you can tie these cuties to alligator clips, headbands and barrettes using the bow wire in the back! They’re so versatile!
Keep up with Bowdabra designer Gail at her blog, Purple Hues and Me, Facebook, G+, Pinterest and twitter!


8 thoughts on “How To Make An Amazing Loopy Bow Bunny Topper”