Hi everyone, Steph here to show you that creating beautiful greeting cards is easy with Bowdabra.


Supplies:
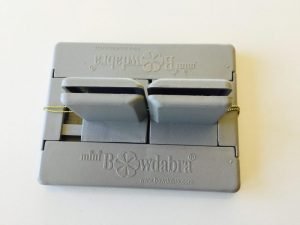
Bowdabra Bow Making and Design Tool
Bowdabra Gold Wire
1/2″ wide sheer ribbon
1″ mesh ribbon
JoyClair Stamps
Clearsnap Ink
Spellbinders dies
There is nothing prettier than greeting cards decorated with a bow. Creating beautiful cards is easy with Bowdabra.


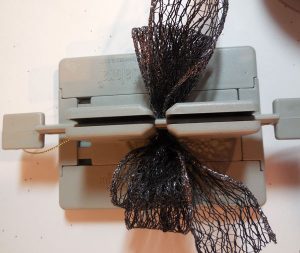
Begin by placing a folded 18″ length of Gold Bow Wire in the Bowdabra. Fold the wire underneath so it is out of your way while creating the bow.

Leaving a 2″ length of ribbon, place the ribbon in the channel. Fold over the ribbon, creating a 2″ loop on the left side. Twist the ribbon and place back in the channel and create another loop on the right side. Continue making loops until you have 2 on each side, twisting each time you place the ribbon in the channel.
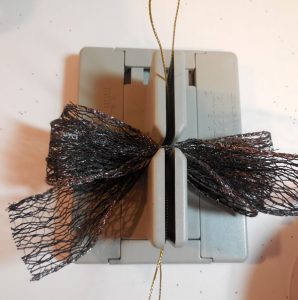

Use the Bow Wand to push the ribbon in the Bowdabra

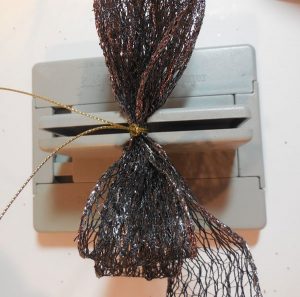
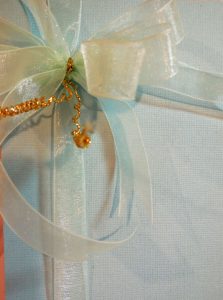
Next, pull up on the Bow Wire and remove the ribbon. Tie the bow tightly and wrap the wire to the back.

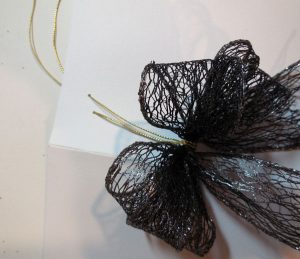
Punch 2 holes in the card and thread the bow wire through the holes. Tape the bow wire to the card and cut off the excess wire. Fluff up the bow.
Finishing your greeting cards

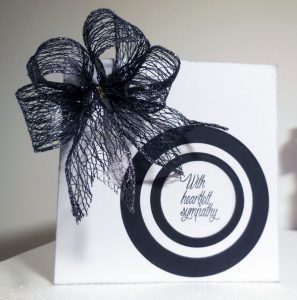
Stamp a sentiment, then die cut 4 black and white circles for the front of the card.
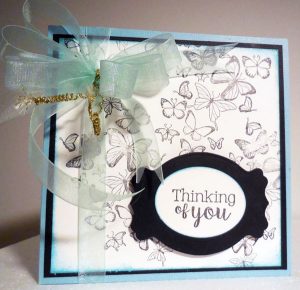
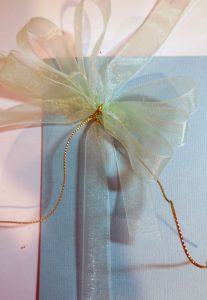
Repeat with the second ribbon. Since this ribbon was much lighter, I created 4 loops on each side. I wrapped a length of ribbon around the card, then used the bow wire to attach the bow to the ribbon.

Next, use a pick to create spirals from the left over bow wire, creating decorative elements for the card.

Finally, stamp butterflies on a panel of white and mat it with black cardstock. Add this panel to the card. Stamp and die cut a sentiment and adhere to the card.
Creating beautiful greeting cards is easy with Bowdabra. Why not make a few today!
Thanks for stopping by.