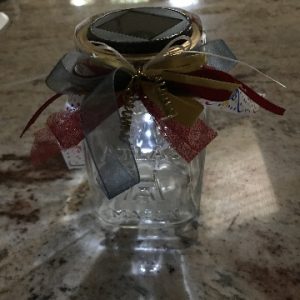
Make your next picnic extra special. Instead of a daytime picnic have a twilight picnic—and light it up with this solar powered picnic light. And, let’s dress up the light with a beautiful bow!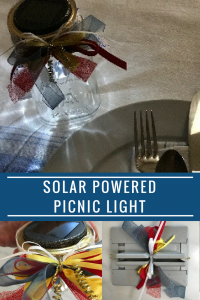

Supplies and Equipment for the Solar Picnic Light
- Bowdabra bow wire, 15″
- 15″ length ⅛” white satin ribbon
- 15″ length ¾” blue tulle ribbon
- Twelve inch length ⅛” yellow satin ribbon
- ¼” wide red grosgrain ribbon 12″ length
- 12″ length ½” red glitter tulle ribbon
- 8″ length ½” yellow satin ribbon
- 18″ length ½” patterned accent ribbon
- Mini Bowdabra
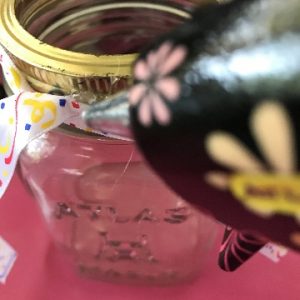
- 1 pint canning jar with brass ring
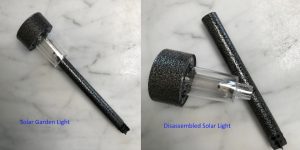
- 1 solar garden light
- Hot glue and glue gun
- Proxxon Thermocut (optional)
- Hot glue and glue gun
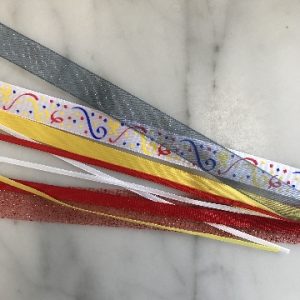
Ribbon Selection

Instruction for Making the Bow and Solar Picnic Light
Let’s start with the bow.
- Cut the ribbons to appropriate length using the Proxxon Thermocut. The Thermocut seals the ribbon to prevent fraying at the same time its hot wire cuts the ribbon. Alternatively, quickly pass the ribbon ends through a flames to seal the ends.

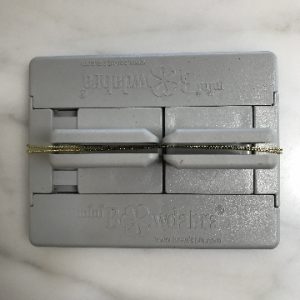
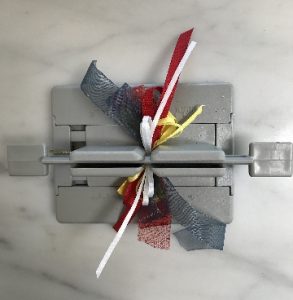
- Fold Bowdabra bow wire in half a place in the Mini Bowdabra. Tuck the ends under the Mini Bowdabra so they are out of the way.
- Set the patterned accent ribbon aside. Starting with the widest of the remaining ribbons begin making one and two loop bows. Note: This bow is a great way to use up scrap lengths of ribbon. Your lengths can be a little longer or shorter than the ones I’ve used.
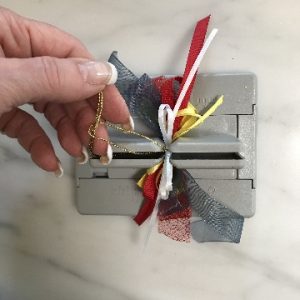
- Compress the ribbons in the Mini Bowdabra with the Bowdabra wand.
- With the bow still in the Mini Bowdabra, pass the ends of the bow wire through the loop, and tighten to secure the bow.
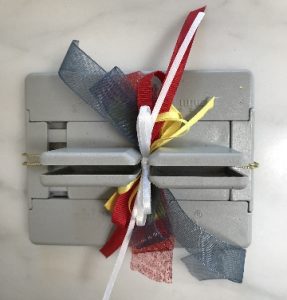
- Bring the wire end to the back of the bow and tie securely.
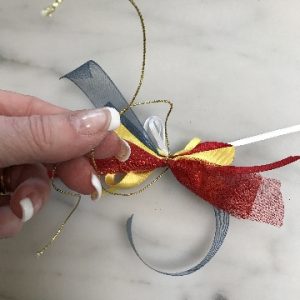
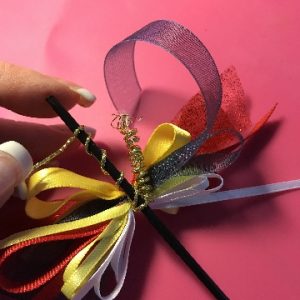
- Bring the wire ends to the front of the bow, and wrap them around a thin pencil or a skewer to coil them for an added accent.
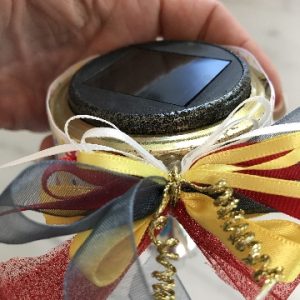
- Tack the patterned accent ribbon to the canning jar ring. Tie the accent ribbon with a loop. Hot glue the completed bow on top of the accent ribbon.
- Disassemble the solar light, and discard the stem and stake.
- Place the solar light into the brass ring on the canning jar to complete your solar powered picnic light.


SaveSave
SaveSave