

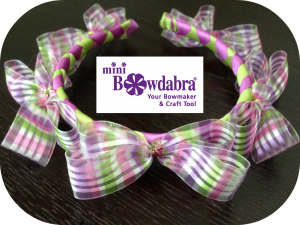
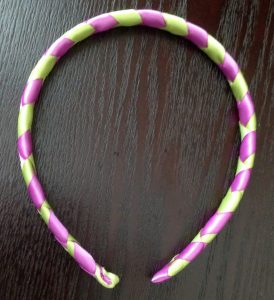
March is National Craft Month and creating crafts is always fun no matter what the occasion! It’s all about learning new crafts or perhaps revisiting a craft you use to love back in the day. Every month is craft month for me since I love creating and sharing crafts. Here’s a lovely crafty creation showing you how to make a woven ribbon headband with bows! So cute for just about any girl, and perfect for gift giving, too!
Materials:
Headband (narrow)
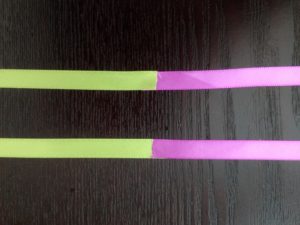
3/8″ ribbon – four 30 inch strips
Hot glue
Clamps
Flame to heat seal
Mini Bowdabra and measuring tool
Bowdabra bow wire
Bowadabra wand
Begin by heat sealing the ribbon ends. Next glue two ends together, overlapping.
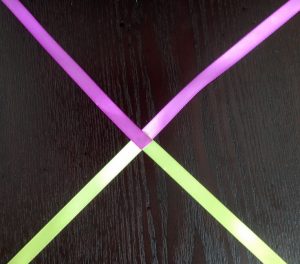
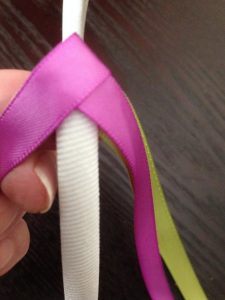
Then place ribbon on top in an X pattern and glue together in middle.
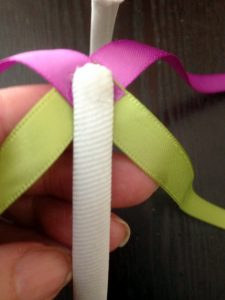
Attach at the X spot to inside end of the headband with hot glue.
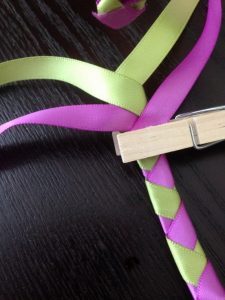
Next, wrap the top right ribbon (purple) down and across the headband, then wrap the top left ribbon down and across the ribbon to the right. You will have two ribbons on either side. Next, wrap the same purple ribbon you just crossed over to the back and around to the opposite side. Do the same for the other purple ribbon you just crossed – down and around the back to the opposite side.
Once the top ribbons are crossed and wrapped around the back to the opposite sides, take one lower ribbon (green) and cross over and hold in place. Then take the other green ribbon and cross over forming an inverted V. Take that last ribbon you just crossed, down around to the back on opposite side. Then take the other green ribbon down and around to the back to the opposite side.
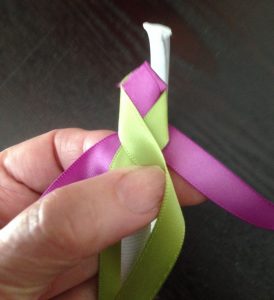
Be sure to straighten out the two ribbons on each side as you wrap.
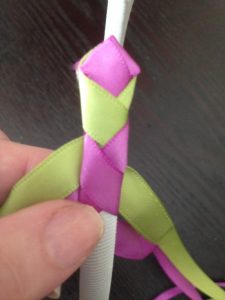
Continue wrapping the headband. Just remember to cross ribbon first to form a V, then take each around back to opposite side and smooth out.
Repeat steps around the headband. Use a clamp to hold the ribbon in place, if needed.

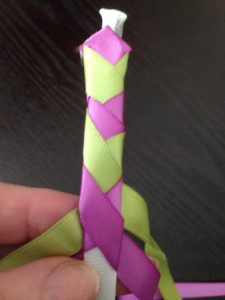
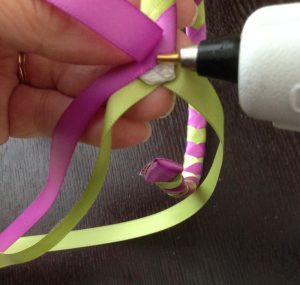
When you have covered and nearly reached the end of the ribbon headband, apply dabs of hot glue on the headband and seal the woven ribbon in place, wrapping as needed in the same formation, cutting off excess ribbon and then, heat sealing with a flame.
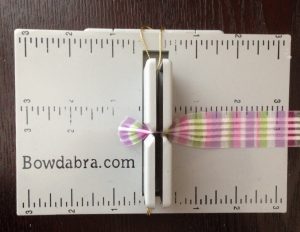
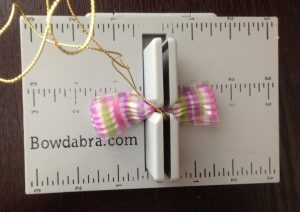
To make three-inch bows:
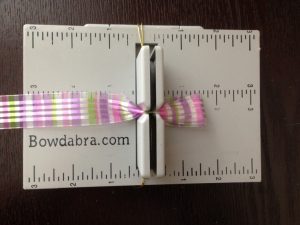
Cut an 18″ piece of Bowdabra bow wire and place in the Mini Bowdabra tucking ends under. Creasing the end of the ribbon, place into the Mini Bowdabra.
Make a loop at the 1 1/2″ mark on the measuring tool, folding and twisting the ribbon down into the Mini Bowdabra.
Next, fold and twist the other side at the same width.
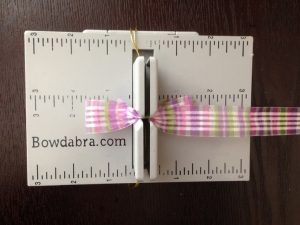
Then take the ribbon up and over the tower and crease the end down into the Mini Bowdabra.
Next, crease the center of the ribbon down into the Mini Bowdabra. Scrunch down with the Mini Bowdabra Wand.
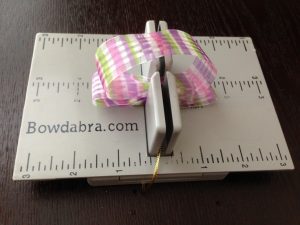
While the bow is still in the Mini Bowdabra, push the loose wire ends through the loop and tighten, taking the wire around to the back and tying in a knot.
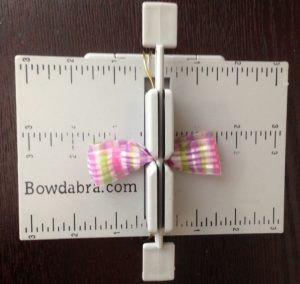
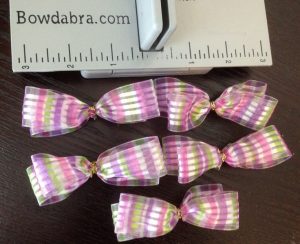
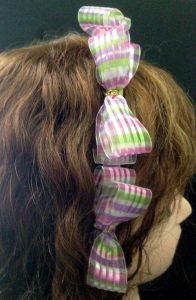
Fluff and straighten bow, then make four more bows to cover the headband.
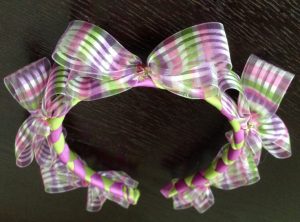
Hot glue one bow and center of headband . . .
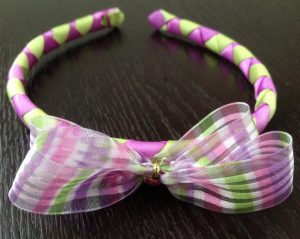
then glue on remaining four bows around the headband for an adorable look!
Visit Bowdabra Designer Gail at her blog Purple Hues and Me, Facebook, and Pinterest for more of her awesome craft tutorials! Come back often to Bowdabra blog for more craft tutorials and how-to videos.


