
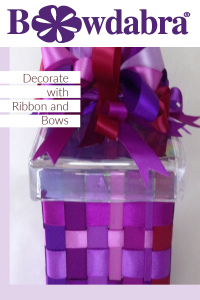
Thinking of a decorative way to dress up a plain glass box? Wouldn’t it look adorable to wrap it with ribbon and bows? Here’s how! It’s so easy and fun to decorate a glass box with Bowdabra!
Materials needed:
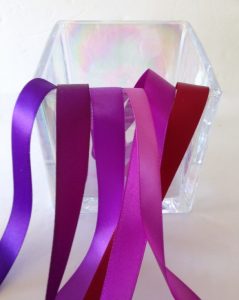
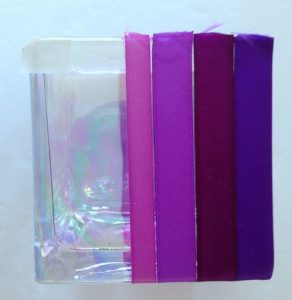
Assorted ribbon
Glue dots
Measuring tape and scissors
Lighter/toothpick
Mini Bowdabra, tool and ruler
Bowdabra bow wire
Bowdabra wand
Decorate a Glass Box with Bowdabra
Let’s begin :
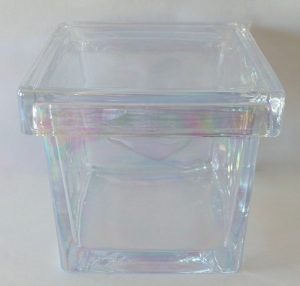
First, rub down the clean glass box – top and bottom with alcohol to remove any remaining dirt and oils.
Next, measure around the glass box from the top edge, down and around the bottom and back up to the top edge on the opposite side. This will be the amount of ribbon you need to cut for each strip. This happens to be 12 inches. Then layout how you want to arrange the ribbon – by colors and width.

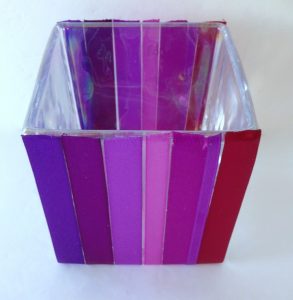
Next, place a glue dot at the top edge and place the end of the ribbon on top and wrap it around the glass. Place another glue dot on the opposite edge and press ribbon down.

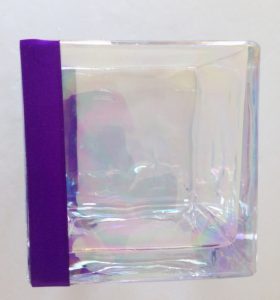

Continue adding ribbon strips
Continue adding glue dots to the top edges and wrapping ribbon strips around the glass box, making sure not to overlap ribbon.
Use a lighter to seal the ends and remove any ribbon frays.

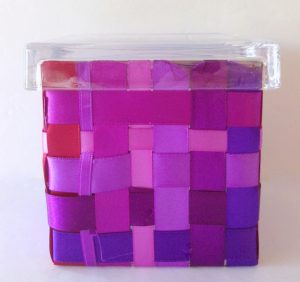
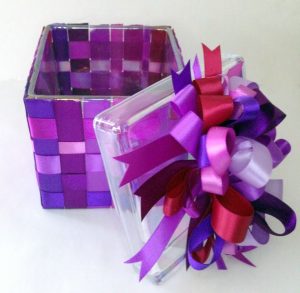
Once the sides are done, turn the glass box upside down and begin weaving the ribbon in the same color and size order by going over and under the ribbon strips. Use a toothpick to help weave the ribbons under and over. Weave the bottom first and then the sides, adjusting the lengths to fit and end on the edge.

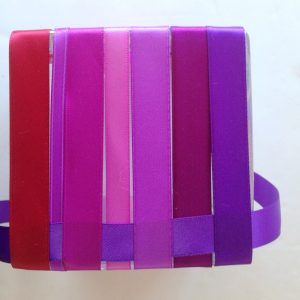
Secure the meeting ribbon ends with glue dots and hide the ends under a ribbon strip so it will look seamless.


To make the Bowdabra bow for the top:

Fold 18″ inches of Bowdabra bow wire together and place in the Mini Bowdabra, tucking ends under. Then, cut 8 inch pieces of matching ribbon for the tails, creasing the center and placing down into the Mini Bowdabra.
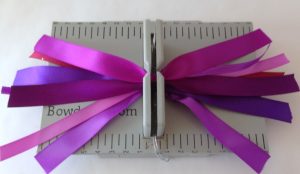
Next, take matching ribbon and fold it at the two inch mark, making a loop and press into the Mini Bowdabra.

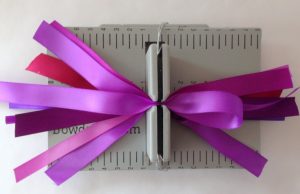
Continue making 2″ loops for a total of four – two on each side. Cut off excess ribbon close to bow center. Insert matching ribbons, making four loops for each color, scrunching down the ribbon with the Mini Bowdabra wand.

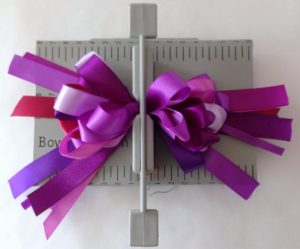
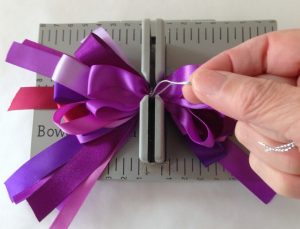
While the bows are still in the Mini Bowdabra, push the ends of the bow wire through the loop, pulling tightly while gently pulling the bows out of the Mini Bowdabra, tying the bow wire around the back into a double knot. Cut off excess wire.

Fluff and arrange the loops of the bow. Glue the bow to the top using glue dots.
Next dovetail the ends of the ribbon and then heat set with lighter.

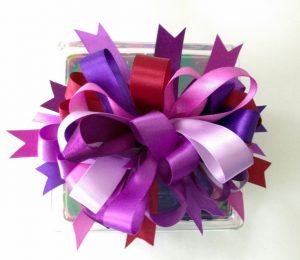
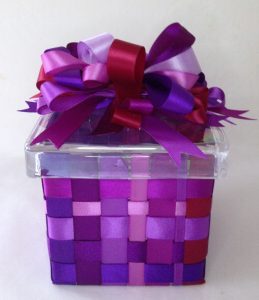
What an adorable look!


Wouldn’t it be great to decorate a glass box and fill it with a sweet little treats to give to someone special for Valentine’s Day or Easter?