

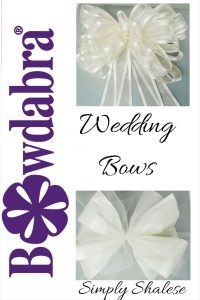
4Gorgeous and Elegant Decorative Wedding BowHey everyone! I’m Simply Shalese, here to make something awesome with you guys! Today we will be making a gorgeous and elegant decorative wedding bow using the Bowdabra bow maker. Let’s get started!
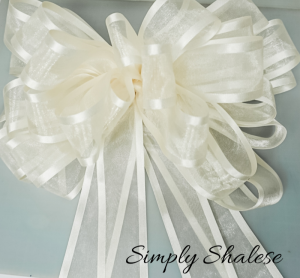
2 ½ in wide cream ribbon – 30 inches long (2 pieces)
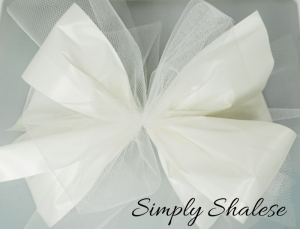
Roll of white tulle – 30 inches long (2 pieces)
Scissors
The first thing I do is fold my bow wire in half and place it in the center of the Bowdabra. I usually use about 14 inches or so. You can use more or less, just make sure you have enough to easily tie it at the end.
Take your first 30 inch long piece of thick ribbon and fold it in half to find the center. Unfold the ribbon and find the crease. Scrunch your ribbon right at the crease. I prefer the uniform scrunch – fold the ribbon in half, and bring the front and the back up. Then place the ribbon down in the center of the bowdabra. Next, take one side, estimate the loop and scrunch it in place. Repeat this step with the other side of the ribbon. Use your wand to scrunch the ribbon in place.
Repeat this step with one of the pieces of tulle. When repeating this step, I prefer to place the loop over the tail and the tail over the loop. I don’t like to place a loop over a loop or a tail over a tail.
You are then going to repeat these steps for the other two pieces. If you chose, you can use more pieces of ribbon or just stick with the two pieces. It’s completely up to you. You also have the option of increasing the length of the ribbon to make a larger bow or decreasing the length to make a shorter bow.
Give your bow one last scrunch and while the wand is in place you can adjust the bow as much as you’d like. Then remove the wand and bring the bow wire together. Bring the two open ends inside the looped end. While one hand is holding the bow in place, use the other hand to pull the bow wire taut. Then carefully remove the bow. Tie the bow wire in several knots.
You can leave the bow wire in place if you want to use the wire to help tie the bow to something. This bow is so versatile and can be used for a wedding in multiple ways! Adjust the color and style to fit your theme!
Bowdabra Bow Maker
1 1/8 in wide ribbon
Bow Wire
Scissors
The first thing I do is fold my bow wire in half and place it in the center of the Bowdabra. I usually use about 14 inches or so. You can use more or less, just make sure you have enough to easily tie it at the end.
I cut two pieces of ribbon, each one 10 inches long. Fold the ribbon in half and place scrunch the ribbon. To scrunch, fold the ribbon in half and bring the front and the back up. Then place it down in the center of your bowdabra. Use your wand and scrunch the ribbon in place.
Leave your ribbon on the roll and take the loose end. Scrunch the end and place it down on the bowdabra. Make a loop and scrunch the ribbon in place again. Repeat this step for as many times as you’d like. My first loops are larger and as I add more loops, I’m going to make the loops smaller. The amount of loops you make is completely up to you. You can use a measuring device to help measure the loops but I prefer to just estimate the size.
Give your bow one last scrunch and while the wand is in place you can adjust the bow as much as you’d like. Then remove the wand and bring the bow wire together. Bring the two open ends inside the looped end. While one hand is holding the bow in place, use the other hand to pull the bow wire taut. Then carefully remove the bow. Tie the bow wire in several knots.
Pull your loops and adjust them to make the bow rounder. I did not use wire edged ribbon but if you do chose to use wire edged ribbon, you will be able to maneuver the ribbon more.
For the tails, you can ribbon cut the ends, but I chose to leave mine squared off. You can add as many or as few tails as you’d like. Or you can leave the tails off all together. It’s completely up to you.

Thanks for joining me! Be sure to check out and subscribe to my YouTube channel, Simply Shalese, for more awesome videos! Also, follow me on Instagram at SimplyShalese_diy! And check out Bowdabra Blog for more awesome videos!
How to make elegant wedding decor your guests will love


