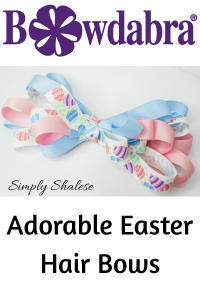
Hey everyone, I’m Simply Shalese, here to make something awesome with you guys! Today we will be making adorable Easter hair bows. Let’s get started!
5/8 inch width ribbon – 3 different colored rolls
Scissors
Hot Glue Gun
Hair Clip
The first thing I do is fold the bow wire in half and place it in the center of the Bowdabra. I like to use about 8-9 inches of bow wire.
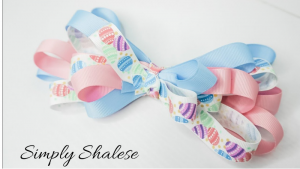
Take your first roll of ribbon, I decided to go with blue. Scrunch the end. I use a uniform scrunch by folding the ribbon in half, bring the front and back up and place it down in the center of the Bowdabra. Make a loop and scrunch the ribbon again. Repeat this step for 4 loops.
Repeat the same steps with the pink ribbon. I chose to make four loops with each color but you make more loops if you chose to do so. After making the loops, be sure to keep the ribbon on the roll for now.
Be sure to use your wand to scrunch everything together. And this is also a good time to maneuver your ribbon if necessary
Repeat the same step with the printed ribbon. Since the ribbon is only printed on one side, start with the wrong side facing up when you scrunch your ribbon. After you make a loop, scrunch the ribbon and twist it before placing it down on the Bowdabra. If you are using a ribbon that is printed on both sides, then you do not have to twist the ribbon with each scrunch.
Next, go back to your first ribbon and make more loops. Repeat these steps with all 3 rolls of ribbon until you have the desired amount of loops.
I decided to make my loops smaller which gave the bow more of a cascading effect.
Once you’ve added your loops, give it one final scrunch. Then take the bow wire, the two open ends inside of the loop. Hold the bow in place and give it a nice tug. Then remove it from the Bowdabra. Tie it in a know a few more times just to make sure it’s nice and secure.
Take about a 4 or 5-inch long piece of your printed ribbon and tie it in a simple knot. Place the knot in the center of the hair bow. You can tie it together at the back of the bow or hot glue it in place. Cut away any excess ribbon.
Take your 3/8 inch long piece and hot glue it to the incline of the hair clip. Bring the ribbon around and glue it down to the back of the clip. Lastly, glue the end of the ribbon to the inside of the clip.
Place hot glue along the back of the hair clip and place it firmly to the back of the hair bow. Be sure that the entire clip is pressed against the hair bow.
Once you’re added the clip, you can manipulate the bow as much as you’d like, making any necessary final adjustments. And you are all done!
7/8 inch width printed ribbon – 12 inches long ( 3 pieces)
5/8 inch width white ribbon – 22 inches long
5/8 inch width lavender ribbon – 22 inches long
3/8 inch width ribbon – 4 inches long
Scissors
Hot Glue Gun
Hair Clip
The first thing I do is fold the bow wire in half and place it in the center of the Bowdabra. I like to use about 8-9 inches of bow wire.
Start with your printed ribbon, the wrong side facing up, and scrunch your ribbon. Use a uniform scrunch, for the ribbon in half, bring the front and the back up and place it down. Make a loop and scrunch the other side. Then estimate the center and scrunch once more.
Repeat these steps with the other two pieces. And use your wand to scrunch the pieces together.
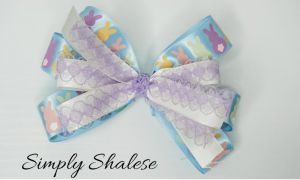
Next, take your white and lavender ribbon and layer them one on top of the other. I placed the lace ribbon on the bottom and the white ribbon on top of it. Scrunch these two pieces together in the center. Then make a small loop. Scrunch the ribbon and twist it in place.
Repeat this step to make four loops. Once your loops are in place, you are going to make the tails. You don’t have to twist the ribbon when making the tails. I chose to go with four loops and two tails but adjust it as necessary.
Once you’ve added your loops, give it one final scrunch. Then take the bow wire, the two open ends inside of the loop. Hold the bow in place and give it a nice tug. Then remove it from the Bowdabra. Tie it in a know a few more times just to make sure it’s nice and secure.
Take about a 4 or 5-inch long piece of your lavender ribbon and tie it in a simple knot. Place the knot in the center of the bow. You can tie it together at the back of the hair bow or hot glue it in place. Cut away any excess ribbon.
Take your 3/8 inch long piece and hot glue it to the incline of the hair clip. Bring the ribbon around and glue it down to the back of the clip. Lastly, glue the end of the ribbon to the inside of the clip.
Place hot glue along the back of the hair clip and place it firmly to the back of the hair bow. Be sure that the entire clip is pressed against the hair bow.
Once you’re added the clip, you can manipulate the bow as much as you’d like, making any necessary final adjustments. And you are all done!
Thanks for joining me. Be sure to check out and subscribe to my youtube channel, Simply Shalese, for more awesome videos. Also, follow me on Instagram at SimplyShalese_diy And check out Bowdabra blog as well!