

Hey everyone, I’m Simply Shalese, here to make something awesome with you guys! Today we will be making an adorable Christmas centerpiece. Let’s get started!
5/8 inch width white ribbon
1 1/8 width gold sheer ribbon
Scissors
The first thing I do is fold the bow wire in half and place it in the center of the Bowdabra. I like to use about 8-9 inches of bow wire.
Take a 10-inch long piece of sheer gold ribbon. Fold it in half to find the center. With the right side facing up, scrunch the ribbon in the center. To use a uniform scrunch, fold in half, bring the front and back up and place it down. Repeat this step with another 10-inch long piece.
Take your gold sheer ribbon and with the wrong side facing up, scrunch the end of the ribbon and place it down. Make a loop. You can use the measuring tool on the Bowdabra to help measure your loops in your bow. Once you make your loop, scrunch the ribbon and give the bow a twist before placing it on the Bowdabra.
The reason I twist the ribbon before placing it down is that the ribbon has a right and wrong side. So I want to make sure I keep the right side facing upwards at all times.
Use your wand to scrunch everything together. Repeat this step with one more loop. Then start with your white ribbon. Repeat the same steps you performed with the gold sheer ribbon. After making two loops with the white ribbon, go back to the gold ribbon. Repeat this step until you have used all of your gold and white ribbon. You can make as many loops as you’d like.
I made the loops in different sizes because I thought that would look more fun and whimsical. But if you prefer to keep the loops the same size, you can definitely do that.
Give your bow one final scrunch. Then take the bow wire, the two open ends inside of the loop. Hold the bow in place and give it a nice tug. Then remove it from the Bowdabra. Tie it in a knot a few more times just to make sure it’s nice and secure. Do not cut away the excess bow wire. This will be used to attach the bow to the centerpiece.
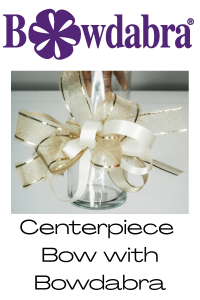
Since you have a decent amount of bow wire still in place, you can use it to attach to your centerpiece. This bow is so versatile. You can also attach it to a candle, jar, door, tree, fireplace, whatever you’d like. Just have fun with it and make it your own.
Below is the video of the Christmas centerpiece I attached this bow to. Check it out and make one of your own!

Thanks for joining me. Be sure to check out and subscribe to my youtube channel, Simply Shalese DIY, for more awesome videos. Also, follow me on Instagram, Pinterest and Facebook! And check out Bowdabra blog as well!


4 thoughts on “Get ahead of the Christmas rush and make an amazing centerpiece”