

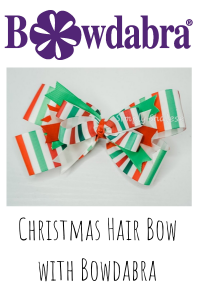
Hey everyone, I’m Simply Shalese, here to make something awesome with you guys! Today we will be making an adorable Christmas Hair Bow. Let’s get started!
Stripped Ribbon from LaRibbons – 1/2 inches in width – 16 inches long (2 pieces)
Stripped Ribbon from LaRibbons – 5/8 inches in width – 9 inches long (2 pieces)
5/8 inches in width – 5 inches long – 2 of each color (red, white and green)
3/8 inches width ribbon -4 inches long (2 pieces)
Hair clip
Scissors
Hot glue gun
The first thing I do is fold the bow wire in half and place it in the center of the bowdabra. I like to use about 8-9 inches of bow wire.
Take the 1.5 inch wide ribbon, scrunch it at the end. I prefer a uniform scrunch, fold in half, bring the front and the back up and place it down. Make sure you start with the wrong side of the ribbon facing up. Make a loop and repeat the same steps with the other end of the ribbon. Estimate the center and scrunch one more time. Use your wand to scrunch everything together.
Repeat these steps with the second piece of 1.5 inch wide ribbon.
Take you 3/8 inch wide ribbon. You do have the option of ribbon cutting the end. Do this by folding the ribbon in half, open ends at the bottom, fold at the top and cut at a diagonal. Repeat this step for all 6 pieces.
Next, estimate the center or fold the ribbon in half to find the center, and scrunch the ribbon in place. As you add the pieces, criss cross the ribbon so that all pieces are visible. Scrunch everything together.
Take your 5/8 inch width stripped ribbon and repeat the same steps as you completed with the 1.5 inch width ribbon.
Scrunch everything together. Make any necessary adjustments.
Give your bow one final scrunch. Then take the bow wire, the two open ends inside of the loop. Hold the bow in place and give it a nice tug. Then remove it from the Bowdabra. Tie it in a knot a few more times just to make sure it’s nice and secure. Then cut away the excess bow wire.
Take your 4 inch long piece of your red ribbon and tie it in a simple knot. Place the knot in the center of the bow. You can tie it together at the back of the bow or hot glue it in place. Cut away any excess ribbon.
Take your 3/8 inch long piece of red ribbon and hot glue it to the incline of the hair clip. Bring the ribbon around and glue it down to the back of the clip. Lastly, glue the end of the ribbon to the inside of the clip.
Place hot glue along the back of the hair clip and place it firmly to the back of the hair bow. Be sure that the entire clip is pressed against the hair bow.
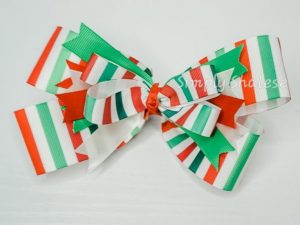
And you are all done. Cute, simple, sweet and easy to make. Modify the colors, style to fix your needs.

Thanks for joining me. Be sure to check out and subscribe to my youtube channel, Simply Shalese DIY, for more awesome videos. Also, follow me on Instagram, Pinterest and Facebook! And check out Bowdabra blog as well!


2 thoughts on “Christmas Hair Bow with Bowdabra, Super easy How-to video”