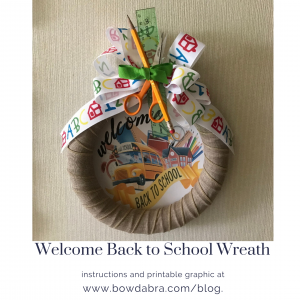
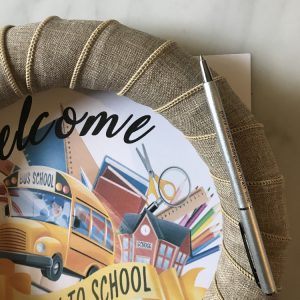
This Welcome Back to School wreath is a great way to greet children heading back to school—for either in-person or remote learning.

These are the supplies you’ll need: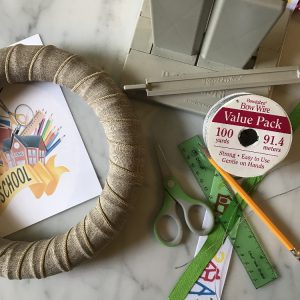

- 10″ floral foam ring
- 4-5 yards 1½” natural ribbon
- 15″ length 1½” patterned grosgrain ribbon
- 60″ length 1½” patterned grosgrain ribbon
- 15″ length 5/8″ solid colored grosgrain ribbon
- 21″ length Bowdabra bow wire
- 18″ length Bowdabra bow wire
- Ruler, pencil, and scissors for embellishment
- Welcome Back to School graphic
- Glue dots
- 8 to 10 straight pins
Note: This great back-to-school themed grosgrain ribbon is from LaRibbons.
Let’s get started making the Welcome Back to School Wreath:
- Wrap the floral foam ring with the neutral ribbon.
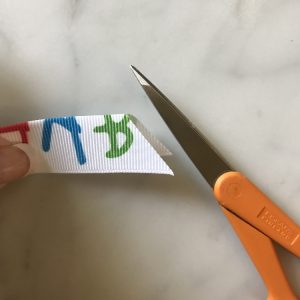
- Dovetail the ends of the 15″ length of patterned ribbon. Fold the ribbon in half, and cut the ends at an angle. Quickly pass the ends of all the ribbons through a flame to seal the ends.
- Print the graphic and set aside.
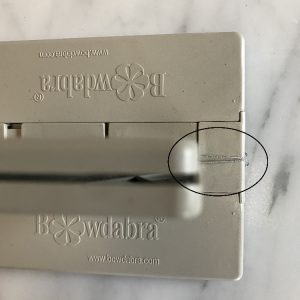
- Next, fold the 21″ length bow wire in half and put it in the Bowdabra. Tuck the ends of the wire under the Bowdabra to keep them out of the way.
- Center the 15″ length of patterned ribbon in the Bowdabra.
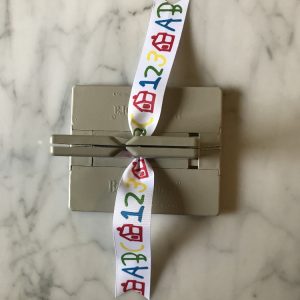
- Lay one end of the 60″ length of patterned ribbon in the Bowdabra with the wrong side facing up.
- Make a fold-and-twist bow with the entire 60″ length.
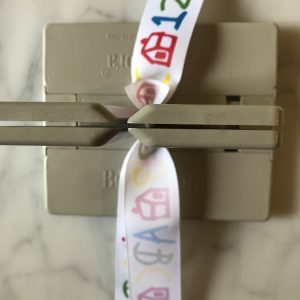
- Compress the ribbons in the Bowdabra with the wand.
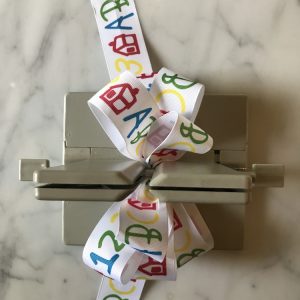
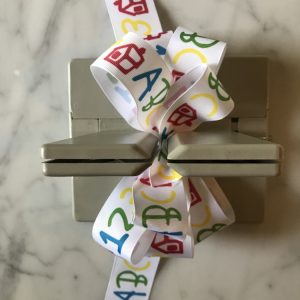
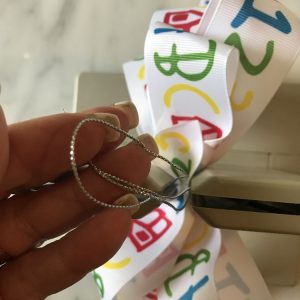
- With the ribbons still in the Bowdabra, pass the wire ends through the loop and tighten. Tie a knot on the reverse side. Leave the wire ends uncut.
Make the embellishment
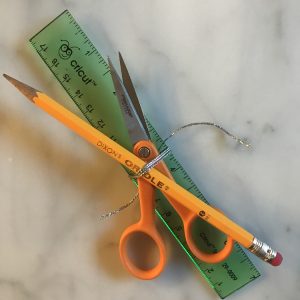
- Next, we’ll make the embellishment. Stack the ruler, scissors, and pencil, using glue dots to hold them together. Then, bundle them with the 18″ length of bow wire. Leave the wire ends uncut.
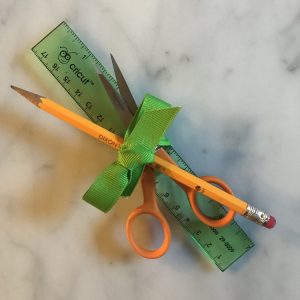
- Use the 15″ length of solid colored ribbon, and tie a bow around the bundle.
- Use the wire ends from the embellishment bundle to attach it to the bow. Cut the wire ends from the embellishment bundle, taking care not to cut the wire ends from the bow. Fluff the bow and arrange the individual loops.
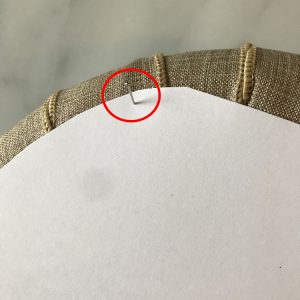
- Lay the ring on top of the printed graphic and mark where you need to cut away excess. Trim the graphic.
- Lay the trimmed graphic face down on the back of the floral ring, and secure in place with straight pins.
- Use the wire ends from the bow to tie the bow in place on the wreath.