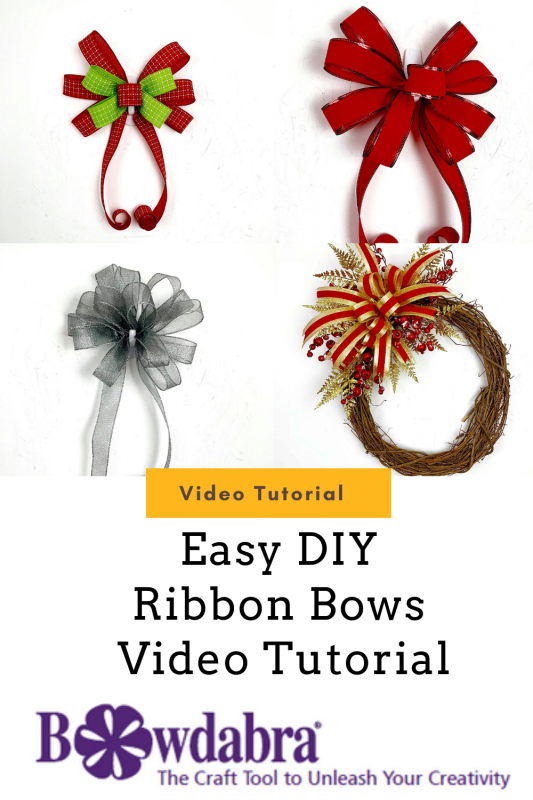
In this episode of Bowdabra Live, watch Nick from Nick’s Seasonal Décor show us how to make a beautiful Christmas wreath. He also creates a variety of traditional and funky bows. You will be the star of the season, right from Fall to Christmas.
Materials required:
• 100 yard Gold Bowdabra bow wire
• 2 ½” single-sided copper-rust orange colored glittery ribbon with a designer trellis pattern
1. Nick begins by snipping a longer length of the bow wire than he thinks he needs for ease of use, folds it into half before tucking it into, and then underneath the Bowdabra.
2. He takes the trellis patterned ribbon roll and cuts a tail length, then folds the ends to cut out a dovetailed pattern in them that helps in creating a professional-looking bow.
3. He scrunches the tail into the Bowdabra so that there is an equal half on each side.
4. Then, Nick takes the roll again and inserts it, with the pattern facing down, into the Bowdabra with an inch overhang on one side. He uses the pinch-and-turn method. He tucks the ribbon into the Bowdabra to create 3 loops on each side.
5. After that, he adds another 2 loops that are smaller by about half an inch than the previous ones, and a final tiny ‘button’ loop, as Nick calls it.
6. He compresses the bow down lightly with his pair of scissors. You can use the Bowdabra wand if you like.
7. He then pulls the bow wire from one end to the other, ties the bow, takes it out of the Bowdabra, and secures it with 2-3 knots before fluffing up the loops to make it look good.
Materials required:
• 100 yard Gold Bowdabra bow wire
• 1 ½” sheer grey shimmery ribbon
• Single-sided lime green and white pin-stripe ribbon
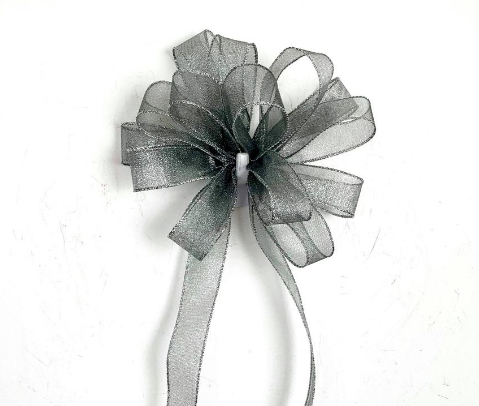
Traditional Grey Christmas Bow
1. Nick snips up a length of the gold bow wire, folds into half before tucking it into the Bowdabra and ultimately beneath it.
2. For the tail, he cuts an extra long length of the ribbon and folds it into half to create a dovetail pattern on the ends, before tucking it into the Bowdabra as well.
3. To fashion the first loop, Nick takes the grey ribbon roll, inserts it in the pinch-and-turn fashion into the Bowdabra and goes on to create as many loops as he can to make a full traditional bow.
4. Then he pulls the bow wire from one end to the other and ties the bow, before pulling it out of the Bowdabra and securing it with additional knots behind.
5. Finally, he fluffs up all the loops in all directions for bringing a professional finishing touch to the bow.
Materials required:
• 100 yard Gold Bowdabra bow wire
• Double-sided golden glittery ribbon with a thick red line running down the middle
• Pretty ornaments like decorative red berries, gold leaves, etc.
• Pine wreath
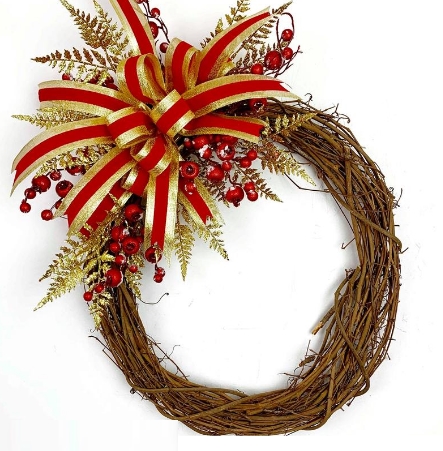
Ornate Traditional Red and Gold Christmas Wreath with Berries
1. Nick begins by snipping up a long length of the gold bow wire, folds it into half before tucking it into and then underneath the Bowdabra.
2. He also cuts up an extra long portion of the beautiful glittery ribbon roll to fashion one large loop that he scrunches into the Bowdabra – so there’s a loop on one side and a tail on the other.
3. Alternatively, he scrunches the ribbon by the pinch-and-turn method into the Bowdabra. He creates a single loop on one side and a tail on the other before snipping it out of the ribbon roll. Then, he goes on to create several such bows in the Bowdabra by either of the two methods.
4. Nick decides to also create a small traditional looped bow after the individual bows to raise the style quotient of the wreath.
5. Next, he pulls the bow wire from one end to the other and ties the bow. He secures the bow with 2-3 knots in the back and cuts out the dovetail pattern on the ends. Finally, he fluffs up the loops to complete the look.
6. In the end, he brings out a great pine wreath and ties the bow to it, and also uses hot glue for better fastening.
7. Finally, Nick gets the berries, cuts the sprigs for size and sticks them with hot glue on to the wreath, and follows the same pattern with the golden glittery leaves to end up with a pretty wreath.
Materials required:
• 100 yard Gold Bowdabra bow wire
• Large Bowdabra
• Single-sided red color chequered shimmery ribbon
• Single-sided lime green color chequered, shimmery ribbon
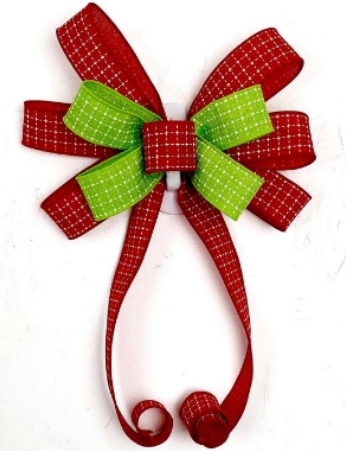
A Two-Layered Christmas Bow
1. Nick begins by snipping up a medium-sized length of the gold bow wire, folds it into half before tucking it into and then underneath the Bowdabra.
2. For the tail, he cuts an extra long length of the red ribbon and folds it into half to create a dovetail pattern on the ends, before tucking it into the Bowdabra.
3. Then, Nick takes the red ribbon roll again and inserts it pattern-down into the Bowdabra. He makes sure to leave an inch overhang on one side. Then, he uses the pinch-and-turn method and tucks the ribbon into the Bowdabra to create 3 loops on each side of this two-layered bow.
4. He follows it up with three smaller loops of the lime green ribbon and returns to the red ribbon to create the cute button loop.
5. Nick pulls the bow wire from one end to the other. He compresses it lightly and ties the bow up before fluffing up the loops by pulling the green ones away from the red ones. Finally, he opens up the cute button loop for the professional flourish.
Materials required:
• Gold Bowdabra bow wire
• Red velvet ribbon with a black frill

Pretty Red Velvet Bow
1. Nick snips up a medium-sized length of the gold bow wire, folds it into half before tucking it into and then underneath the Bowdabra.
2. For the tail, he cuts the ribbon and folds it into half to create a dovetail pattern on the ends, before tucking it into the Bowdabra.
3. To fashion the first loop, Nick takes the red ribbon roll, inserts it in the pinch-and-turn fashion into the Bowdabra and goes on to create 4 loops on each side and a button loop down the middle.
4. He follows it up by pulling the bow wire from one end to the other, compresses it lightly and ties the bow up at the back before fluffing up the loops for the professional touch.