Use natural leaves to make this colorful leaf rubbings banner. A great activity for kids, and a beautiful addition to your home.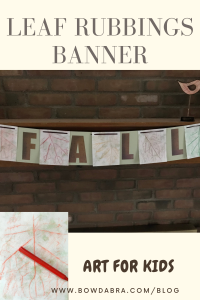

Gather these supplies for the Leaf Rubbings Banner: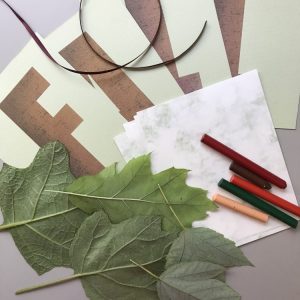

- Leaves with prominent veins
- Fall color crayons or crayon pieces
- Banner Letters
- 60″ narrow ribbon (or twine)
- Copy paper (white or light color)
Let’s make the banner:
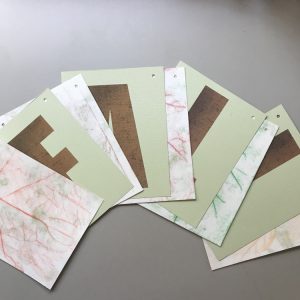
- Print the Banner Letters, and cut into 4¼” x 5½” segments.
- Cut two pieces of paper into 4¼” x 5½” segments. Each sheet of 8½” x 11″ paper will give you four banner segments. You’ll need five segments for the banner, so you’ll have three pieces for practice.
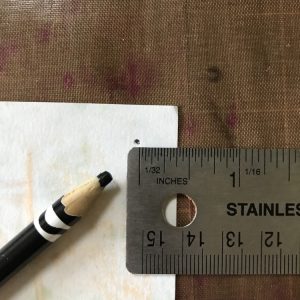
- Measure and mark a dot ⅜” from the top and ⅜” from the sides of each segment and the banner letters. Punch a hole at the dot for stringing the segments together.
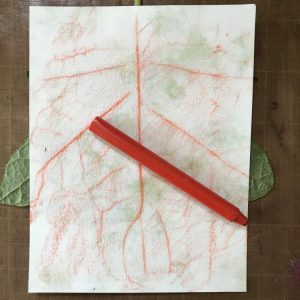
- Lay a leaf face down on your work surface.
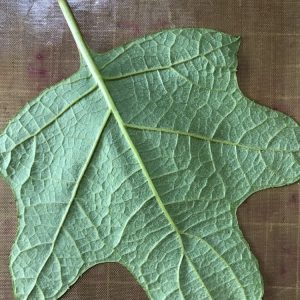
- Cover the leaf with one of the banner segments. It’s OK if the leaf extends beyond the edges of the paper. You can also position the leaf at an angle. Try positioning two smaller leaves.
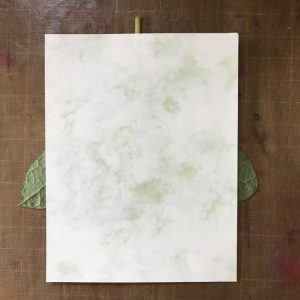
- Remove the paper from the crayon. Use the flat side of the crayon to rub the leaf impressions onto the paper. You may need to experiment with pressure. I suggest you begin with little pressure and add more as you progress. You can always press more firmly to build up color, but if you press too hard, you can’t take the color away.
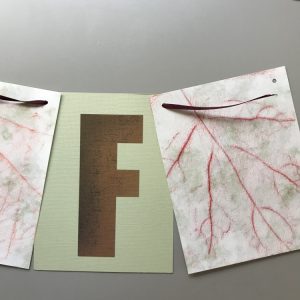
- Arrange the rubbings and letters. Begin with a rubbing, then a letter, another rubbing, then the second letter. Continue alternating rubbings and letters, ending with a rubbing.
- Thread the ribbon through the banner segments. Leave about a 12″ tail at the beginning. Adjust the segments as needed. You should end with another 12″ tail. Use the tails to tie your banner in place.
- Enjoy your autumn leaf rubbings banner.
