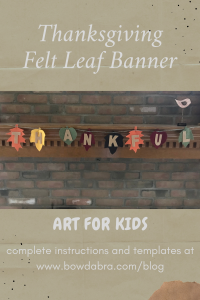
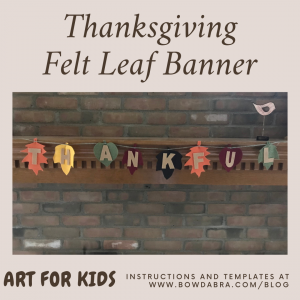
Get the kids involved in Thanksgiving decorating with this felt leaf banner.

Gather these supplies for the Leaf Banner:
- Leaf Patterns
- Letter Patterns
- Fine tip marker
- 5 pieces of 9″ x 12″ felt in autumn colors
- 6′ of cord, yarn, or ribbon
- Liquid adhesive or double-sided tape
Here’s how to make the Felt Leaf Banner:
- Print out the templates for the leaf and letter patterns. Cut out the templates.
- Let’s begin with the letters. Lay the letter out on your piece of felt.
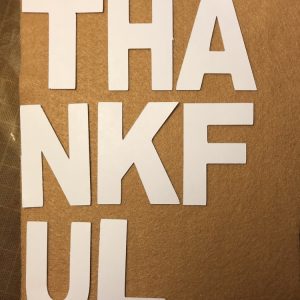
- Turn each letter over so it is face down on the felt.

- Trace around each letter with a fine tip marker. Since you flipped the letters over, your tracings will be on the wrong side and any stray markings won’t show on the right side.

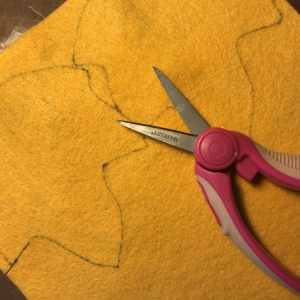
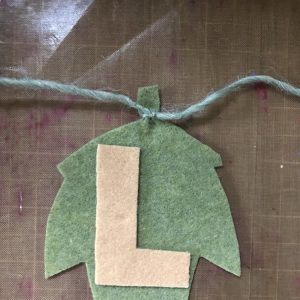
- Now, trace the leaf templates. You’ll need two of each leaf shape. Since there’s no right or wrong with the leaves, there’s no need to flip them. Cut out the shapes. When you’re finished cutting them out, turn them over so any stray markings are on the backsides.
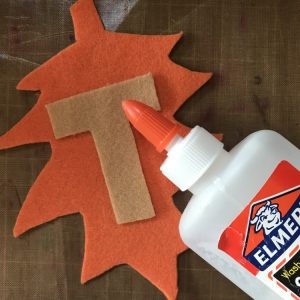
- Glue the letters to the leaves using liquid adhesive or double-sided tape.
- Use the cord to tie a knot at the base of the stem on each letter.
- Enjoy your felt leaf banner!!

Be sure to visit the Bowdabra blog each Friday for more kid’s crafts and kid’s art projects. And be sure to follow Bowdabra on Facebook!