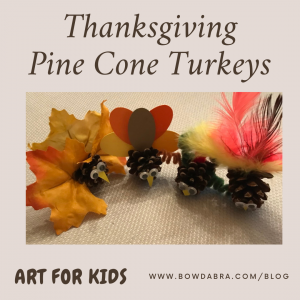
Turkeys and Thanksgiving just go together. Kids will have fun creating these pine cone turkey decorations.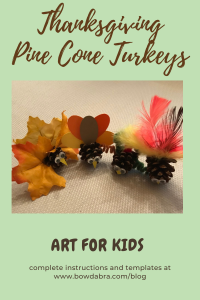

These are the supplies that you’ll need:
- Pine cones
- Assortment of embellishments for tail feathers—colored cardstock, feathers, chenille stems, artificial (or real) autumn colored leaves
- Pine Cone Turkey Tail Feather Patterns
- Googly eyes
- Yellow or orange cardstock for beaks
- Strong liquid adhesive or hot glue
Let’s make a Pine Cone Turkey:
- Gather the pine cones. You may want to freeze them overnight to kill any beasties that might be in them.
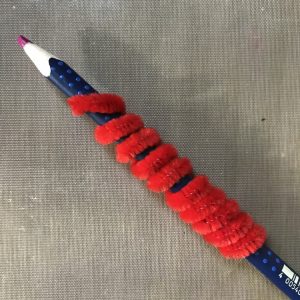
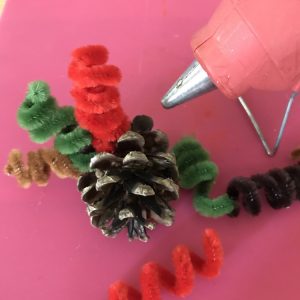
- Let’s start with the turkey that sports chenille stems as tail feathers. First, coil a chenille stem around a pencil. You’ll need five or six.
- Use hot glue or a strong liquid adhesive to glue the chenille stem tail feathers to the pine cone.
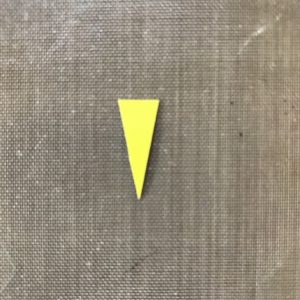
- Now, let’s make the beak. Cut a long, narrow triangle from yellow or orange cardstock. Mine measure about 3/8″ wide and 7/8″ long. Your size may vary depending on the size of your pine cones.
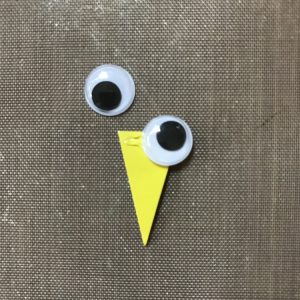
- Next, glue the googly eyes to the top of the beak.
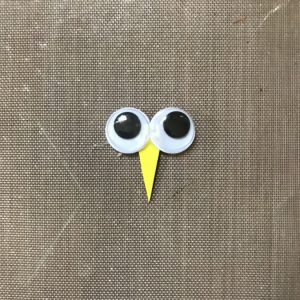
- Your finished beak and eyes will look like this. Glue it in place on the tip of the pine cone.
- All the turkeys are made following Steps 3 through 6. The only difference is the embellishment that you select for the tail feathers. For paper tail feathers print out the Pine Cone Turkey Tail Feather Patterns. Select the size that is appropriate for the size of your pine cones. Cut it out and use it as a template to trace feathers on colored cardstock.
- Have fun decorating with your pine cone turkeys.