Shibori is a Japanese method for manually dyeing textiles. Specialized techniques combine to create specific types of shibori. Arashi shibori uses a process of wrapping the cloth around a cylinder, scrunching it into folds, and dyeing it. This shibori ribbon necklace begins with a silk scarf, so the dyeing step is eliminated. The wrapping techniques are used to create the tiny, pleated folds.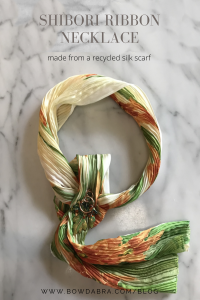

You’ll need these supplies for your Shibori Ribbon Necklace:

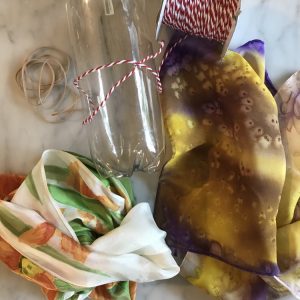
- Silk scarf
- Empty can or bottle
- Twine or unwaxed dental floss
- Rubber bands
- Jewelry embellishment
Here are the instructions for making the Shibori Ribbon necklace:
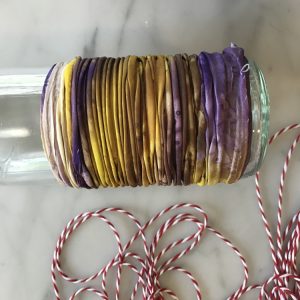
- Selecting the right cylinder for wrapping the cloth will make your work easier. Look for a container with a circumference of ~9″. A soup can works well, but you’ll need one with totally smooth sides—no ridges. A glass bottle is also a good alternative—a wine bottle is perfect. I’ve not had success with plastic and acrylic containers. They seem to have just enough “tooth” to prevent the cloth from sliding easily—and that is key to the shibori ribbon process. Remove any labels and adhesive residue from your selected container.
- Search thrift stores—or your own closet—for a 100% silk scarf. You want a sheer, lightweight scarf. You can also cut apart 100% silk clothing to create shibori ribbons.
- Begin by wrapping the scarf around the bottle. Wrap it snugly, but not too tight. Don’t worry if the scarf extends beyond the bottle. We’ll deal with that later. Just keep wrapping the scarf around the bottle.

- First, secure the bottom ends with rubber bands.
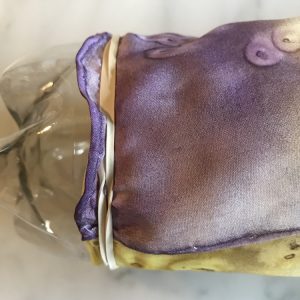
- Next, secure one end of twine under a rubber band at the base of the cylinder.
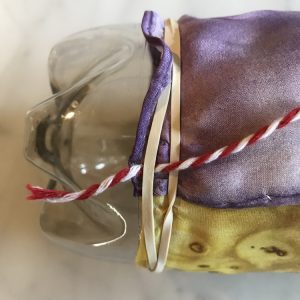
- Then, wind the twine securely—again, not too tightly—around the bottle leaving about ¼” between wraps.
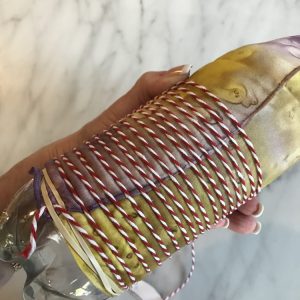
- If you come to the shoulder of your bottle or top of your can and still have scarf extending, gently scrunch the twine-wrapped section toward the base. Scrunch it tightly taking care not to push it so far that it slides off the bottom. (Yes, I’ve done that.)
Continue wrapping the twine
- Continue wrapping the twine around the bottle until the entire length of the scarf is wrapped.
- Secure the top of the scarf and end of the twine with a rubber band. Scrunch the entire scarf together.
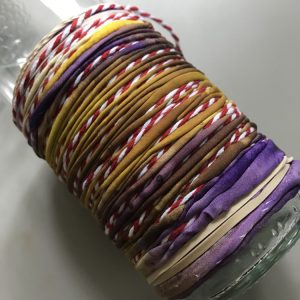
- Now, totally saturate the scarf with water. Cover it with water and let it rest in the water for several minutes to ensure it is wet all the way through.
- Let it dry thoroughly—leaving it overnight is best. Alternatively, if your clothes dryer has a drying rack to support the container, you can machine dry it for at least an hour. The key is that all the layers of the scarf must be bone dry.
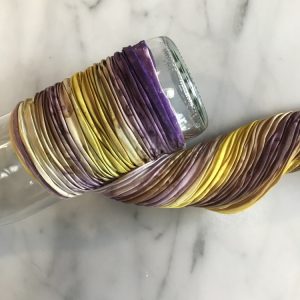
- Remove the rubber bands and unwrap the twine.
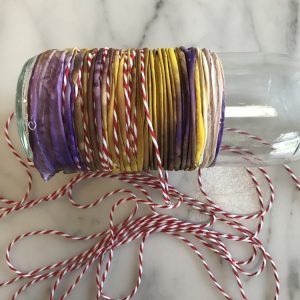
- Even with the twine removed the silk remains firmly scrunched and attached to the bottle.
Finishing the Shibori ribbon necklace
- Gently begin peeling the silk from the bottle. It will naturally twist into loose spiral.
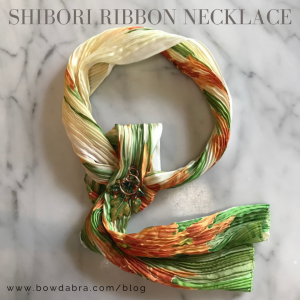
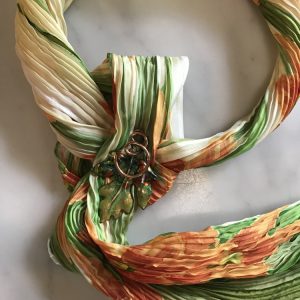
- Finally, to complete the necklace, loosely tie one loop of a knot and secure in place with a brooch.
- Enjoy!!