

Hello, friends! It’s Nancy here with a fun new project! This month there isn’t a bow in sight!
Instead, I’m sharing and showing you how to make a snippet roll, or banner roll. This is a unique way of storing your bits and pieces for journaling or other crafty uses. If you’re not familiar with a snippet roll, it is a long strip that is decorated with bits and pieces, like paper, fabric buttons, lace, and more.
Once your snippet roll is finished, you just roll it up to store it.
Then when you need a piece for a project, you just snip it off!
I’m going to use mine in my junk journals!


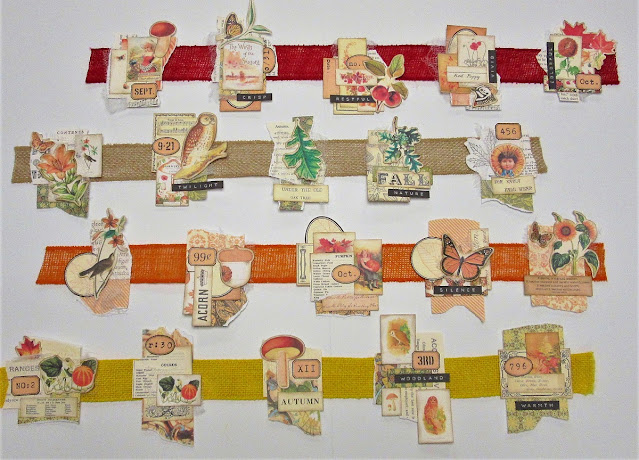
2. Next, determine what ephemera bits and pieces you want to use. I used the Autumn Cluster Builder Kit from Paper Craftivity. It’s the perfect collection for a Fall themed snippet roll. I fussy cut all the bits of paper. I also inked the edges of all the little bits but that is optional.
Here’s a closer look at how I did mine:
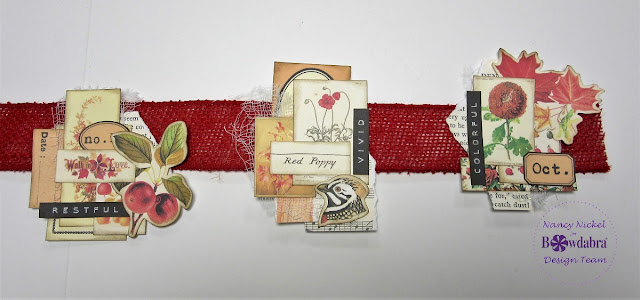
4. Start with some larger pieces, and separate them far enough to allow you to snip between, while leaving some of the burlap ribbon on each side.
5. Now add another layer; a label, a journal spot, or a piece of decorative paper. Just keep layering from back to front. I like to add a little bit of cheesecloth somewhere in my layers. It adds a lovely texture. Save your smallest and prettiest pieces for the top layer. Finally, add a word or number bit.
6. Once you have your snippet bits laid out, and spaced the way you like, go through with a small glue stick and just tack things in place lightly.

7. Take the roll to your sewing machine. Use matching thread, or a contrasting thread, to stitch the length. There are so many creative options for the step, and I show several. Sew a zig zag stitch down both sides, or down one side. Stitch around various pieces. There are no right or wrong ways to do this…it’s whatever you want.
8. If you are not interested in sewing your snippet rolls, then you can use glue or staples to hold everything in place.

The first one has been added to my junk journal page with a spiral clip:

The second one has been adhered to the page as a corner tuck pocket:

Thanks so much for stopping by today!
I’ll be back next month with another fun bow project!


