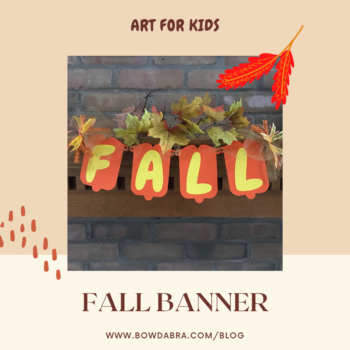
The kids are back to school. The morning air is turning crisp. Time to think about fall decorations—especially ones that young artists can create or help to create. Here’s a fun banner that’s highlighted with easy-to-make bows created using the Mini Bowdabra.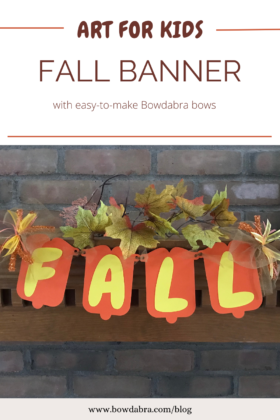

Here are the supplies that you’ll need:
For the banner:
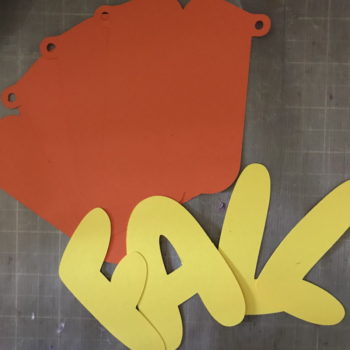
- Two 8½” x 11″ sheets of fall colored cardstock—one for the banner shapes and one for the letters
- Liquid adhesive or double-sided tape
- Free banner templates from Dreaming Tree or the Pumpkin Banner Template
- FALL text template
- Three 3½” x 6″ lengths of tulle, twine, or narrow ribbon

For each of the two bows:
- 12″ length of 6″ tulle
- Three 4″ lengths of orange mesh ribbon
- Three 4″ lengths of ½” yellow ribbon
- Three 4″ lengths of 1/8″ orange ribbon
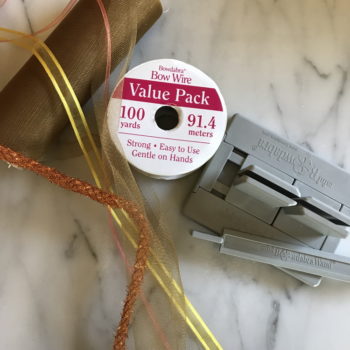
- 15″ length Bowdabra bow wire
- Mini Bowdabra Bow Making and Design Tool
Let’s make the bows first:
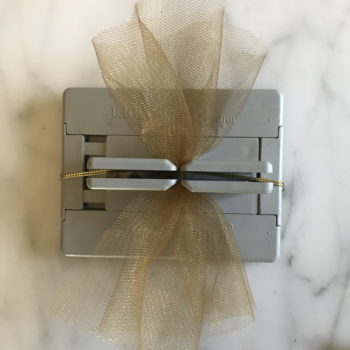
- Fold the 15″ bow wire in half and put it in the Mini Bowdabra. Tuck the ends of the wire under the Mini Bowdabra to keep them out of the way.

- Next, scrunch the tulle into the Mini Bowdabra with the narrow end parallel to the Bowdabra base.
- Lay the lengths of mesh ribbon on top of the tulle.

- Next, layer the yellow and orange ribbons.
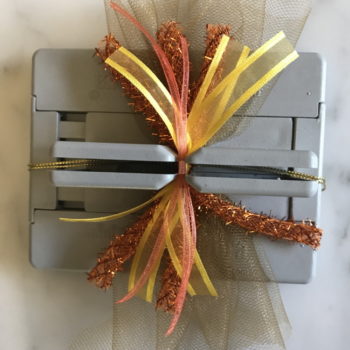
- Compress the ribbons with the Mini Bowdabra wand.
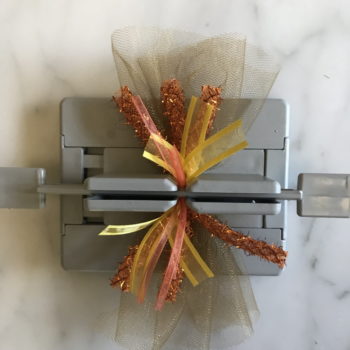
- With the ribbons still in the Mini Bowdabra, pass the wire ends through the loop, and tighten. Bring the wires to the back side of the bow and tie a knot. Leave the wire ends long.
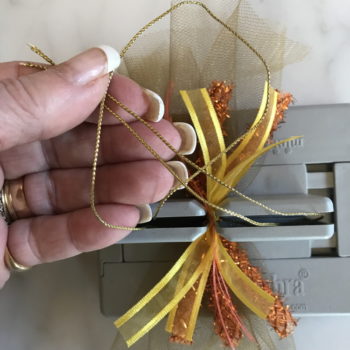
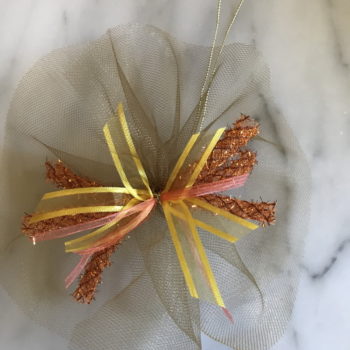
- Fluff the bow and arrange individual ribbons. Set the bows aside while we make the banner.
Now, let’s make the banner:
- The free downloadable banners from Dreaming Tree include six different designs, so you can select your favorite. Cut one banner shape for each letter in your banner. The download is in SVG format, ready to cut on an electronic cutter, but you can convert the files to a printable PDF at CloudConvert so you can easily cut them by hand. If you want pumpkin-shaped banners, print the Pumpkin Banner Template on orange cardstock and cut out the shapes.
- Print the FALL text template on the sheet of cardstock that you’ll be using for the letters, and cut out each letter.
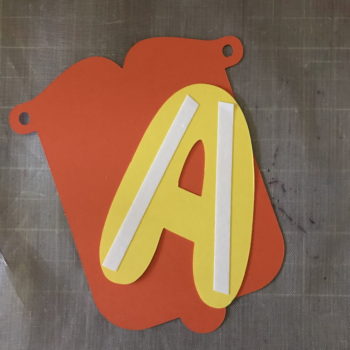
- Adhere the letters to the banners with liquid adhesive or double-sided tape.
- Tie the letters together with the short lengths of tulle.

- Using the bow wires, tie a bow to each end of the banner. Use the bow wire ends to tie the banner in place.
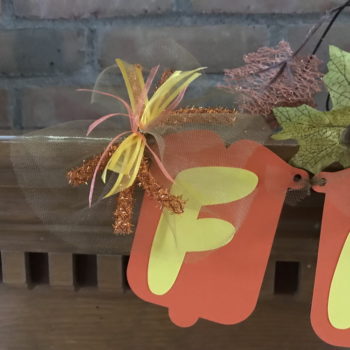
Enjoy your Fall Banner!!