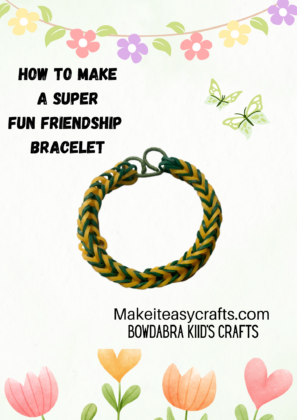
Crystal from Make it Easy Crafts shows kids how they can make spring friendship bracelets for practically nothing. Once you make one you will want to make several in all colors! So let’s get started!

Materials:
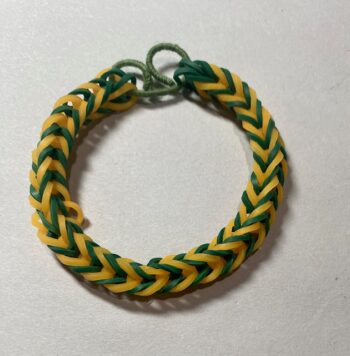
Pack of Green and yellow mini rubber bands or desired two colors
Two pencils
3 inches of wrapped floral wire
Wire cutters
Needle nosed pliers
Ruler
Instructions:
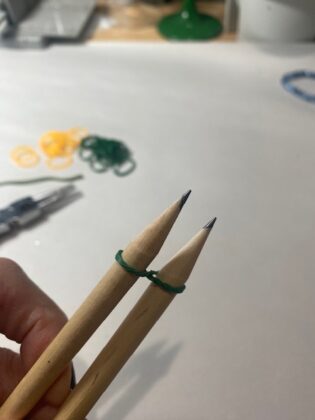

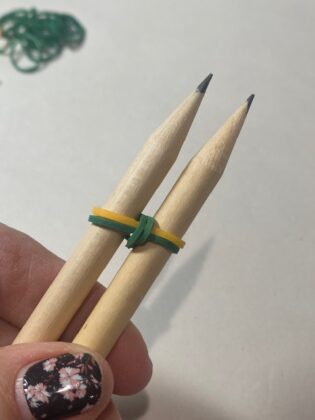
First, place two pencils side by side. Next, slide a green rubber band in a figure-eight shape on the pencil. (See photo) Next, slide on a yellow rubber band, and then a green one. You just need to slide these on without a figure eight. (See photos)
Now, lift the bottom rubber band and pull it over the top of the pencil. Repeat on the opposite side. (See photo)
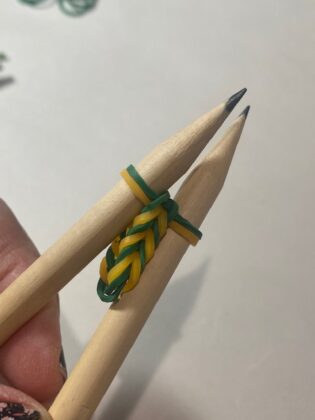
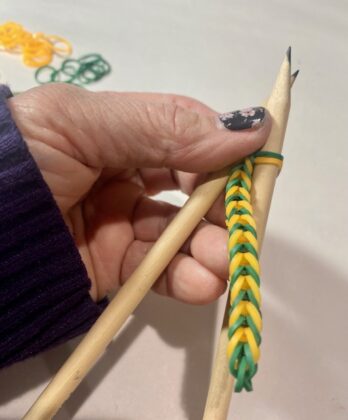

Add a green rubber band and repeat step #2. Continue adding rubber bands and pulling over the top alternating green and yellow. You will start to see a chain forming in between the pencils. As it grows, pull on it slightly to keep it even.
Keep adding bands to make the chain longer until you have a length to fit adjusting the wrist. Factor in the size of a one-inch wire curl closure.
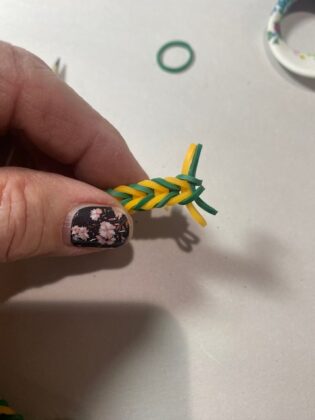
Using the wire cutters cut a 3-inch piece of wrapped floral wire. Next, Insert the wire into the loose end of the chain loops. Curl the wire end around the rubber band loop.
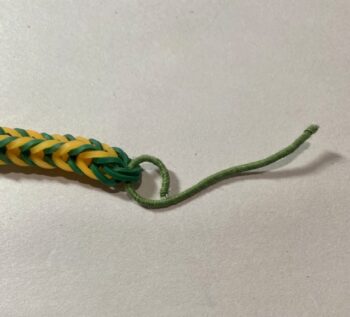

Remove the other end of the chain from your pencils and insert the uncurled end of the wire in both loose ends. Now, curl it around as you did the other side and adjust if necessary.
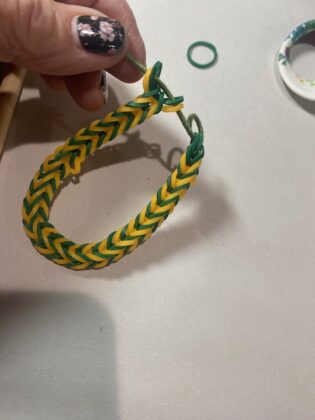


You can make as many adorable spring friendship bracelets as you would like in just minutes with hardly any supplies!
Check out the Bowdabra blog for hundreds more kid’s crafts, videos, tutorials, and more. New posts are added every week! And don’t forget to follow us on Facebook too!