Hi! I’m Hannah Sturch Caldwell from A Little Bit of Fringe, and I’ve got a sensational DIY Fall glam Pumpkin Decor project to share with you. Get ready for a glamorous journey that will ignite your creativity and leave you in awe. Let’s dive right in and make this fall season unforgettable!
Watch this video to learn how I made the embellished “Glamkins” I used in my front porch topiary! All supplies were purchased from Walmart, Hobby Lobby, Amazon and the Dollar Tree.


You will need:
- Glue gun
- Glue sticks
- Clean working area
- Foam brushes
- Scissors
- A pencil
- Copy paper
- Clean rag
- Printed tissue paper or napkins
- ModPodge
- Yarn
- Ribbon
- Bowdabra
- Zip ties
- Florals
- Wire cutter
- Some creativity!

Instructions:
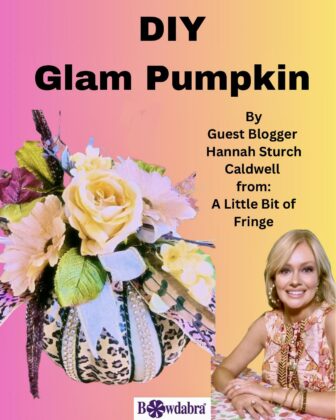
First, transfer the shape of the ridges of the pumpkin on to the paper. Then, cut out the tissue paper or napkin to fit the ridges. Next spread a thin layer of ModPodge on the pumpkin ridges and apply the tissue paper or napkin pieces smoothing with the cloth. Let dry and then add another layer of ModPodge for added sheen.
Next, measure lengths of yarn to fit in between the ridges of the pumpkin and apply using a glue gun. Then, add some bling with the ribbon.
Make the bow
Add a zip tie to the Bowdabra. Next, add ribbon and form loops for a bow. Add some florals and foliage. Pull the zip tie tight and remove from the Bowdabra. Add some extra florals with another zip tie and be sure and fluff our your bow and florals.
You have a gorgeous glam pumpkin to brighten up your fall decor and with Bowdabra is was super easy!


DIY Glam Pumpkin By Guest Blogger Hannah Sturch Caldwell from: A Little Bit of Fringe
Did you find this video helpful? Let me know! ♥️ You can find me on Instagram
Or on Facebook
🎶: Spooky – Classics IV