With just a few craft supplies and these step-by-step instructions your young artist can make their own holiday greeting card.

You’ll need these supplies: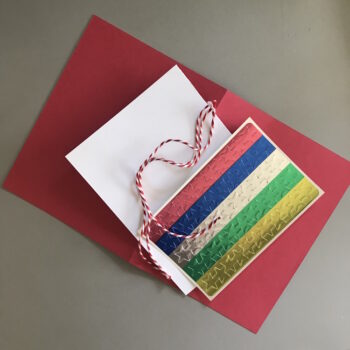

- 8½” x 11″ sheet red cardstock
- 8½” x 11″ sheet white cardstock
- Three 7″ lengths twine
- Adhesive foil star labels
- Scotch tape
- Double sided tape
- Pop dots (optional)
The cardstock, twine, and optional pop dots are available from big box craft stores and art supply stores. The adhesive foil stars are available from office supply stores.
Follow these step-by-step instructions for the holiday greeting card:
- Prepare the cardstock. Cut the red cardstock in half widthwise, ending up with two 8½” x 5½” pieces. Cut the white cardstock into 5″ x 4″ pieces. You’ll need one red and one white piece for each greeting card. Fold the red piece in half to form a 4¼” x 5½” notecard.
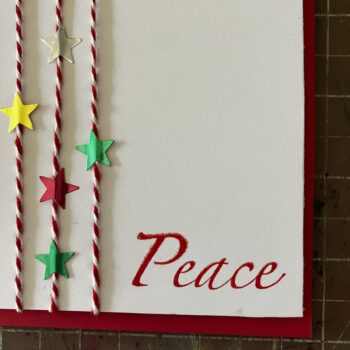
- Add the lengths of twine to the piece of white cardstock. Using Scotch tape, secure each length of twine in place on the back of the white cardstock. Space the twine about ½” apart.

- Add stars on top of twine.
- Add greeting. Hand write or rubber stamp your greeting in the lower right corner.
- Add decorated white cardstock to front of red notecard. Center the decorated card on the red notecard and secure with double sided tape or pop dots.

We hope you enjoyed making this beautiful greeting card. Check out the blog for more ideas like this greeting card holder too! Please join us every Friday for another kid’s craft of art project at the Bowdabra blog. And don’t forget to like us on Facebook too!