

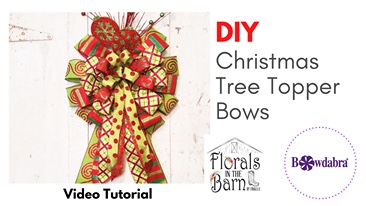
Watch kelly on Bowdabra Facebook Live, with one dog collar bow and a fantastic multi ribbon tree-top bow. Kelly teaches you the step-by-step process. Tune in to learn just how easy it is to make this amazing tree-top bow in minutes.

Materials required:
1. Kelly folds the bow wire in half and tucks it underneath the Bowdabra.
2. After cutting a tiny tail, she places it right into the Bowdabra and creates 2 tiny loops and 1 center loop with the white ribbon roll.
3. To secure the bow she brings the wire from one side to another and put a slip knot.
4. She finishes off by fluffing the loops and cutting off the excess tail ends.
5. Again she folds the bow wire in half and tucks it underneath the Bowdabra.
6. She places the Bowdabra crunchy red ribbon into the Bowdabra and keeps adding it to the Mini Bowdabra.
7. Kelly cuts off the excess ribbon and secures the bow with the bow wire.
8. To finish it off, she adds the white ribbon bow to the crunchy red bow with the bow wire.
Materials required:
1. First, Kelly folds the red bow stem and tucks it underneath the Bowdabra.
2. Next, she places an 18” tail right into the Bowdabra and creates big 4 loops (8’’) on each side of the Bowdabra with the green-red glittery heavy ribbon roll.
3. Then, she adds a shorter tail (less than an inch) with the multicolored ribbon roll and she creates 3 loops (7’’) on each side of the Bowdabra.
4. Keeping one inch shorter tail each time, Kelly repeats the process with the Red-green chequered ribbon roll and creates 3 loops on each side of the Bowdabra.
5. Now, she picks another red glittery ribbon roll and creates 2 loops on each side of the Bowdabra.
6. Next, she opts for a green ribbon roll with shimmery red piping and adds 2 loops on either side of the Bowdabra with a cute button loop in the center.
7. To secure the bow she brings the red bow stem from one side to another and puts in a knot.
8. Kelly adds decorative picks in the back of the bow and finishes off by fluffing the loops on the tree-top bow. To finish she cuts the dovetail pattern on the tail ends.

For more quick and easy DIY tutorials and tree-top bows visit the Bowdabra blog each week. And be sure and like us on Facebook. Each Monday at 4:00 p.m. PST, 5:00 p.m. MST, 6:00 p.m. CST, and 7:00 p.m. EST, Bowdabra will host a Facebook live. There is always something new to make and we take you through the easy steps. Each week one lucky viewer will receive a special gift!


