

 Transform extra wide ribbon (this is burlap but any ribbon 5″ or more will work) into an adorable ribbon envelop favor to hold delicious treats for your dinner guests. You won’t believe how easy it is to make! And the best part, they’re quite versatile and can be customized for any celebration or occasion, giving your table that little extra something your guests will rave about!
To Make the Envelope Favor
Materials:
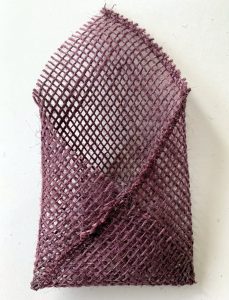
Begin by cutting the ribbon fabric into a square. This burlap ribbon is five inches wide, so a five-inch length was cut making a square, 5″ x 5.”

Lay the square fabric on the work surface with the pointed ends at the top, right side, bottom, and left side. Then take the right and left side ends over to the center and glue them together using quick-dry fabric glue.
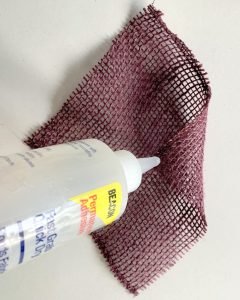
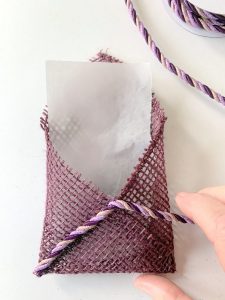
Place a piece of parchment paper on the center of the fabric so the glue won’t get on the rest of the fabric.
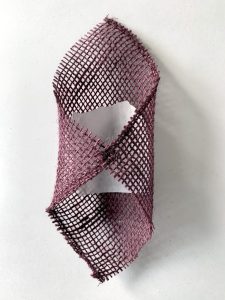
Run a bead of fabric glue along the lower edges of the fabric and . . .
pull the bottom fabric up to seal into an envelope shape.
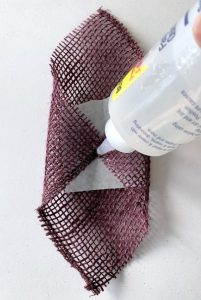
Next, apply fabric glue along the edges and lay the braiding on top, following the outline of the envelope edges.
Continue applying glue to the edges and adding the braiding to outline the envelope until
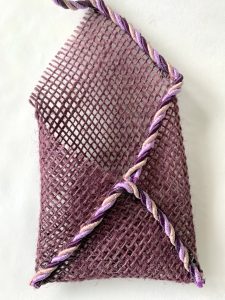
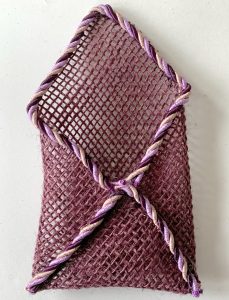
the entire envelope is outlined with braiding.
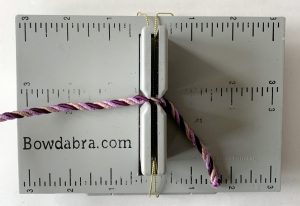
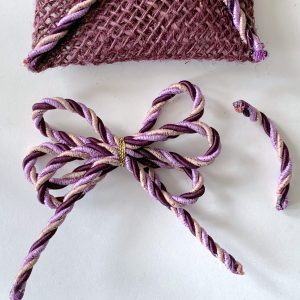
Cut an 18″ strip of Bowdabra bow wire, fold together and place down into the Mini Bowdabra, tucking ends under. Next, measure two inches of braiding for the tail and insert the braiding down into the Mini Bowdabra.
Take the braiding on the left side and fold over at the 1 1/2″ mark on the ruler creating a loop.
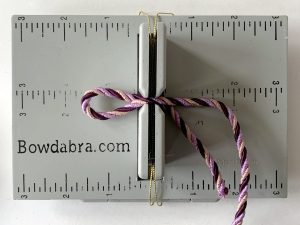
Then take the braiding and fold over at the 1 1/2″ mark creating a loop on the opposite side. Continue creating loops – three on each side for a total of six loops. Then scrunch down the loops using the Mini Bowdabra Wand.
Cut the braiding at the two-inch mark creating another tail on the opposite side.
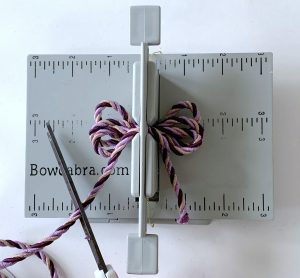
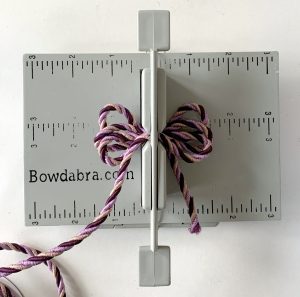
Make a slip knot by taking the loose ends of the bow wire through the wire loop, pulling tight while gently pulling the bow out. Then, separate the wires around to the back of the bow, tying in a double knot. Cut off excess bow wire.

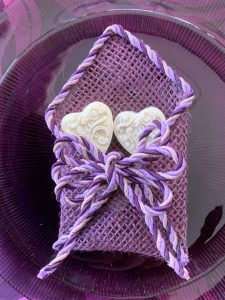
Then cut a 3″ piece of the braid to glue onto the center of the bow to finish the look.
And finally, attach the bow to the center of the envelope using fabric glue.
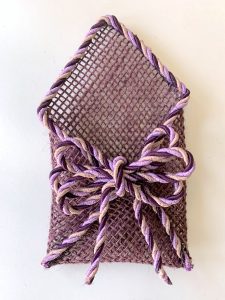
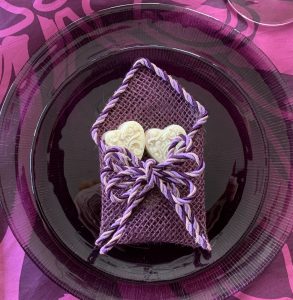
For a decorative look, fill the ribbon envelope favor with enough treats that they peek out from the top.
Don’t forget to like us on Facebook and join us every Monday at 4:00 p.m. PST, 5:00 p.m. MST, 6:00 p.m. CST, and 7:00 p.m. EST for Facebook live! Viewers have a chance to win a special gift! And for even more DIY tutorials and videos visit the Bowdabra blog today!
Hop on over to Bowdabra designer, Gail Griffin’s blog, and be sure and say hello!


